GUI Usage
Once you launch Badger in GUI mode, you'll have various Badger features to explore. You can search through this page to get to the guide on any specify GUI feature, or if you believe a guide is missing for the topic you are interested in, please consider raising an issue here or shooting us an email, many thanks :)
Home page
Create a new routine
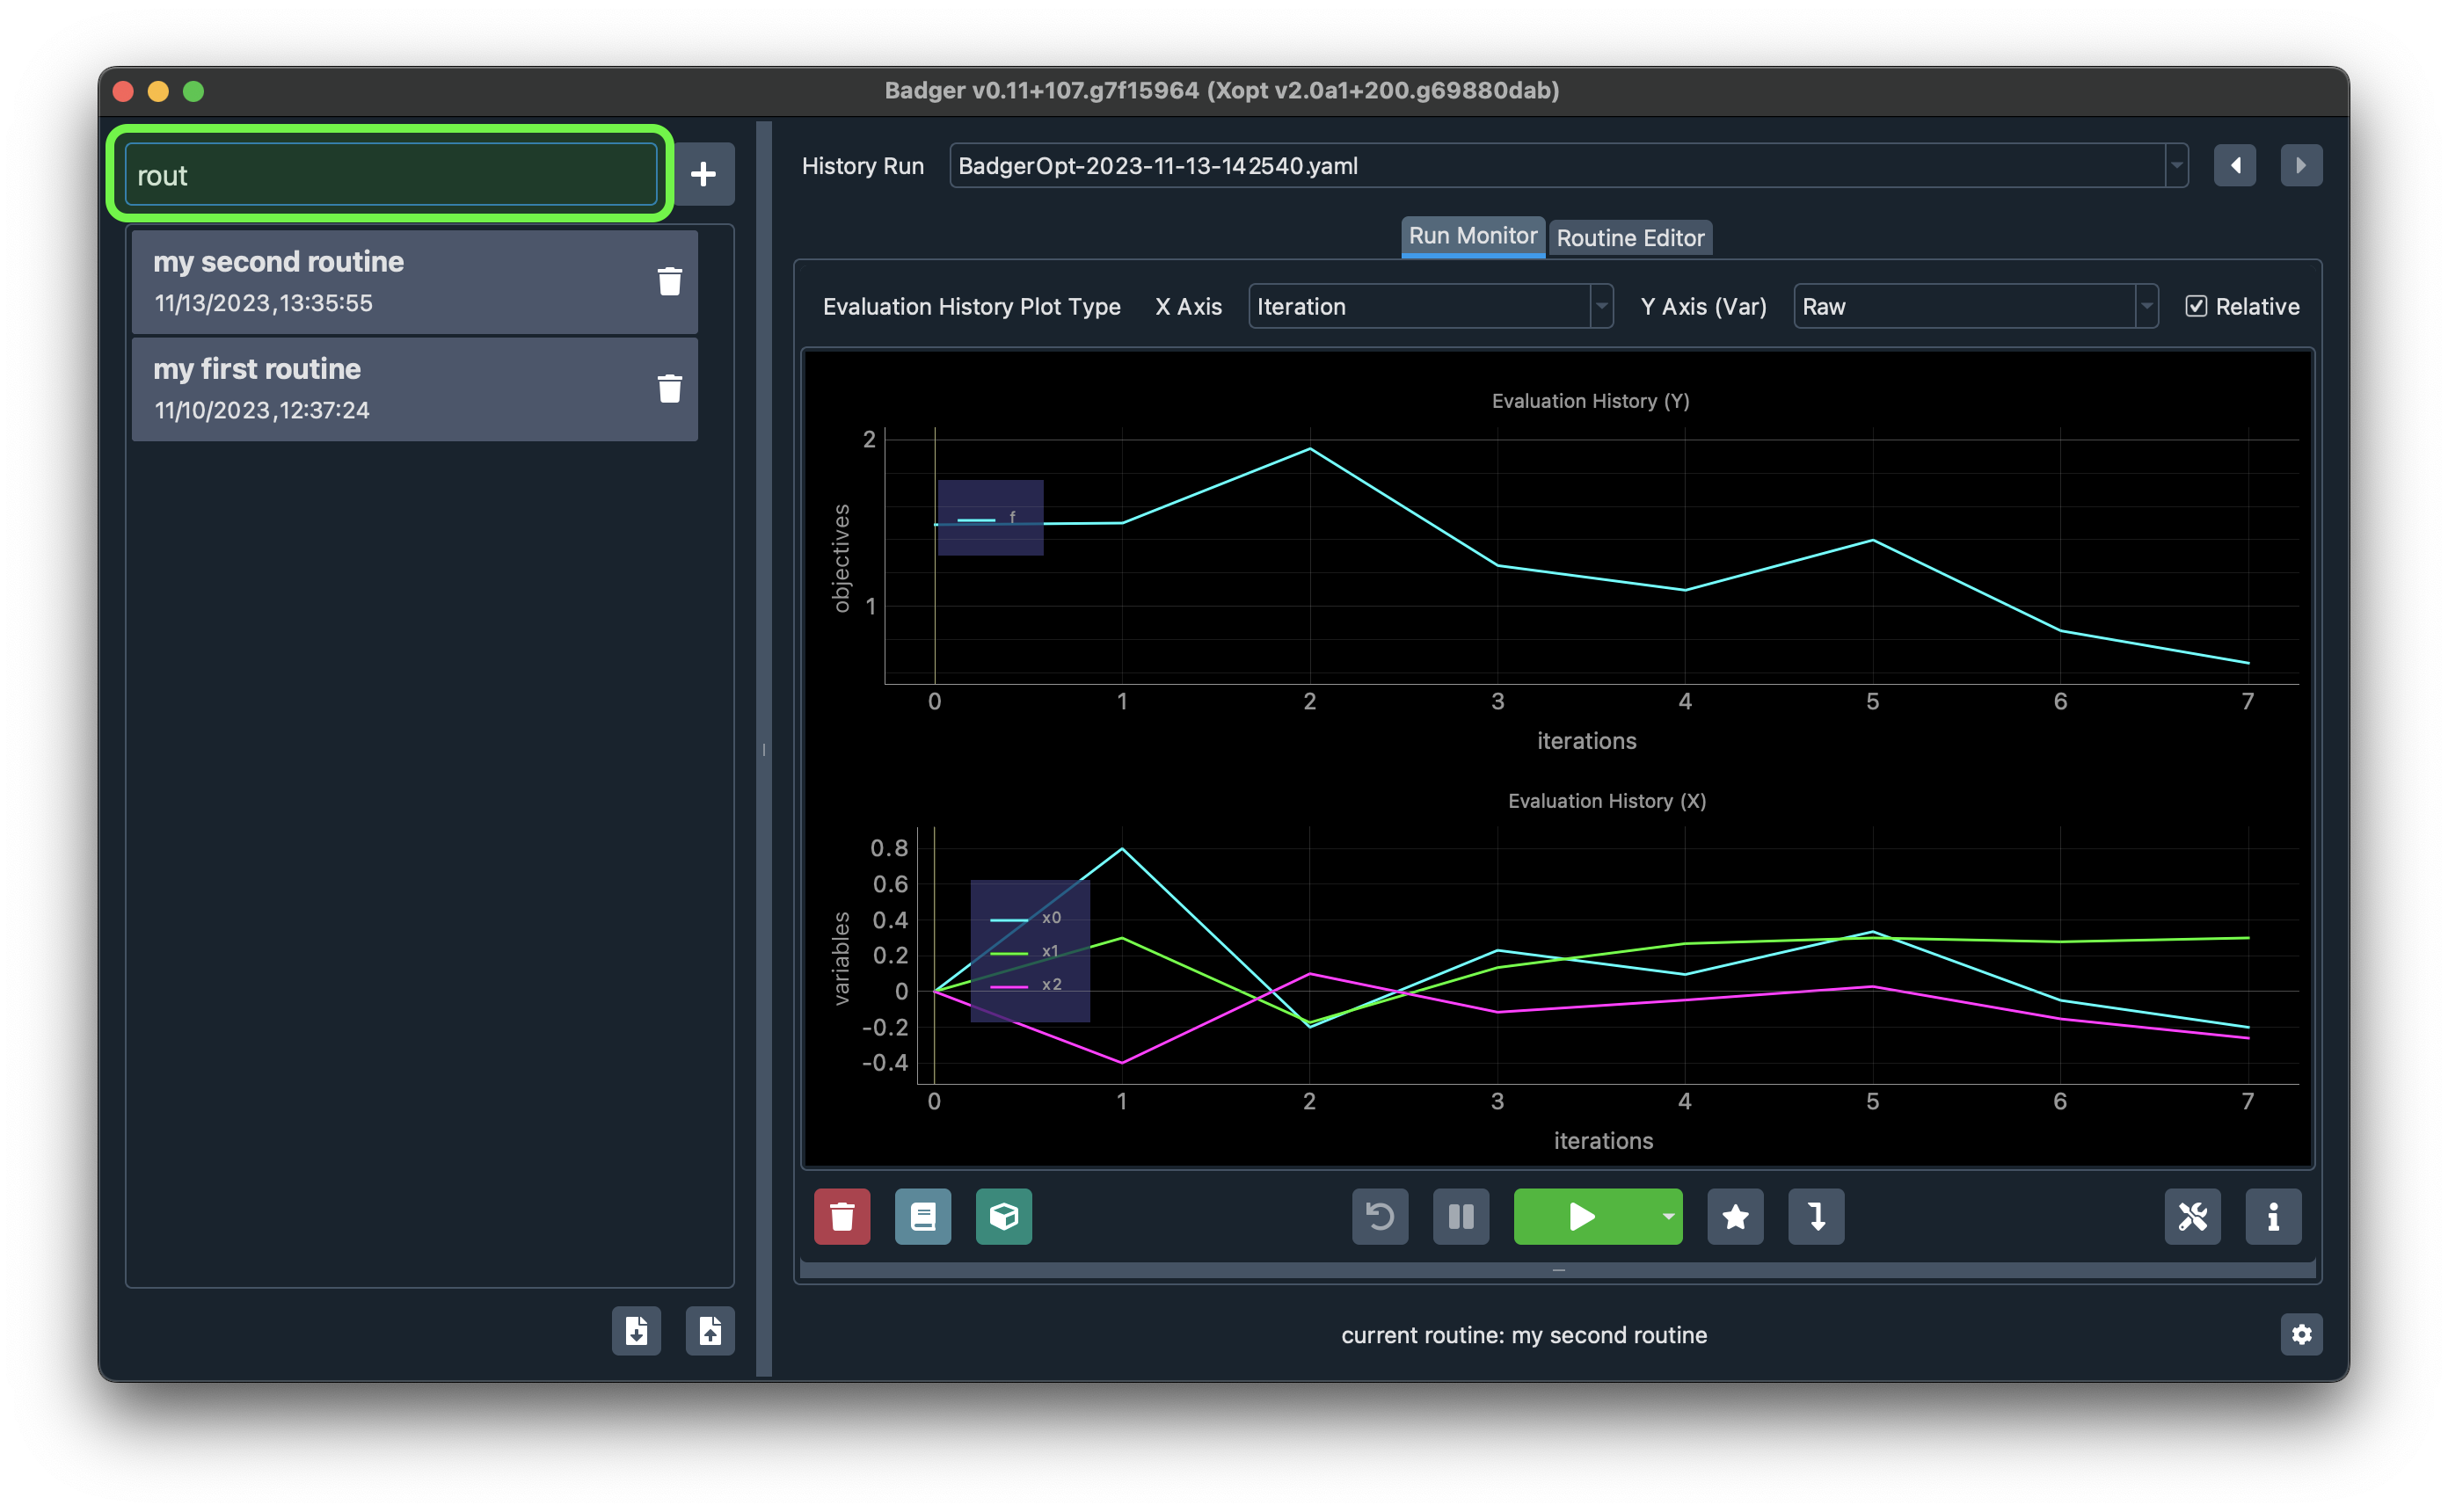
On Badger home page, click the Plus button (highlighted in the screenshot below):
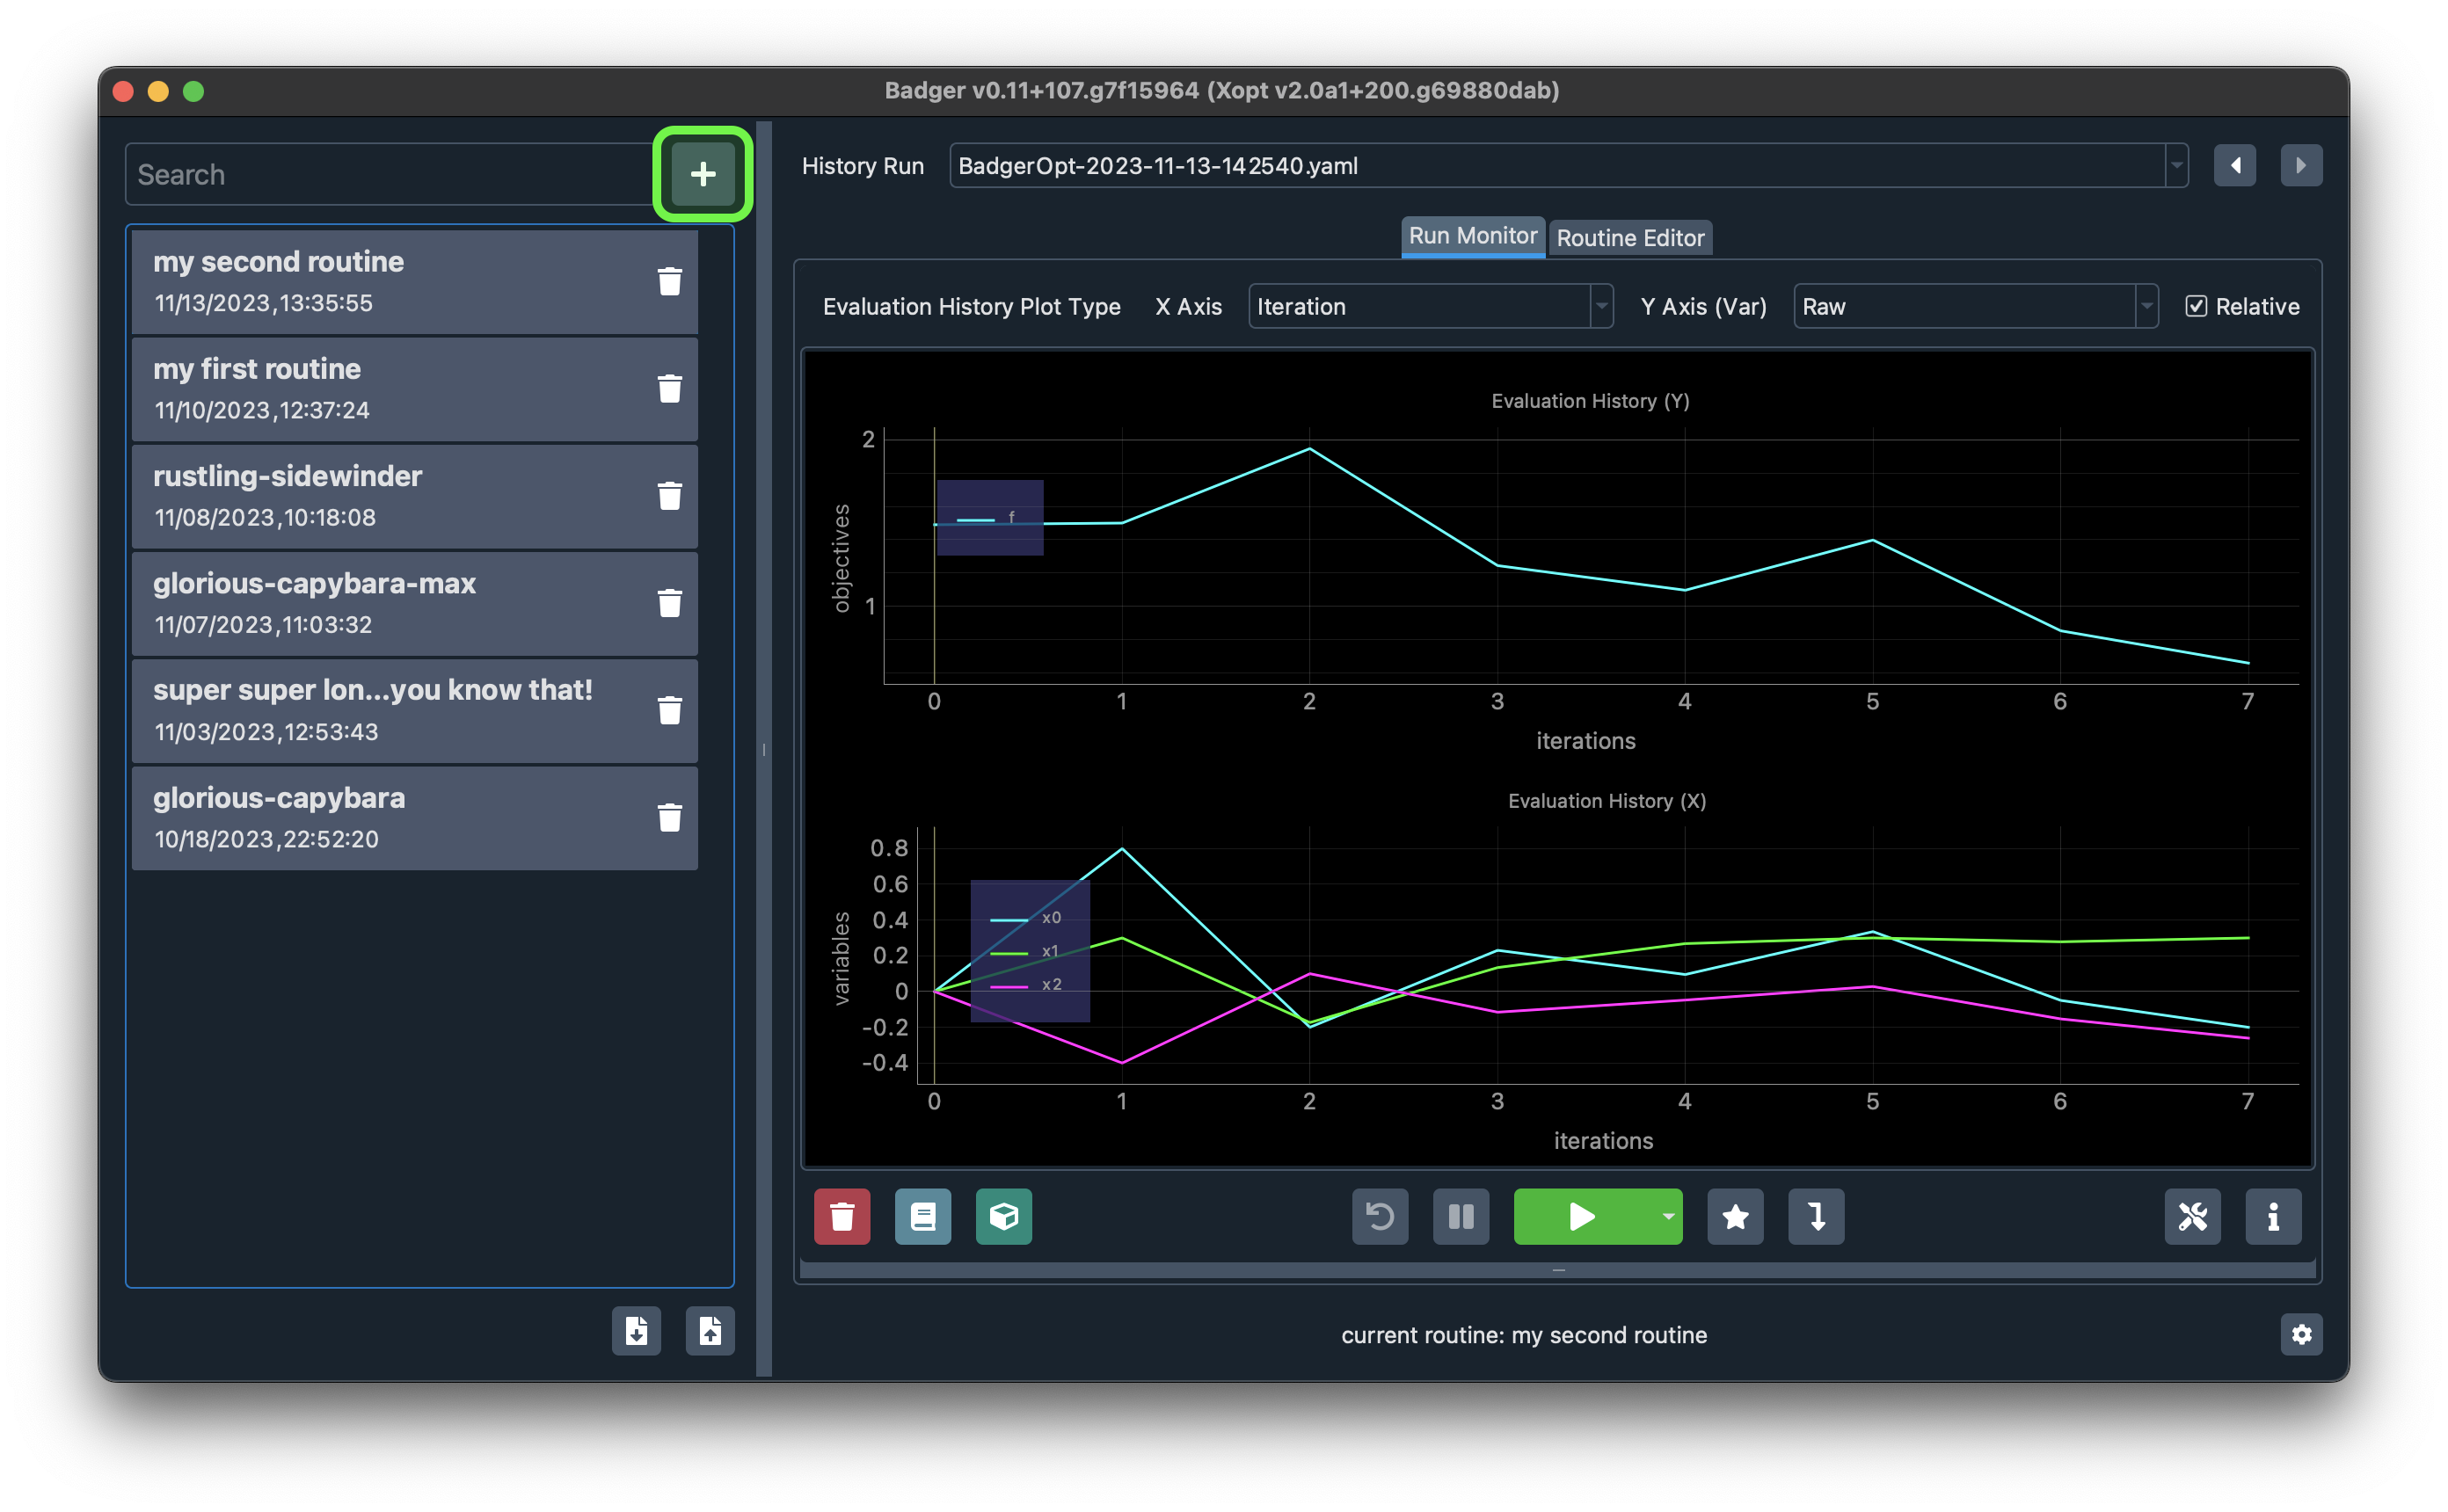
You'll land on the routine editor page:
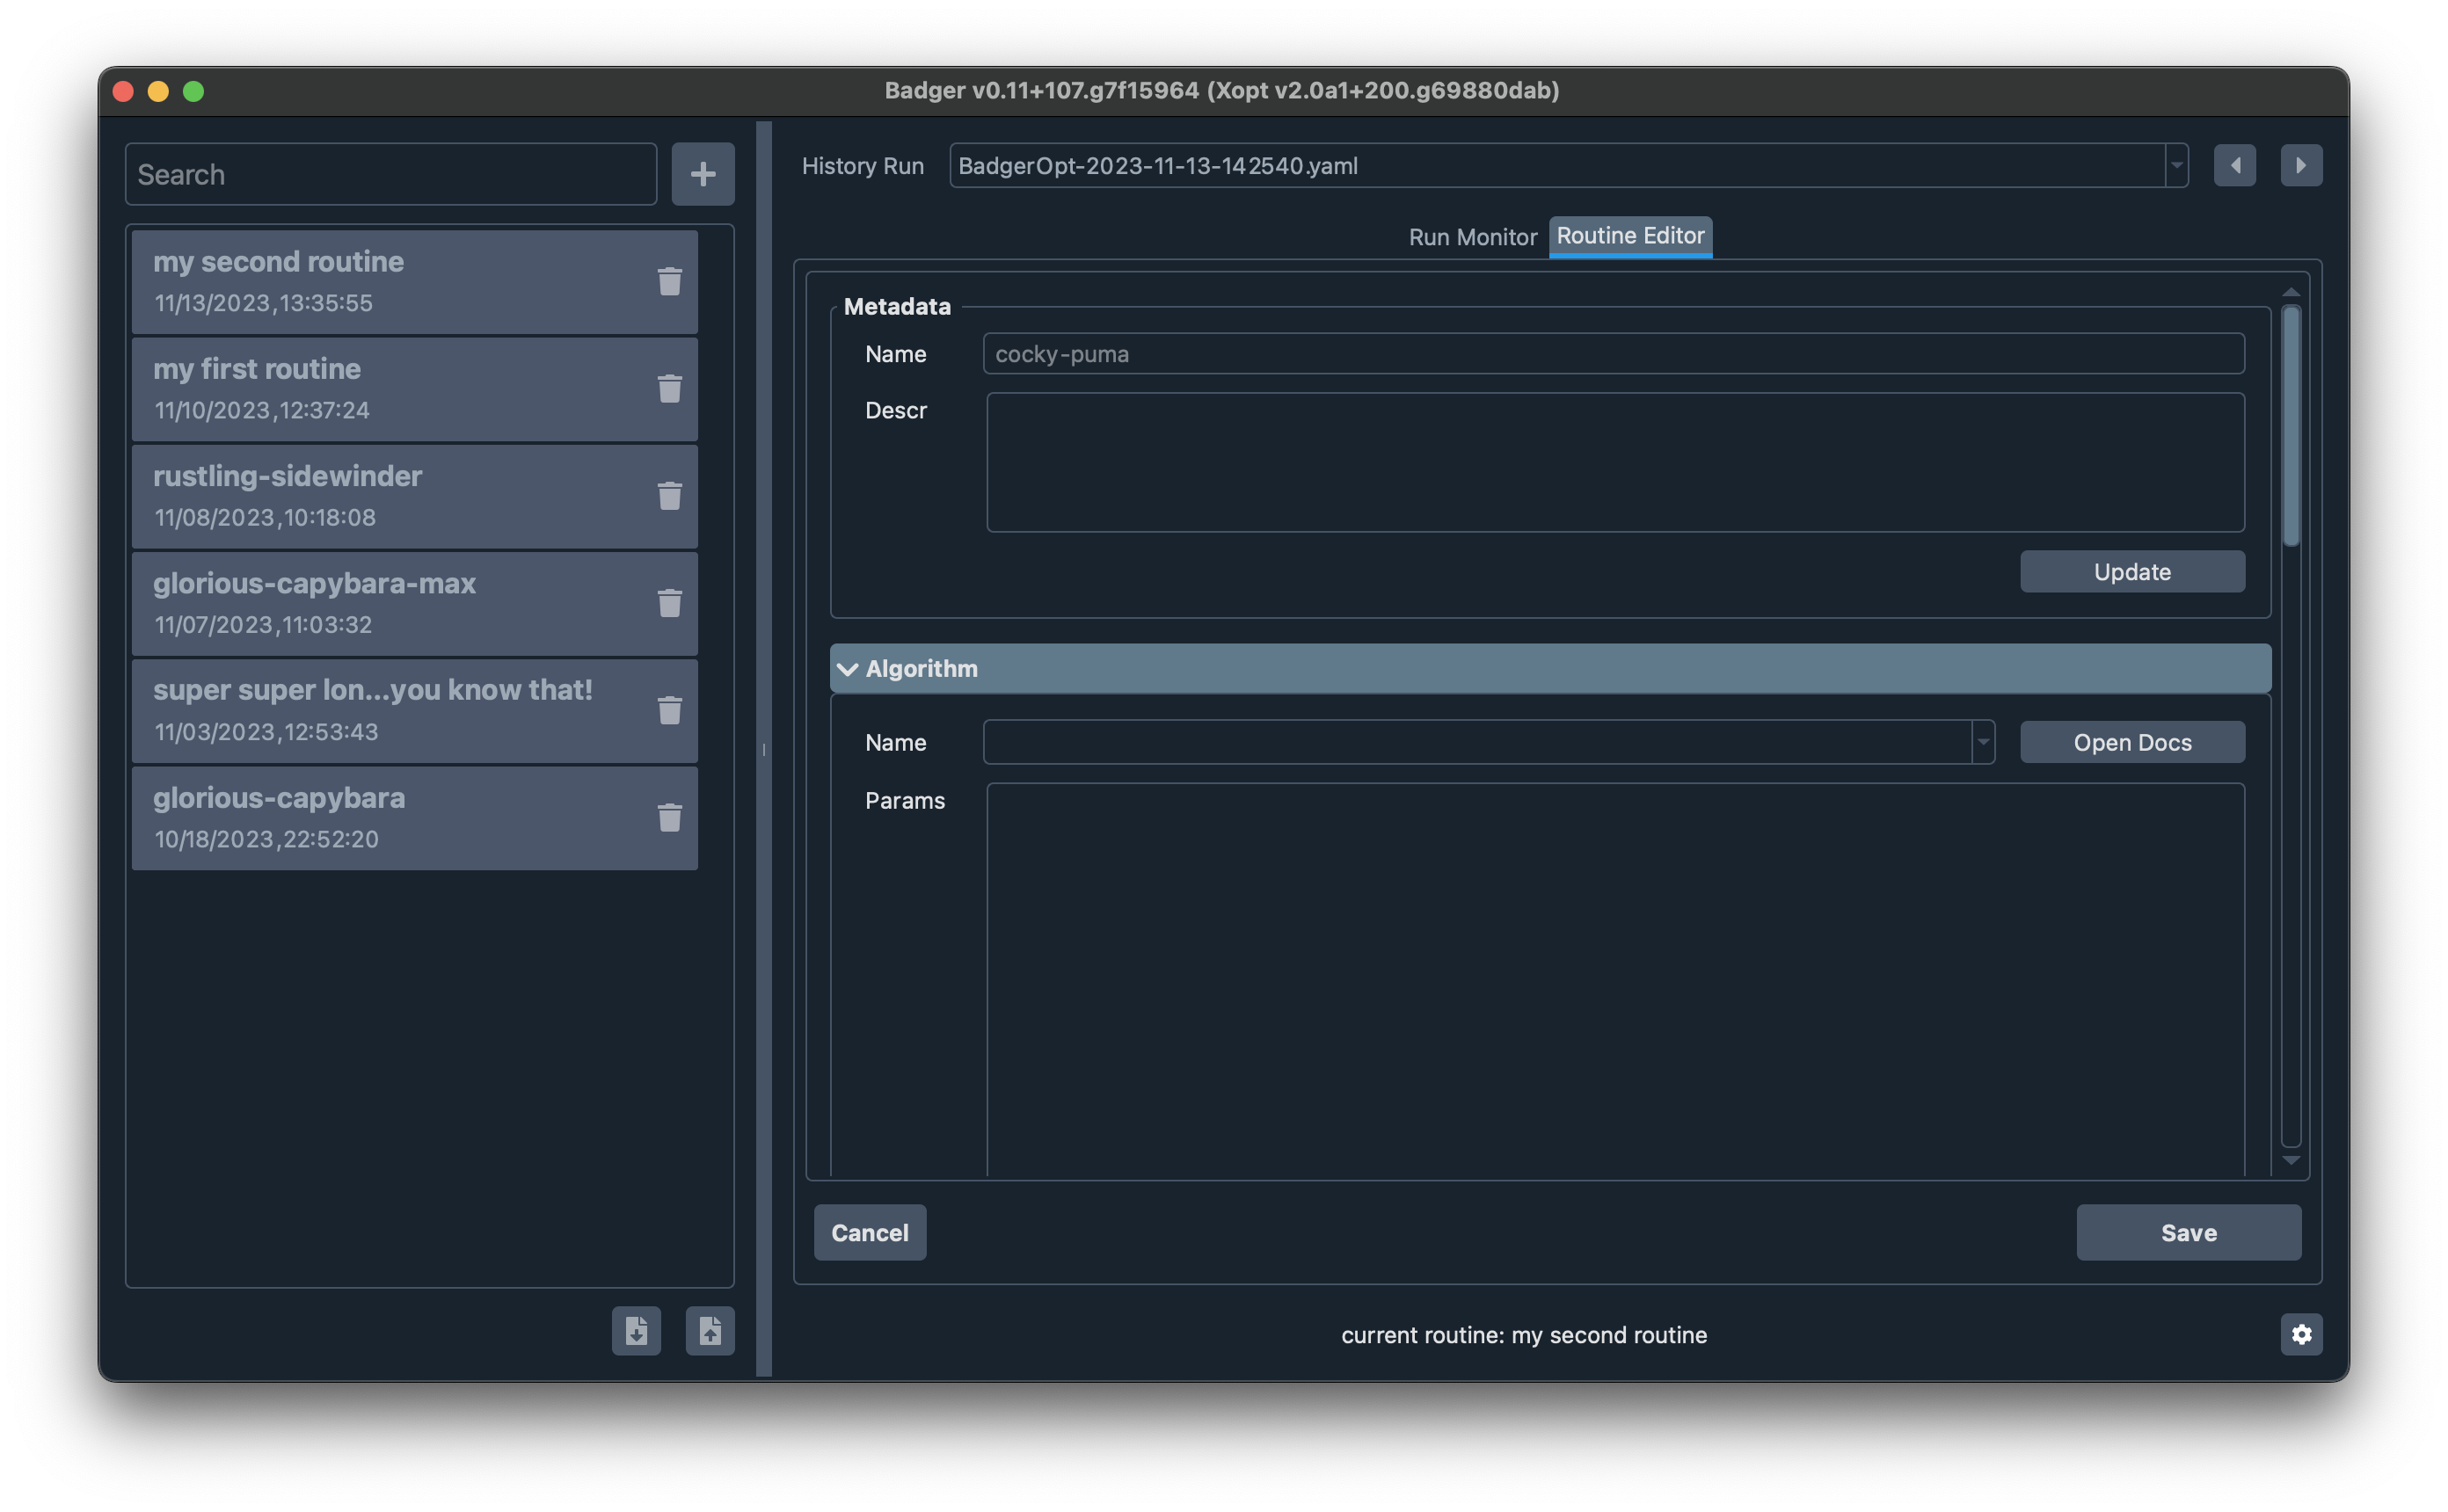
where you can select the generator to use, the environment to optimize on, and configure the VOCS.
Select/deselect a routine
Hover one item in the routine list (highlighted below) and click it will select the specific routine:
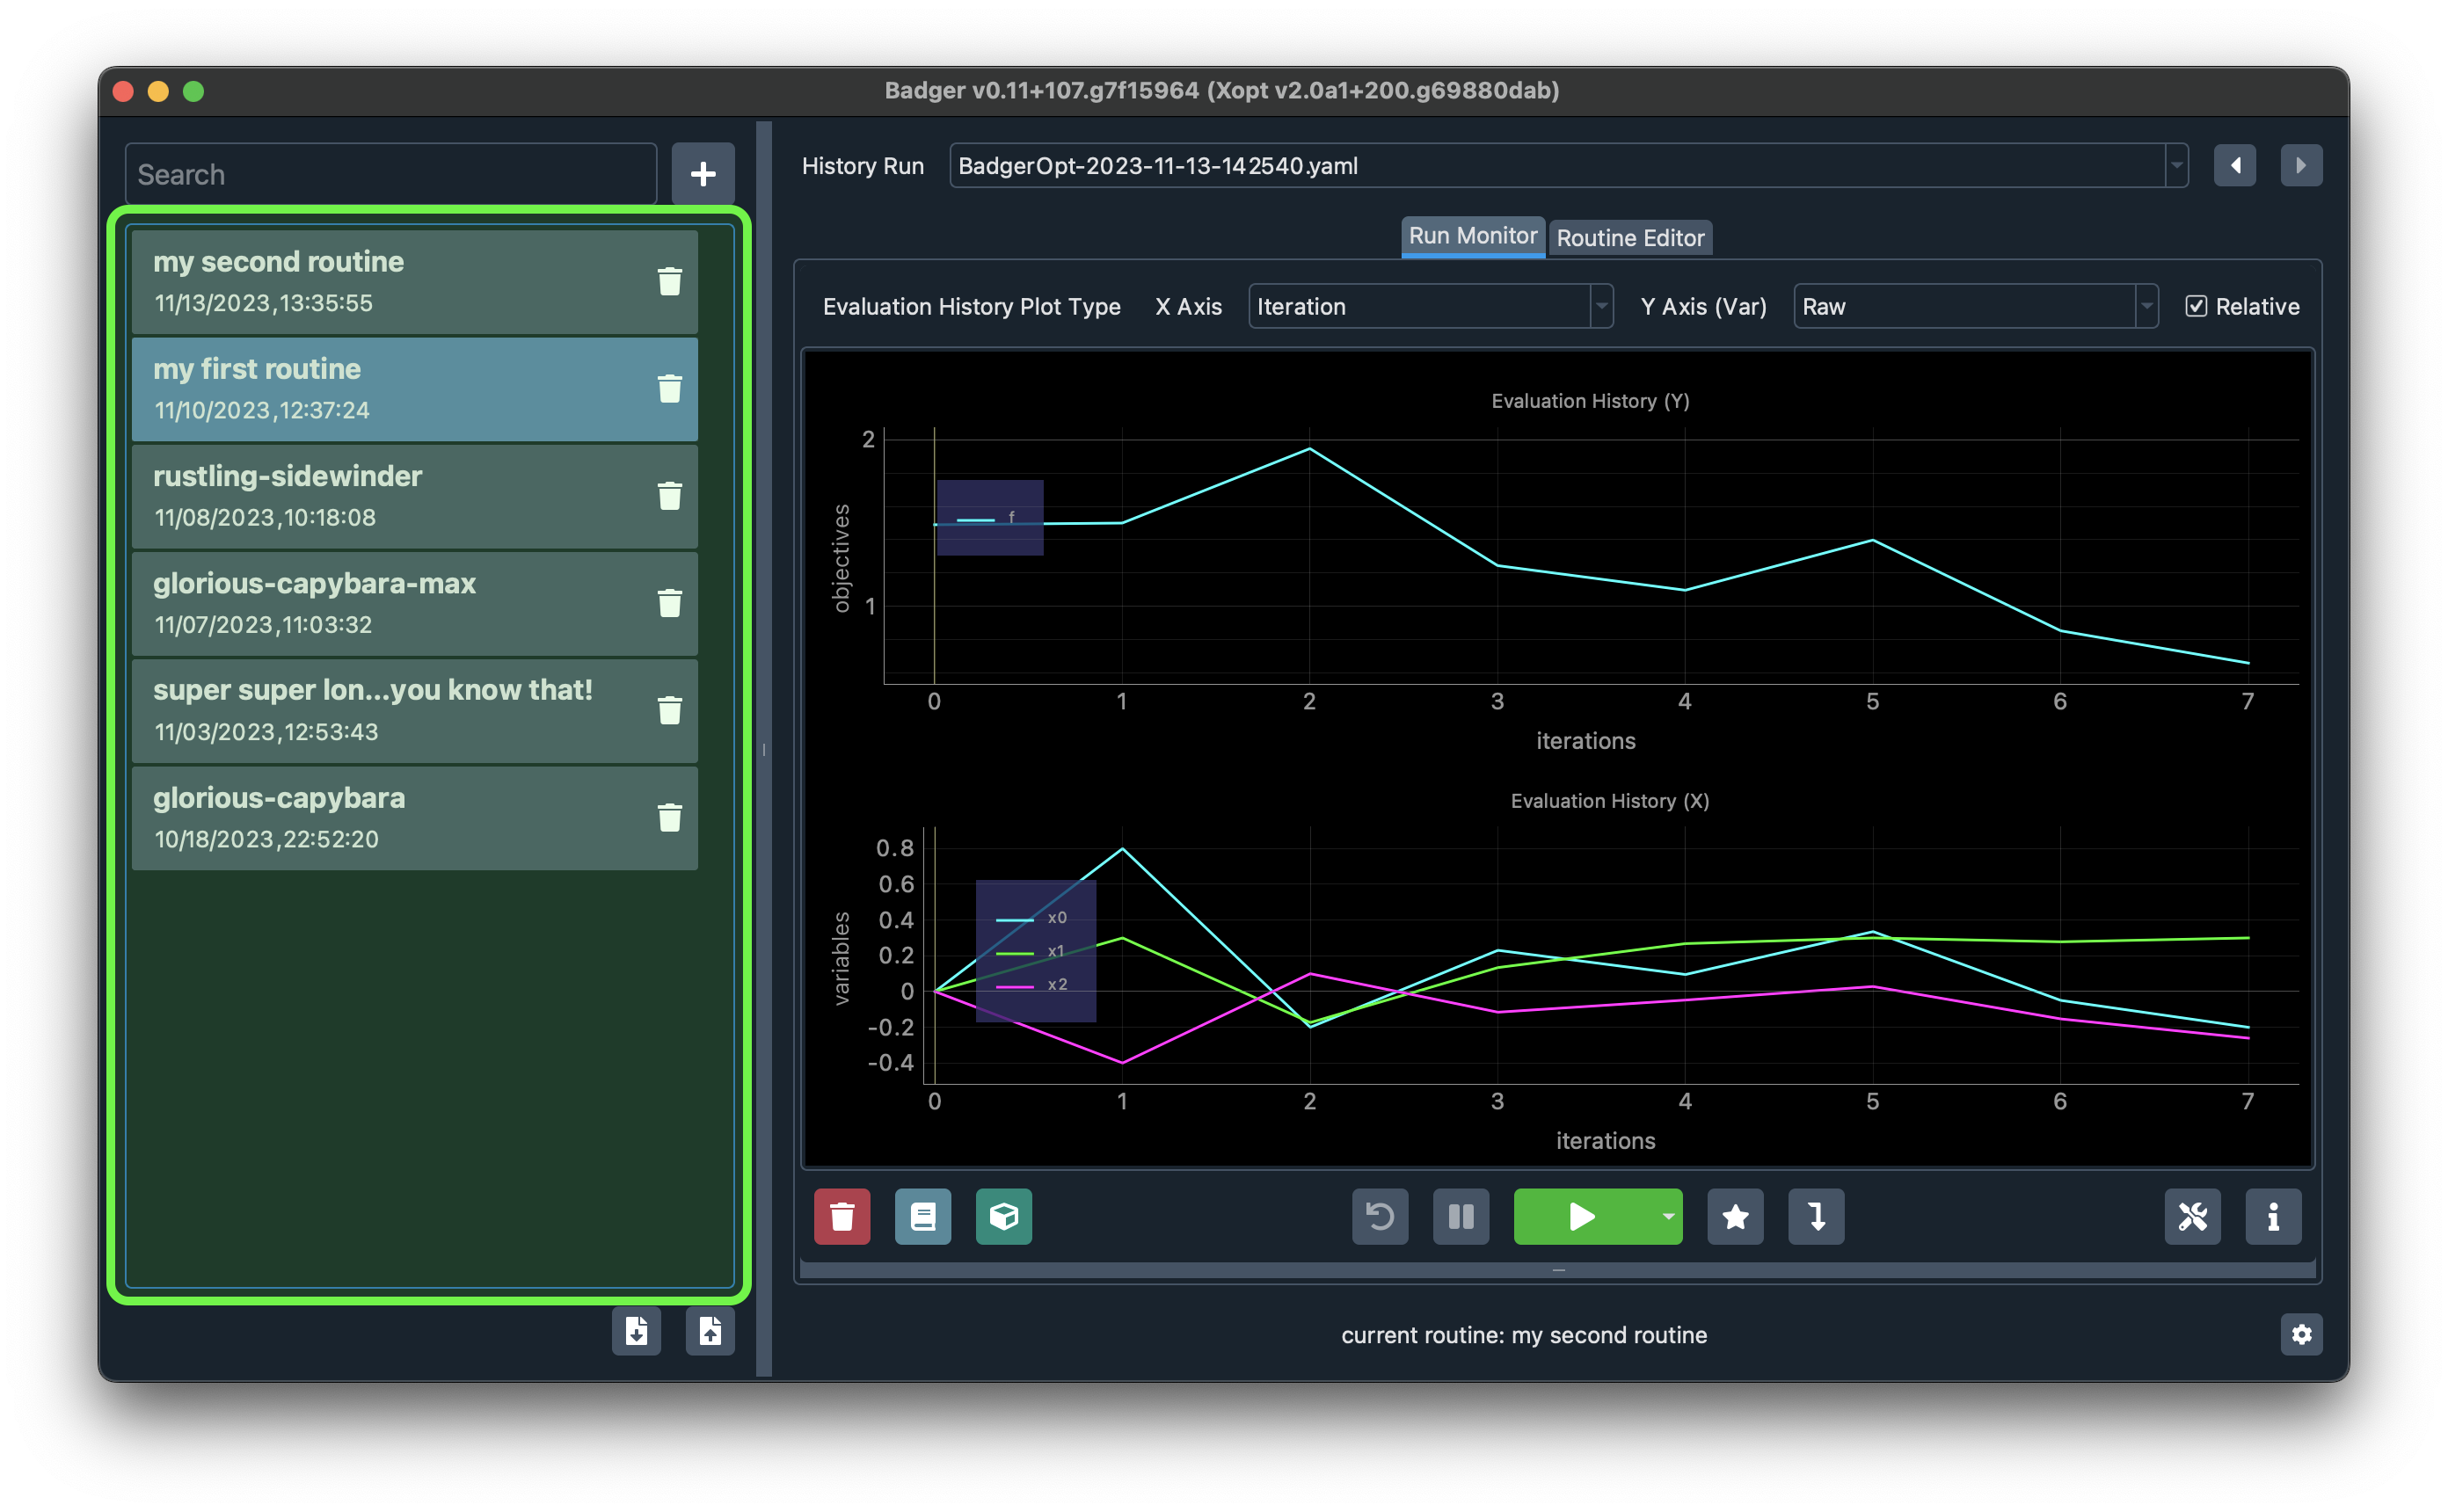
Once selected, the content in the history browser (on top of the run monitor) will change to show the runs corresponding to the selected routine only.
Click the selected routine again to deselect it. If no routine is selected, the history browser will show all the runs for all the routines.
Edit a routine
After select a routine, click the Routine Editor tab on top of the run monitor, you'll be able to edit the routine and save the changes.
One important/counterintuitive thing to keep in mind though, is that in Badger, if you have at least one run associates with the routine, you cannot edit and save the changed under the same routine name, you'll have to give the edited routine a new name. This behavior is to guarantee that each run can be mapped to the correct routine by the time it was run.
Of course, if there are no runs associate with the routine, you can edit and rename it just fine.
Delete a routine
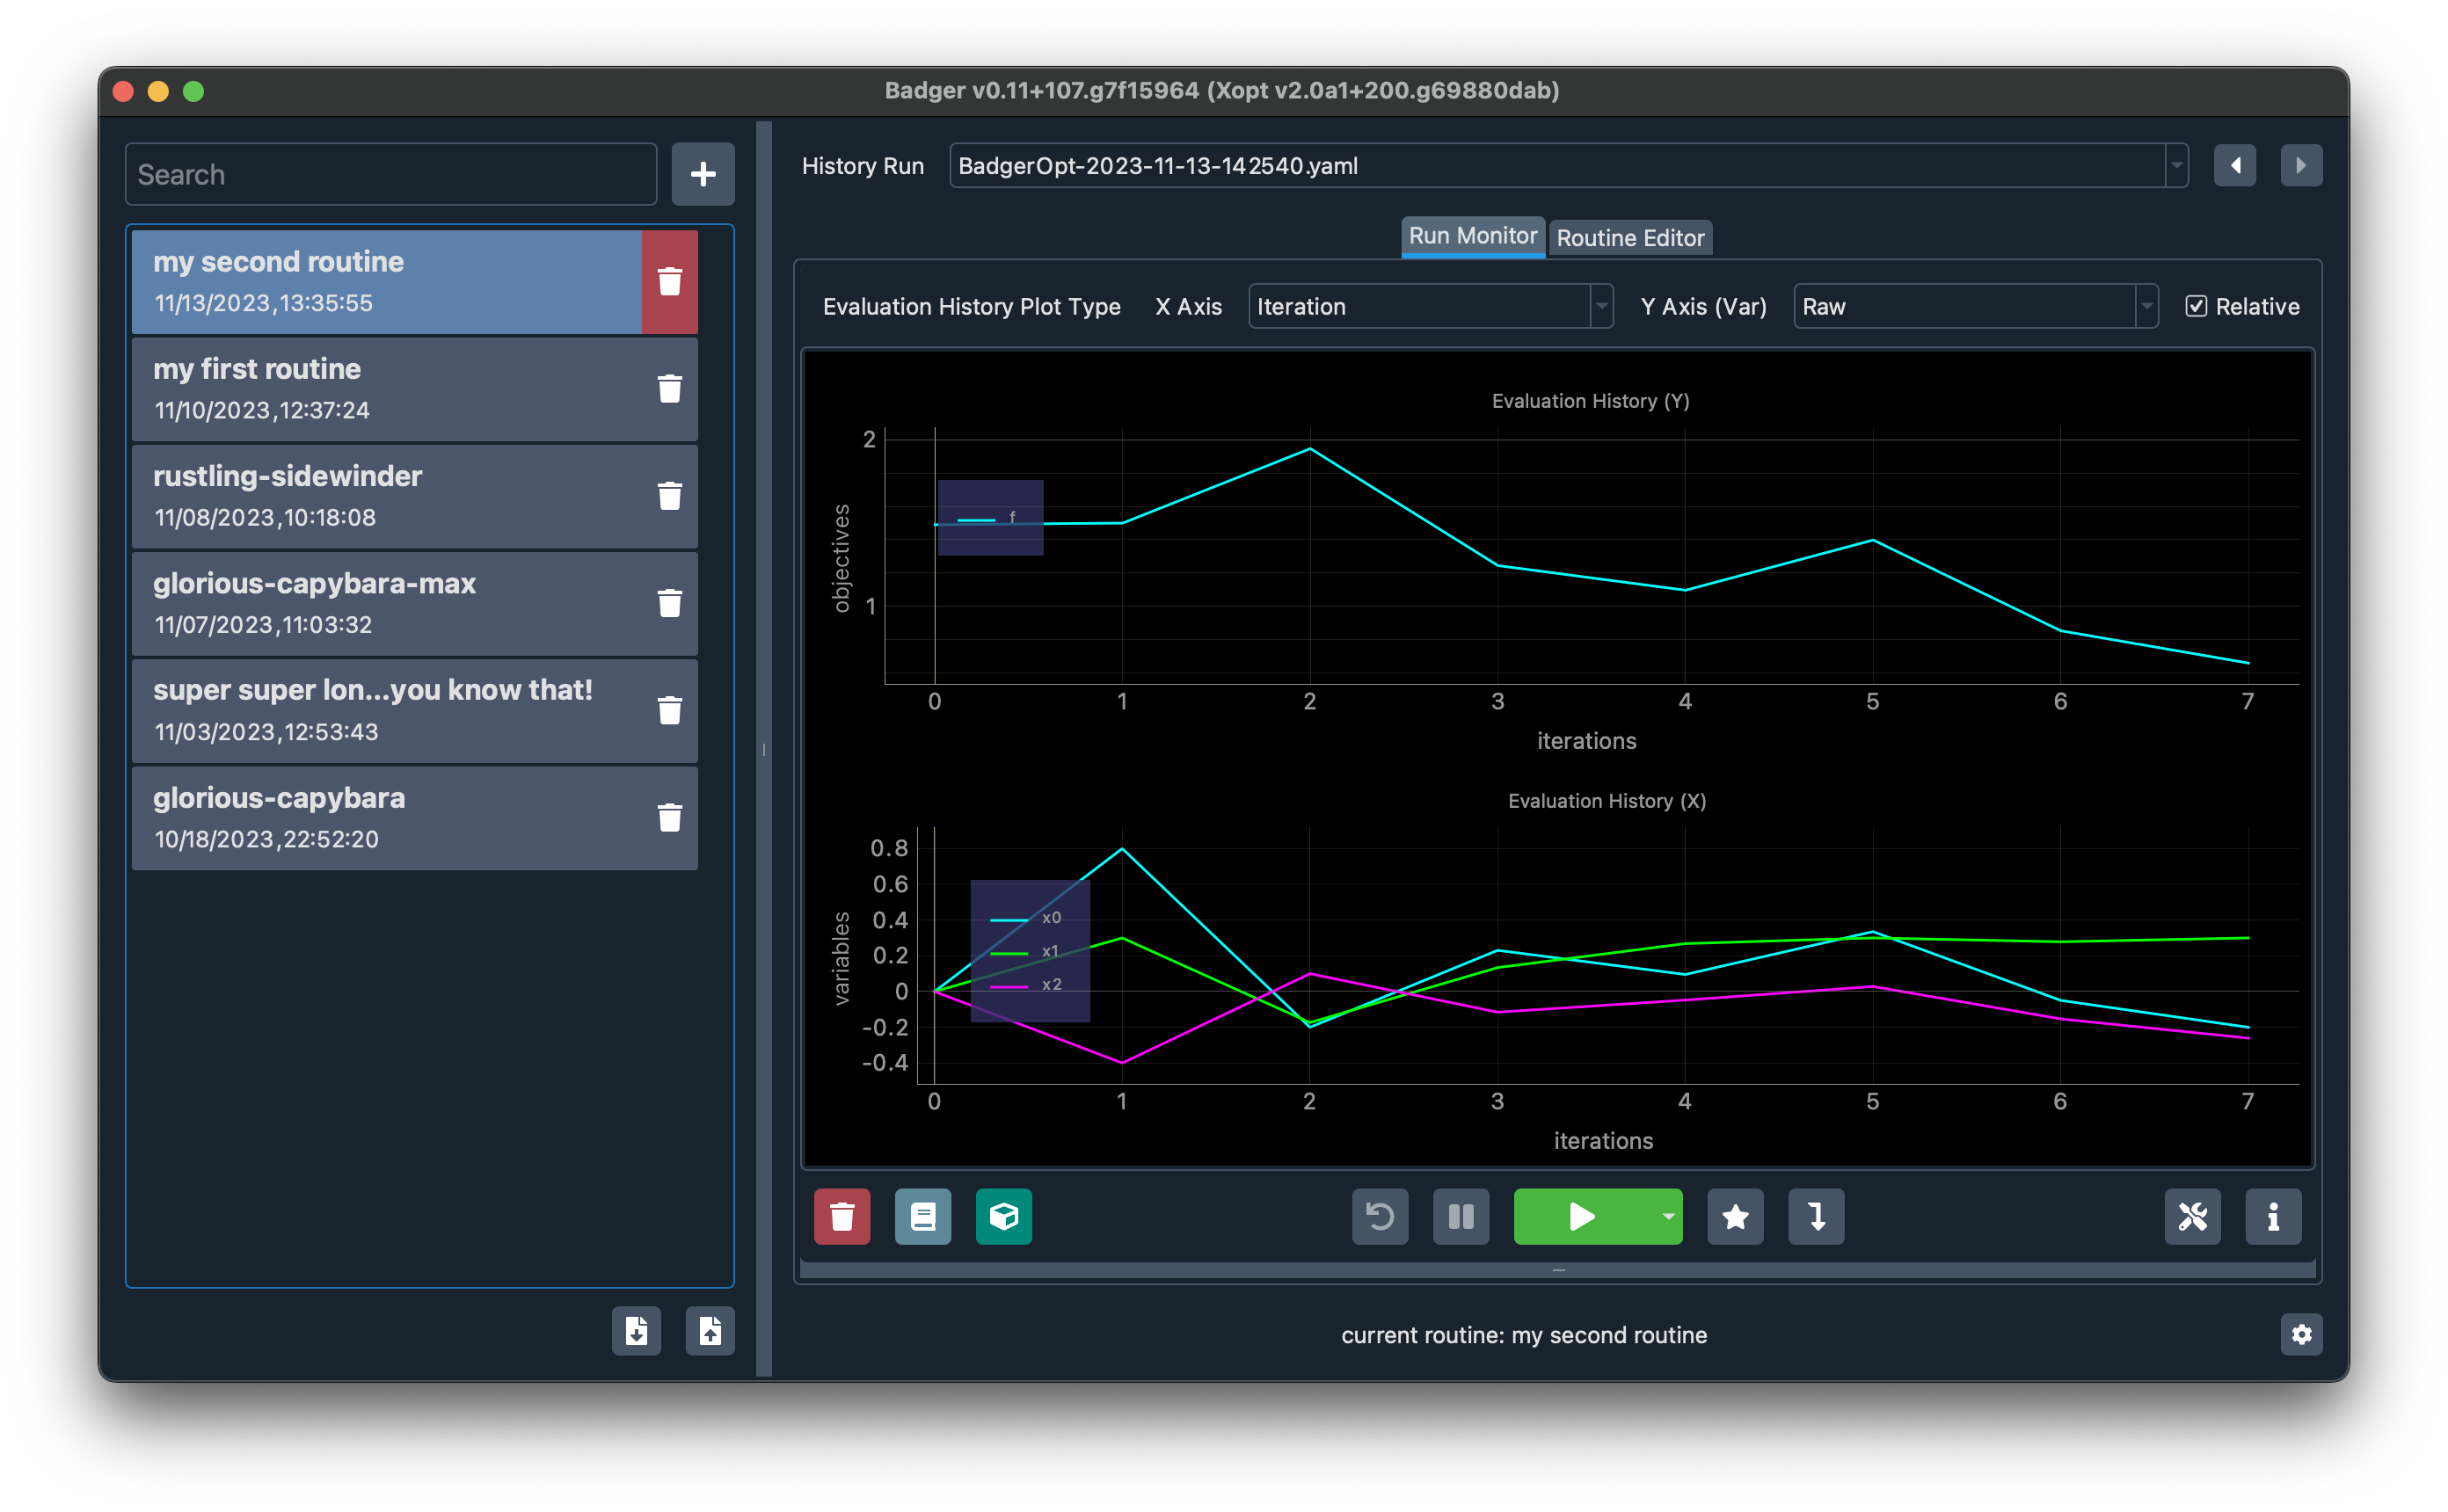
Hover the Delete button (the one with the trash can icon) on the routine you'd like to delete will highlight it in red, click the button and confirm on the confirmation dialog will delete the routine.
Note that deleting a routine will NOT automatically delete all the runs associate with it. This behavior is intended to give users a chance to recover it if regretted later. Of course, if all the associated runs have already been deleted, then it will not be possible to recover the routine -- nevertheless you can recreate it, creating a routine is not that hard after all.
Filter routines
You can use the search bar to filter the routines. Badger will try to match the routine names with the text you put in the search bar. Currently we don't support RegEx, but we plan to add the support in the future releases, along with the ability to search other metadata, such as descriptions.
Browse the historical runs
You can browse the historical runs in Badger by clicking the Next/Previous buttons in the history browser:
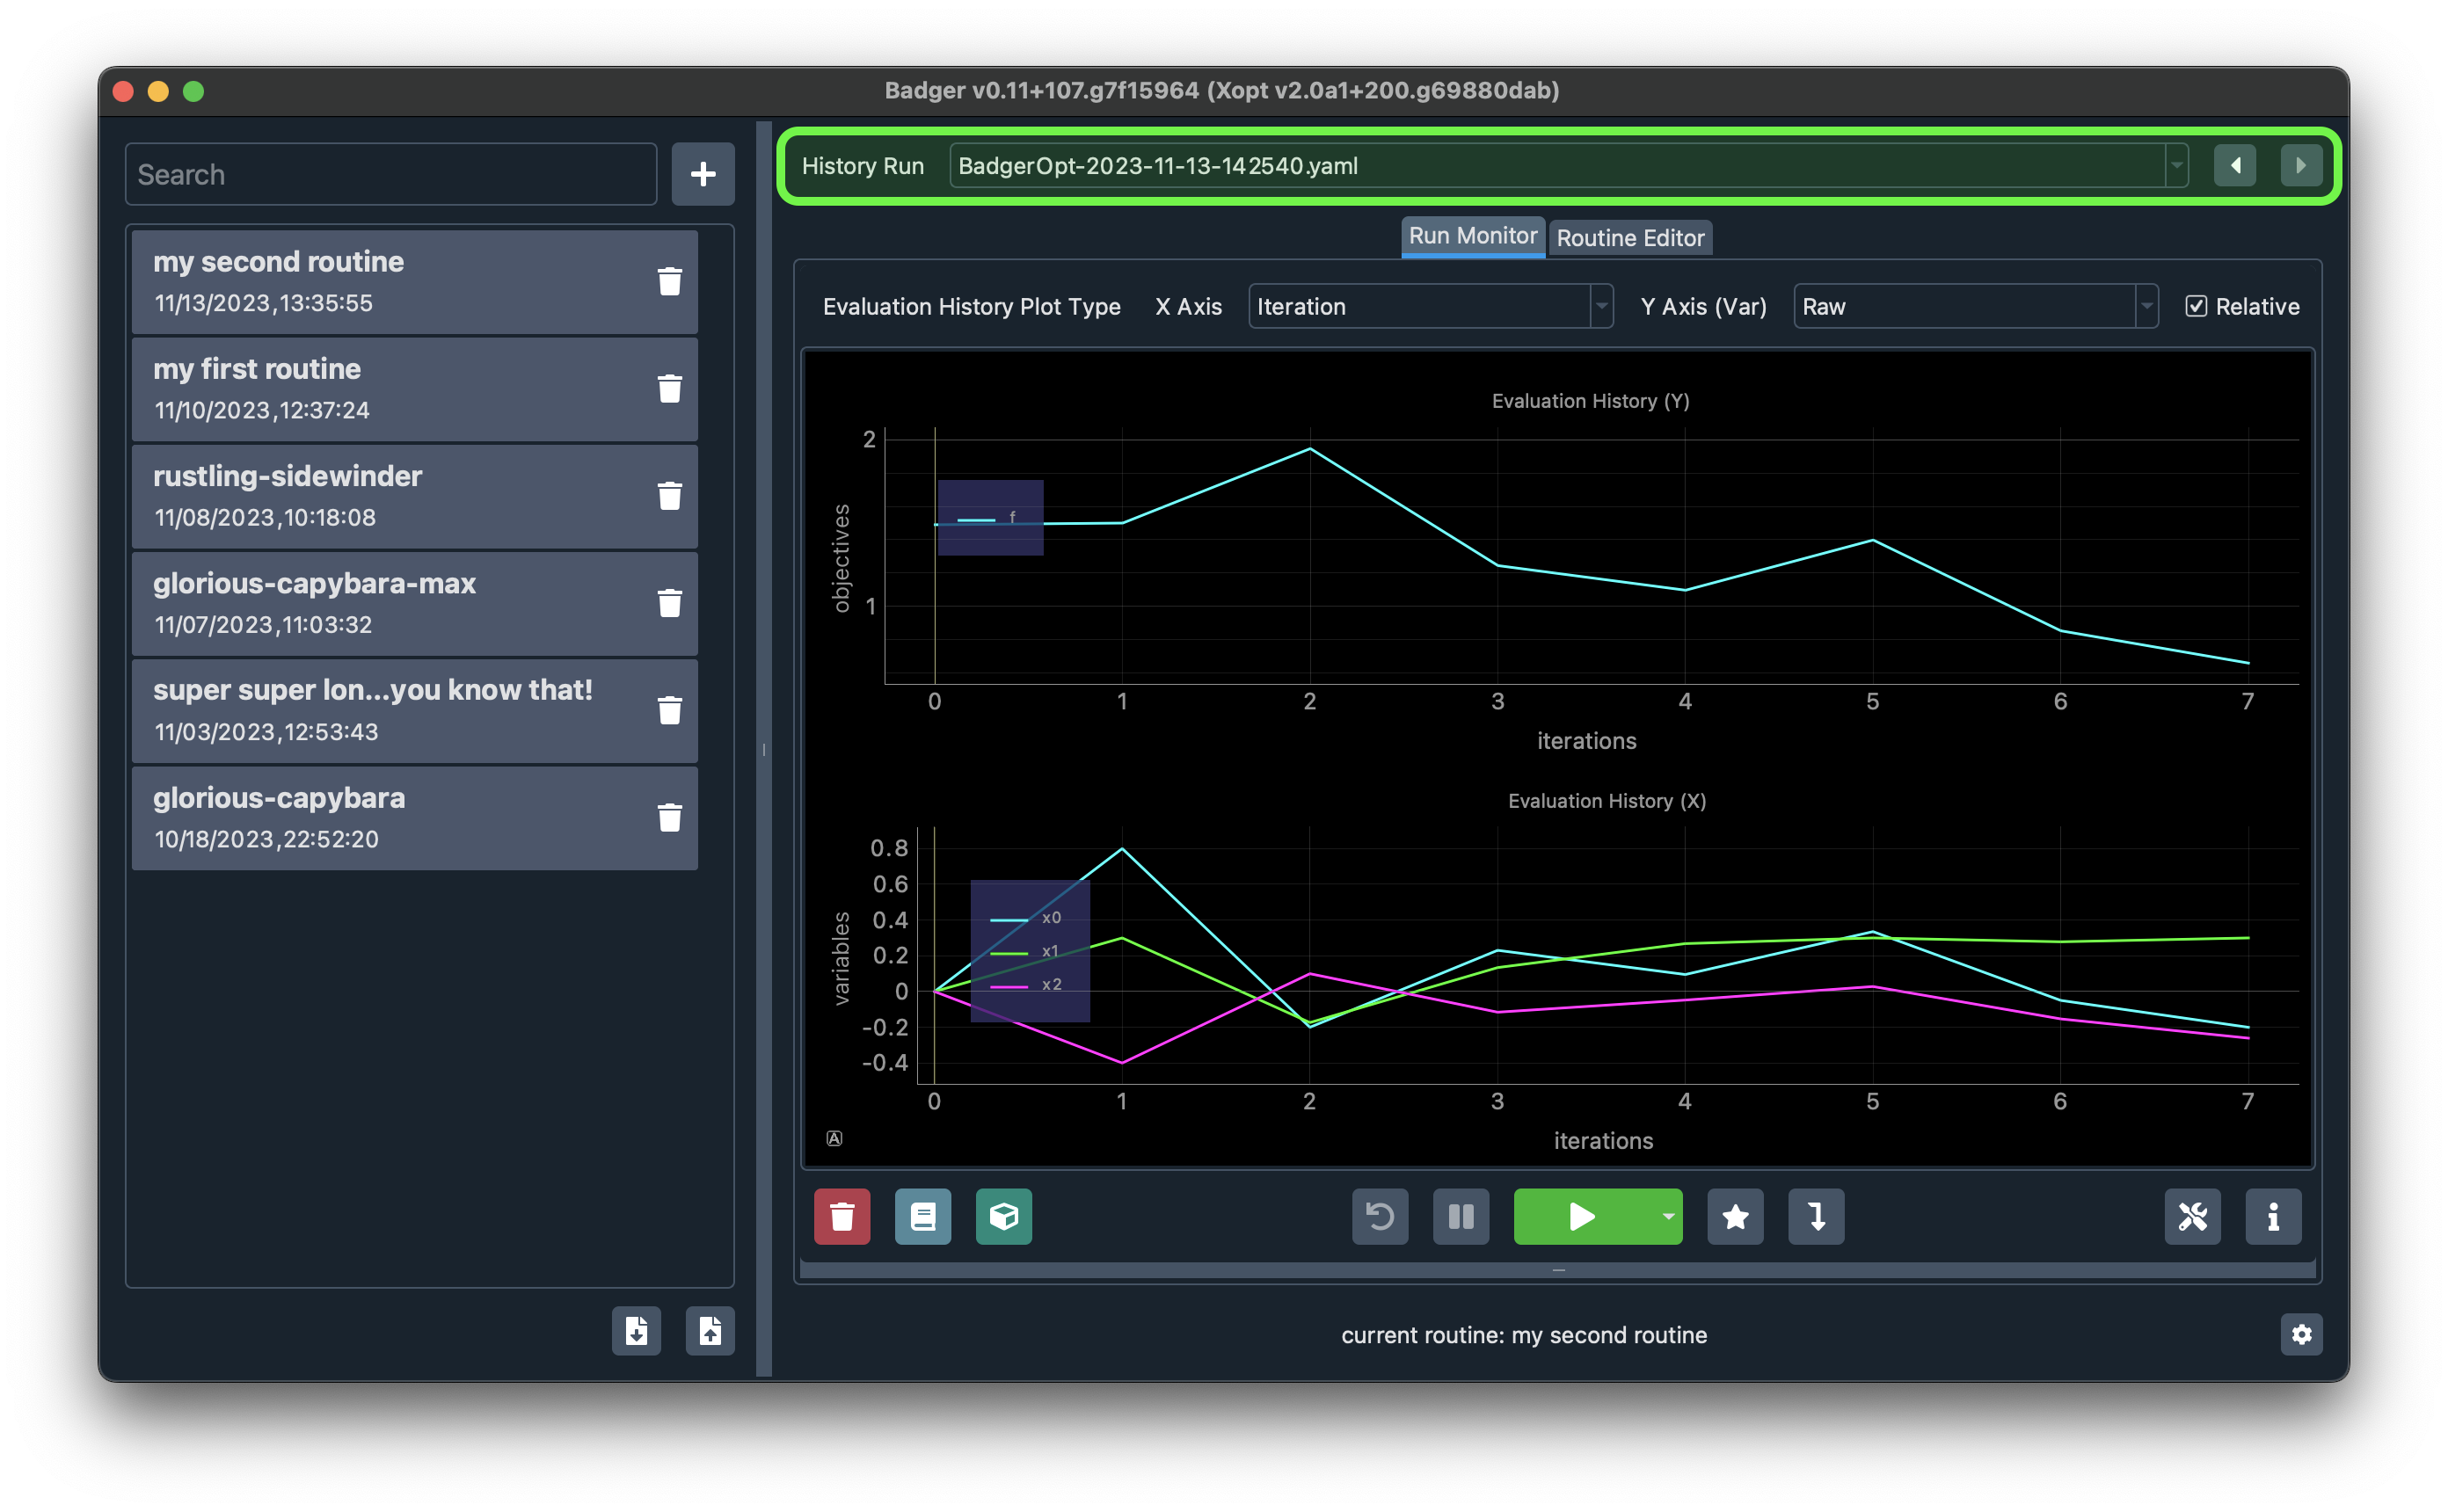
or simply click on the combobox that shows the current run name, to trigger a dropdown menu that lists all the matched runs (categorized and sorted by run date and time). Clicking on a run in the menu will show the run data in the run monitor below.
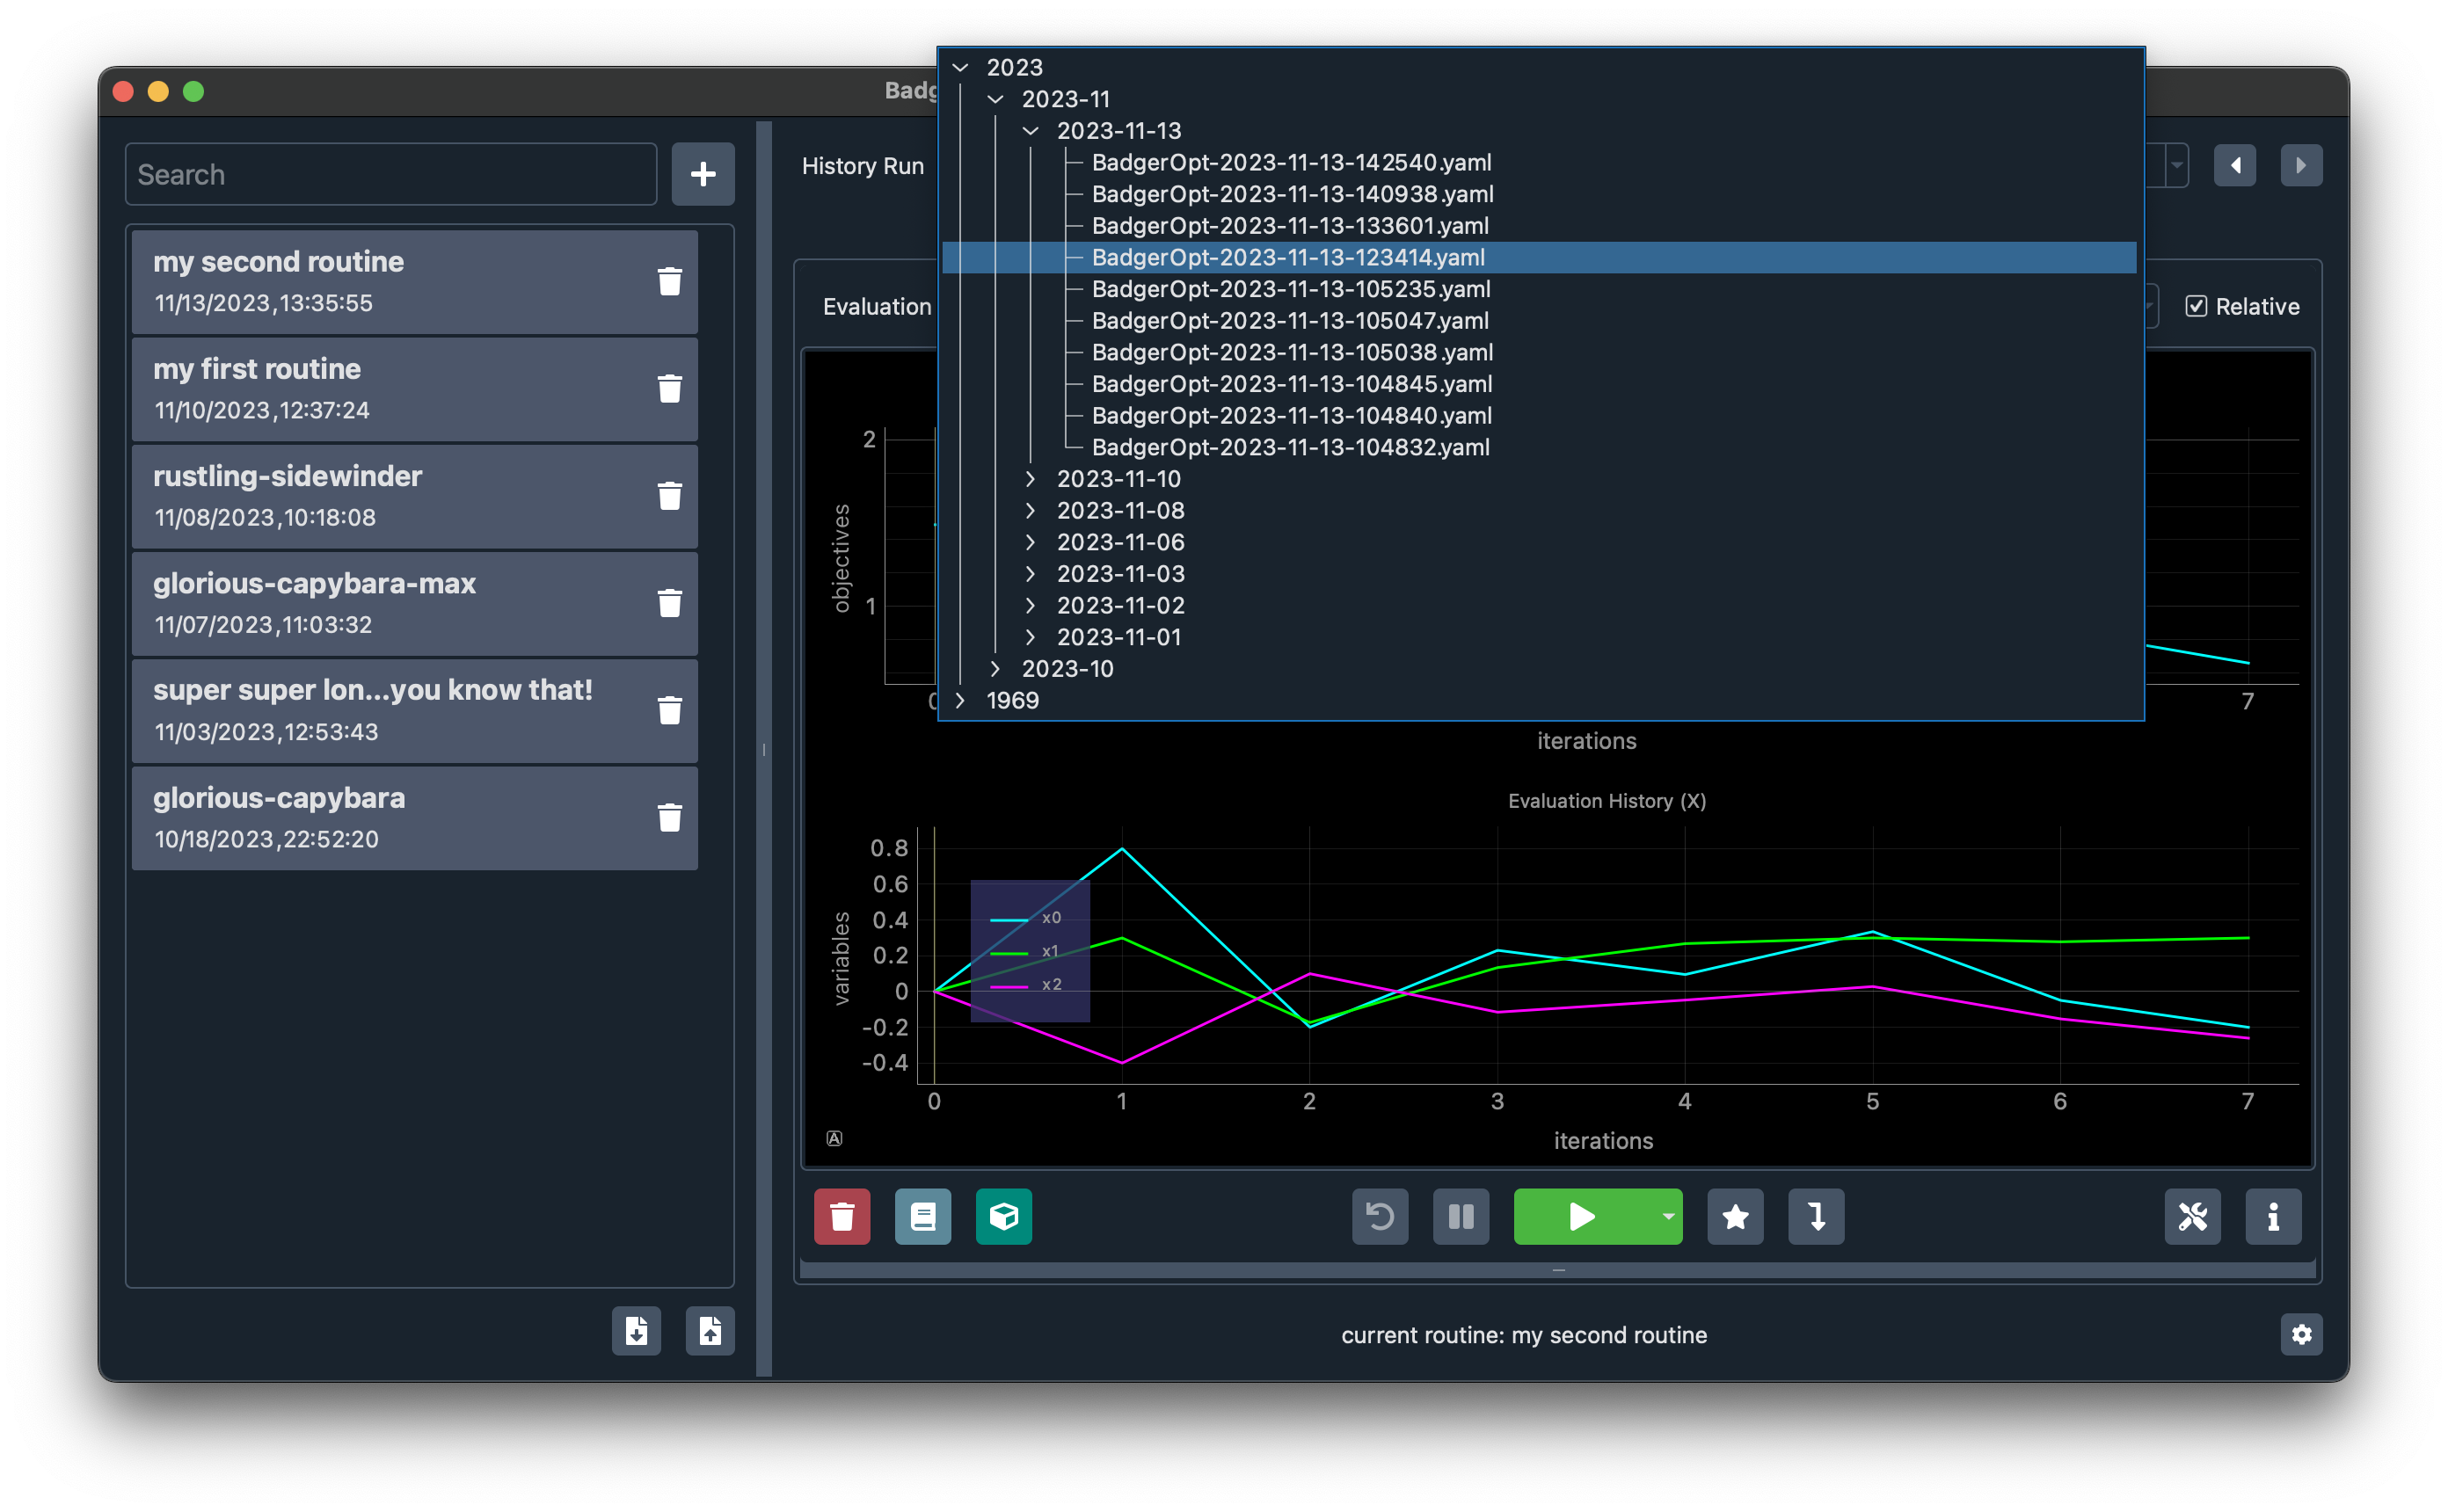
Note that the routine editor content will also be refreshed according to routine of the selected run.
Configure Badger settings
Click the Settings button (with the little gear icon) on the bottom right of the Badger GUI will bring up the Badger settings dialog, where you can configure Badger as needed:
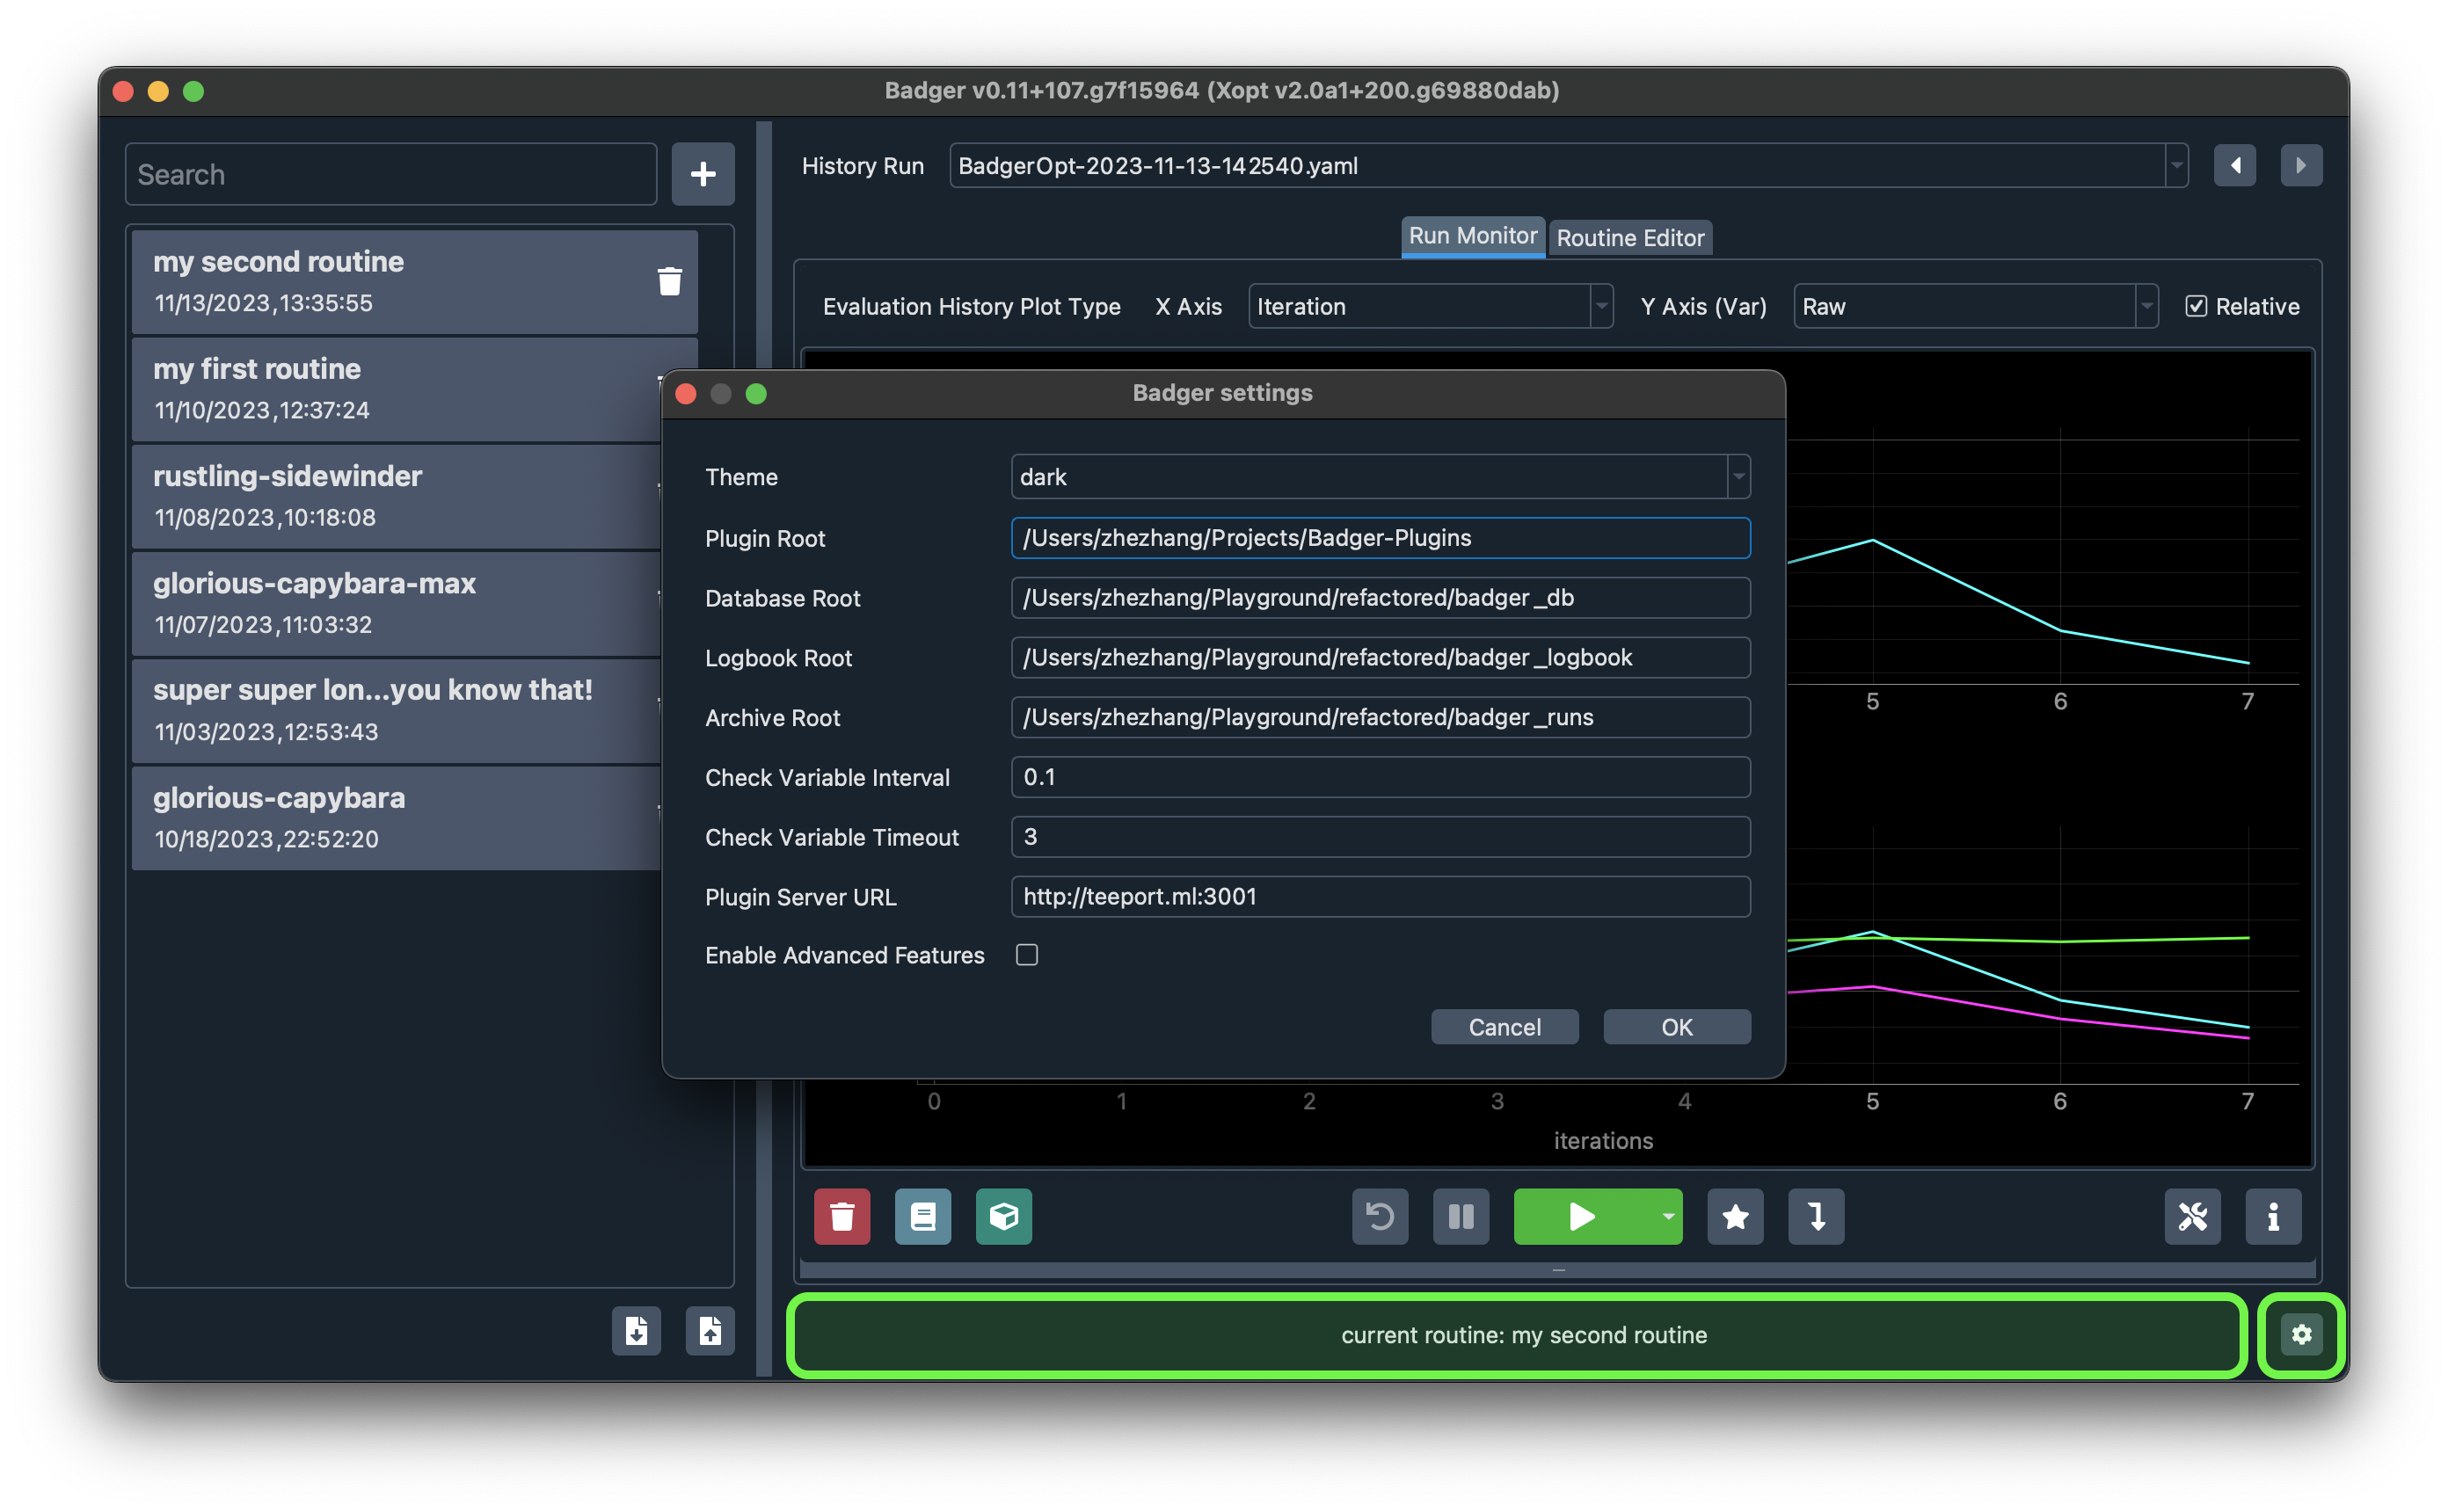
As a side note, the routine name for the current run shown in the run monitor is displayed besides the Settings button.
Export/import routines
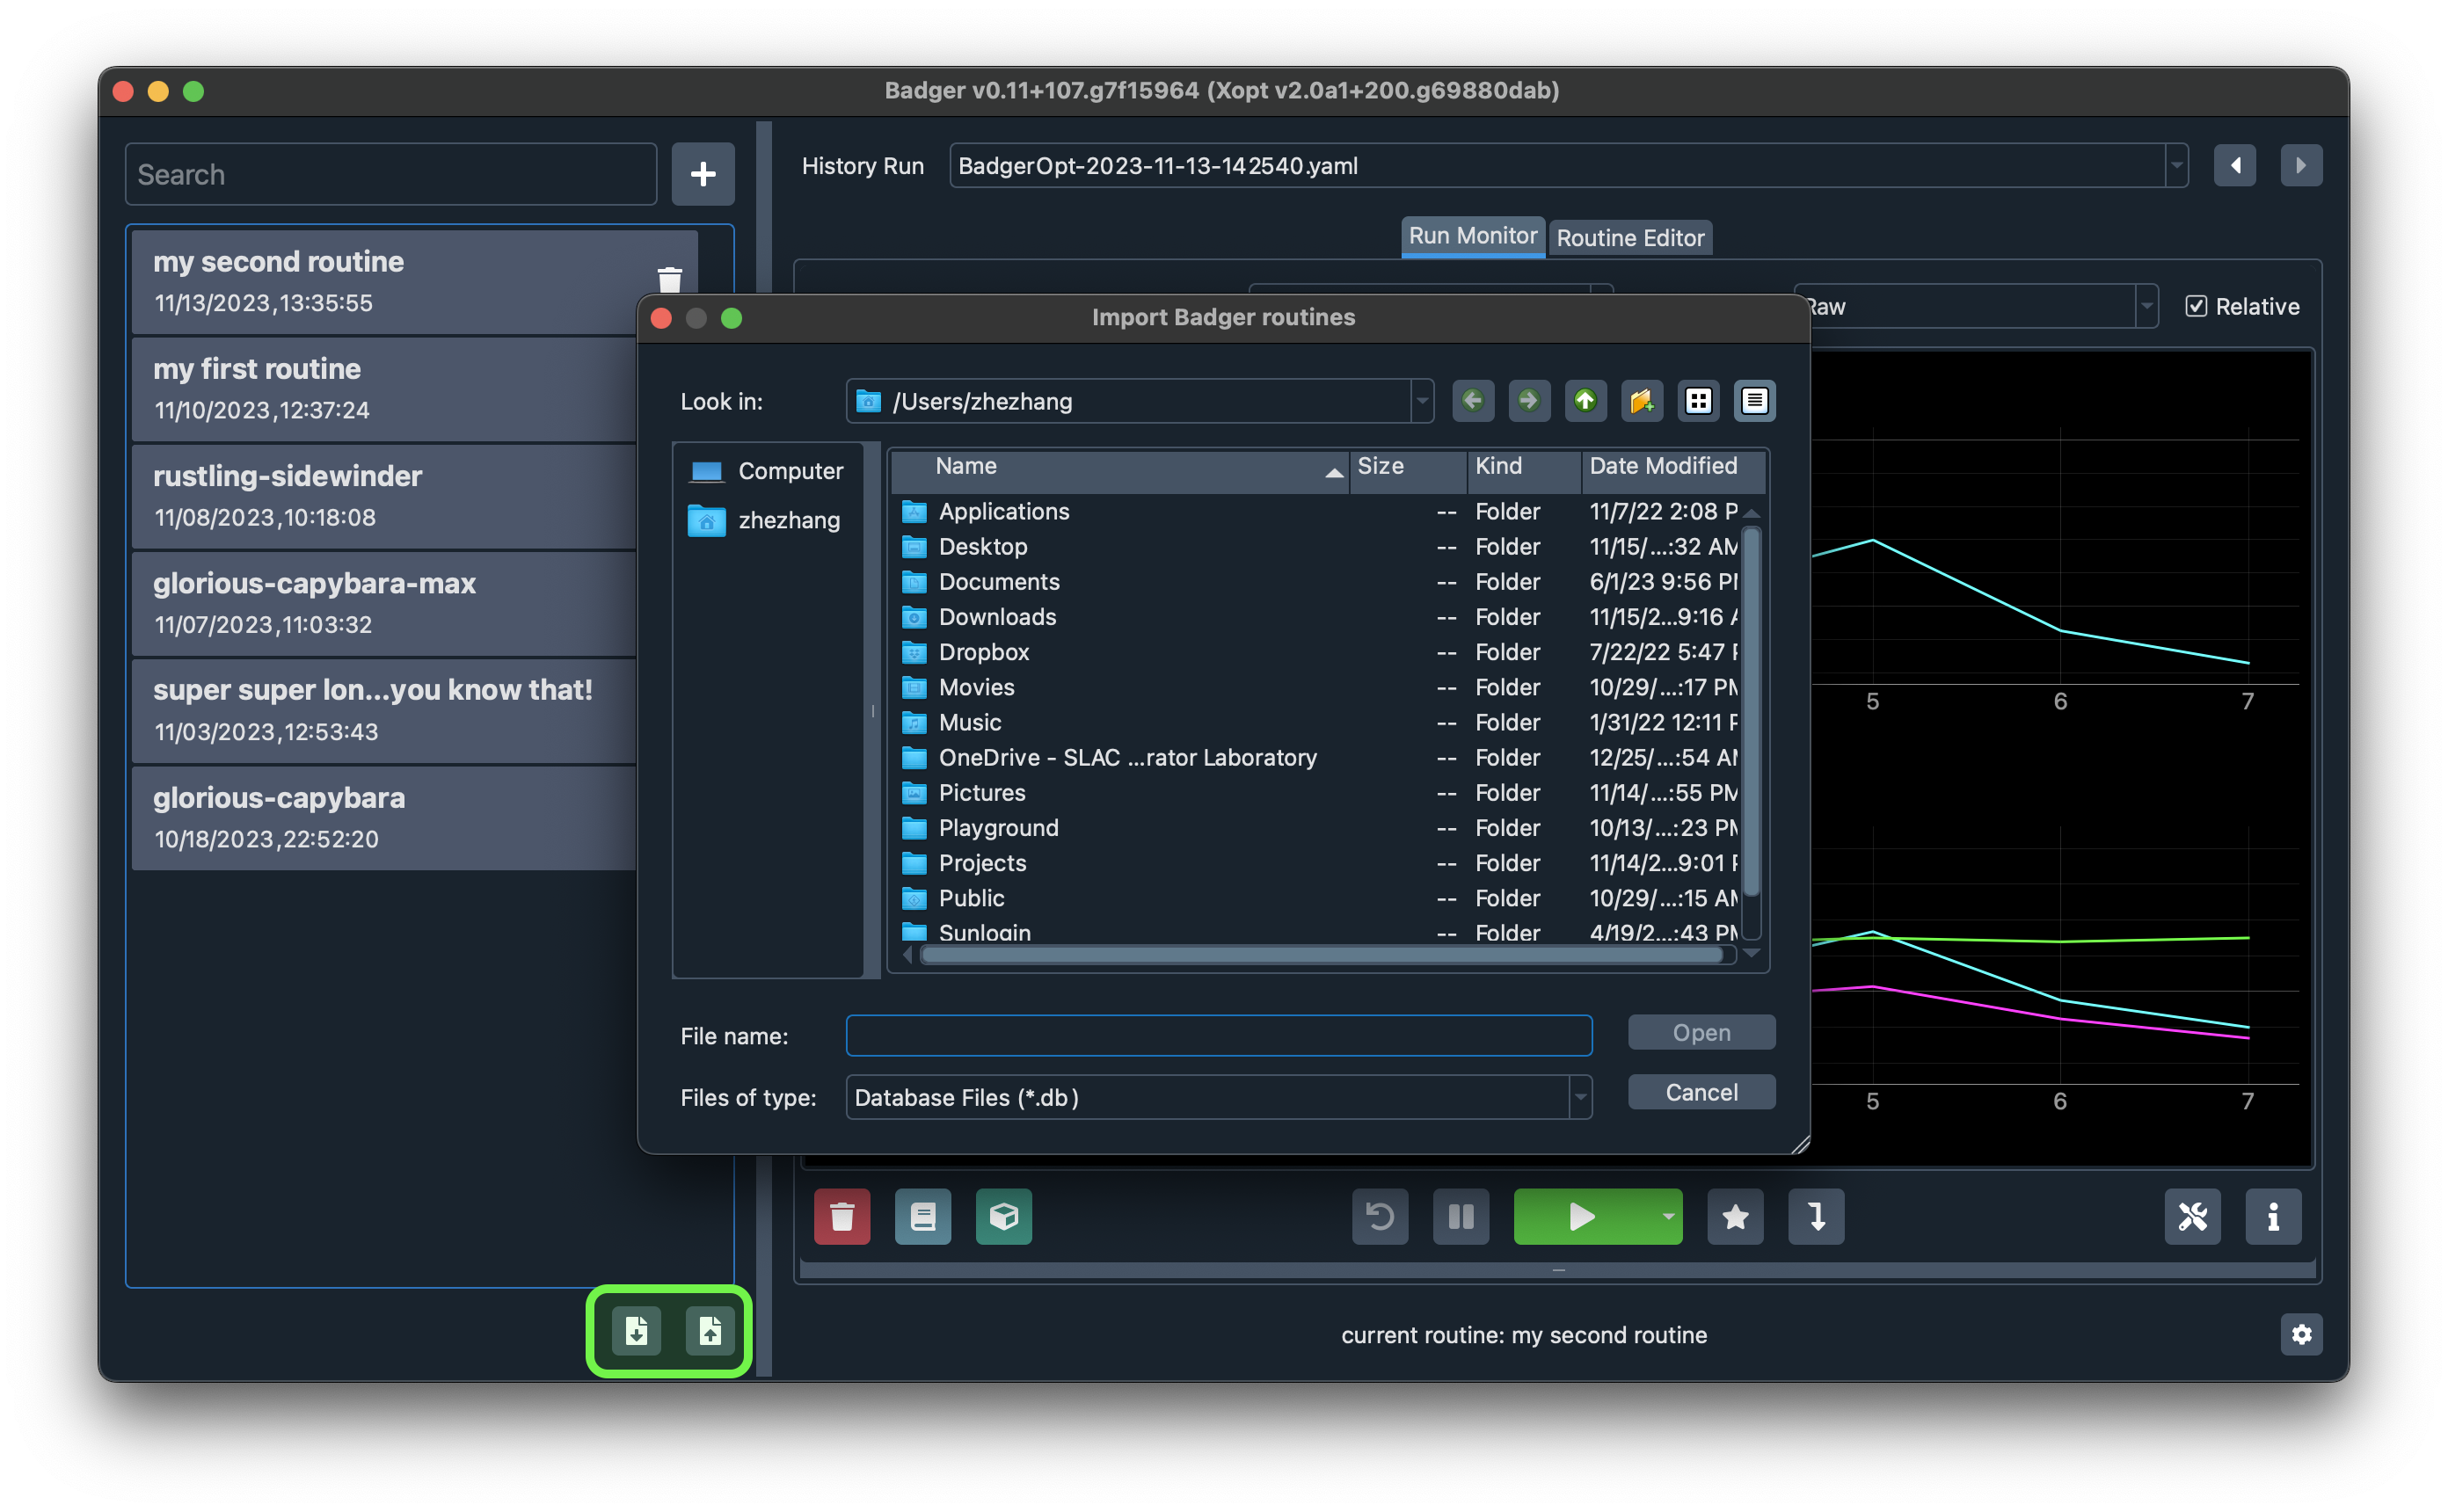
Click the Export/Import button below the routine list will let you export the FILTERED routines as a .db file or import the routines in a .db file.
Run monitor
Control an optimization run
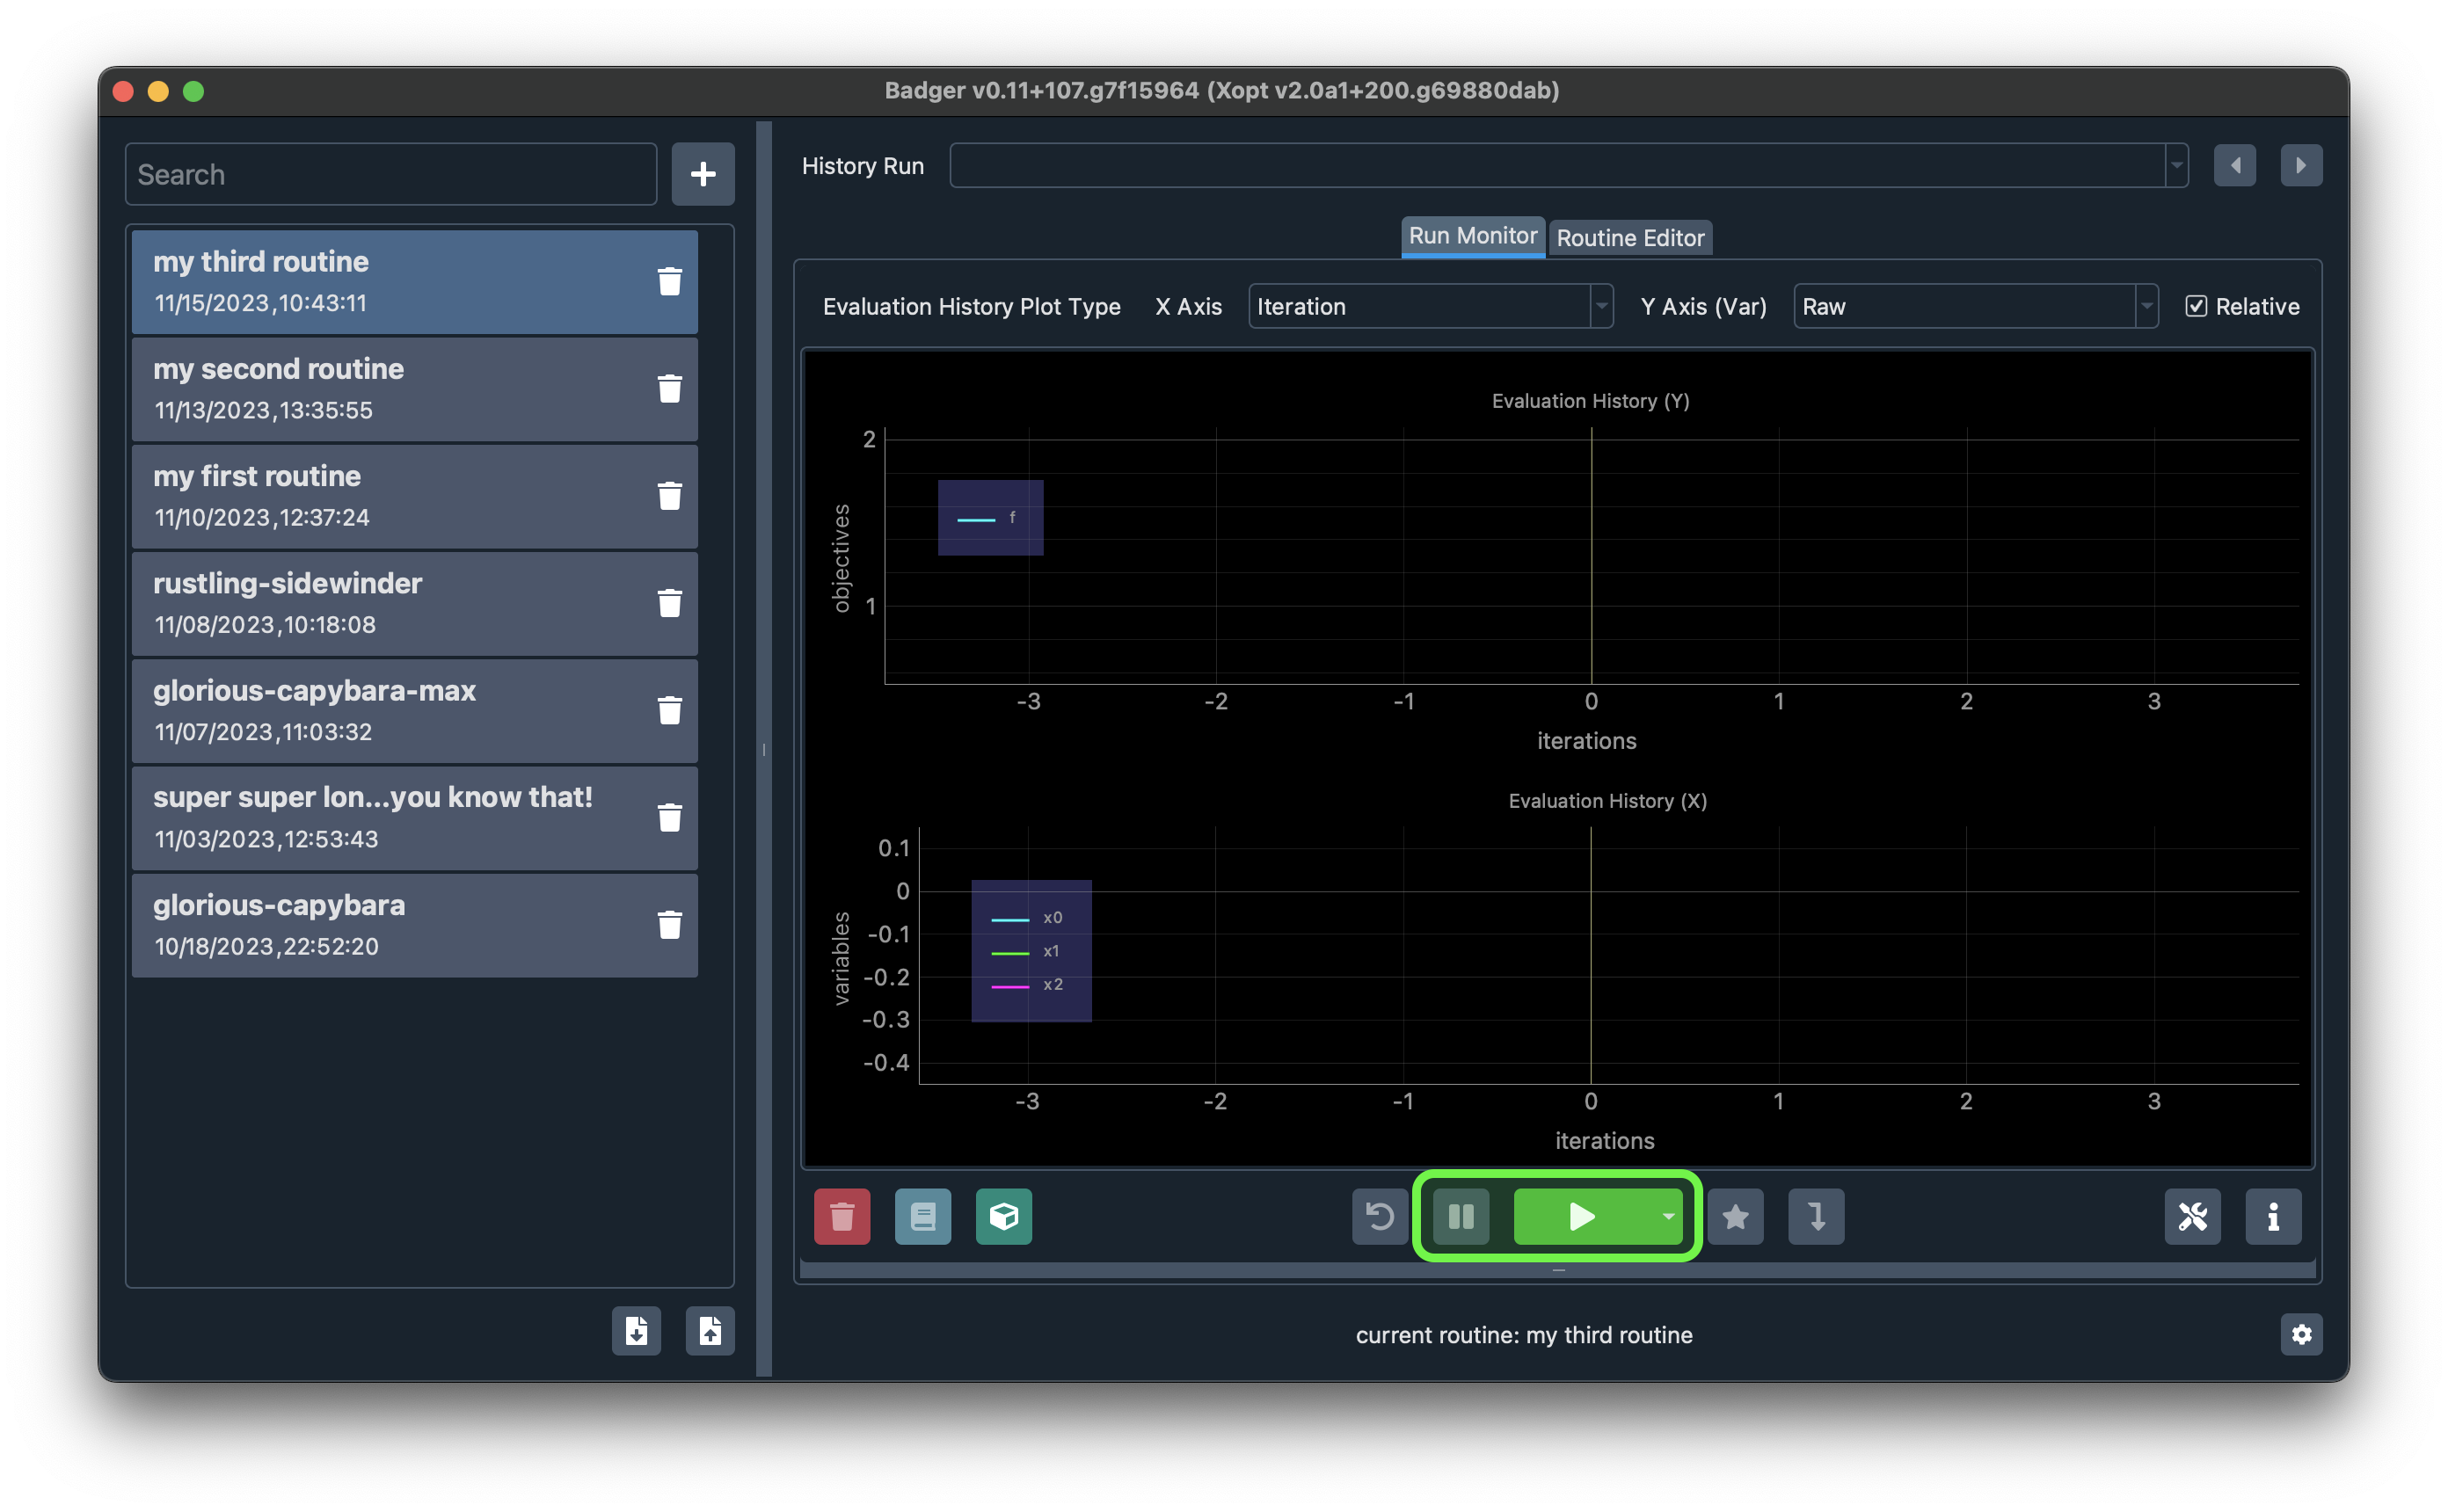
Start an optimization run by either:
- Select a routine and click the green Run/Stop button (with the play icon), or
- Browse the historical runs and select the one you'd like to rerun, then click the Run/Stop button
Note that for the second approach, Badger simply uses the routine that drove the selected historical run to run the new round of optimization. It does NOT continue the old run. That being said, the continue old run feature is planned for future releases of Badger.
To pause the run, click the Pause/Resume button to the right of the Run/Stop button. To resume a paused run, click the Pause/Resume button again.
Click the Run/Stop button again (turned red once the run started) to stop the run.
Set termination condition
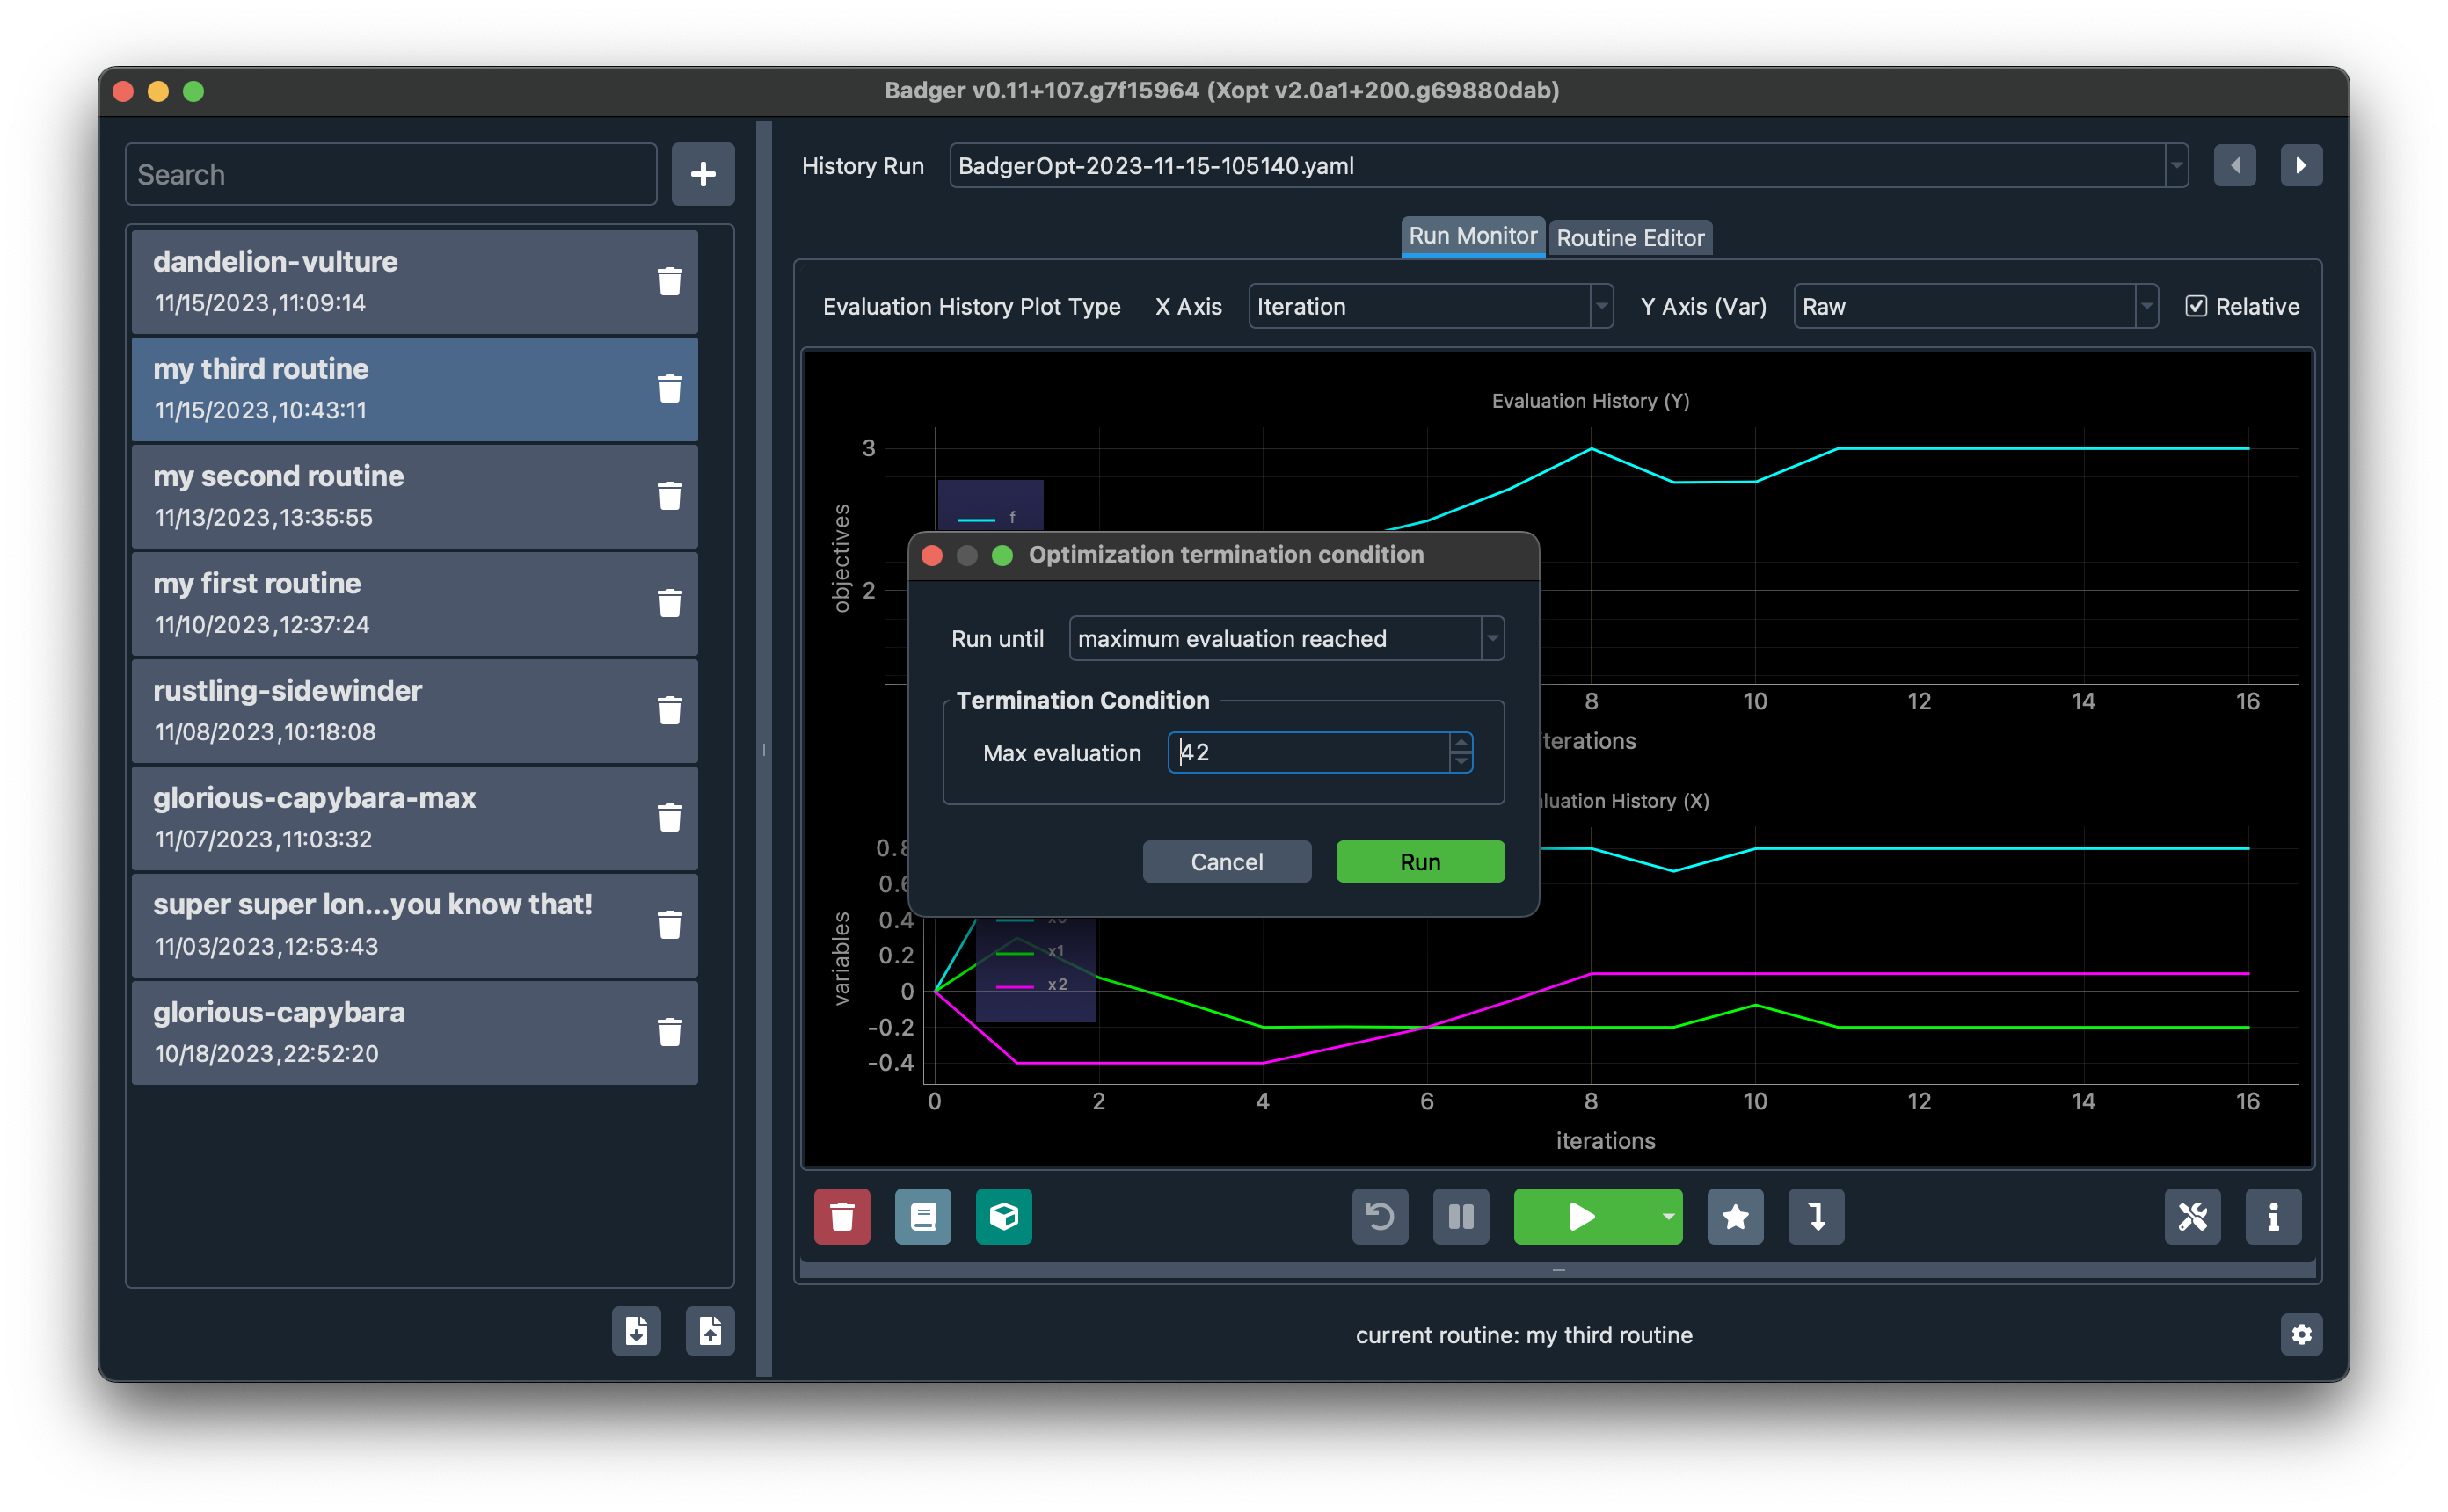
Click the small dropdown arrow on the Run/Stop button to open the run menu, select Run until, then configure the termination condition and run the optimization. The run will be terminated once the terminaton condition is met.
Currently Badger supports two types of termination conditions:
- Terminate when maximum evaluation reached, or
- Terminate when maximum running time exceeded
The convergence-based termination condition will be added soon.
Once you select the Run until action, the default behavior of the green Run/Stop button will change accordingly. The default behavior (Run, or Run until) will be reset to Run (means run forever) when Badger GUI is closed.
For now, you can only use single termination condition. Multiple termination rules will be supported in the future.
Reset the environment
You can reset the environment to initial states after a run by clicking the Reset button. Note that you can only reset the environment that you just run, and you cannot reset the environment in the middle of a run. To achieve the latter, terminate the run first and then reset.
Inspect the solutions in a run
You can either drag the yellow inspector line (the position will be synced across all monitors), or click inside the monitor, to select the solution you are interested in.
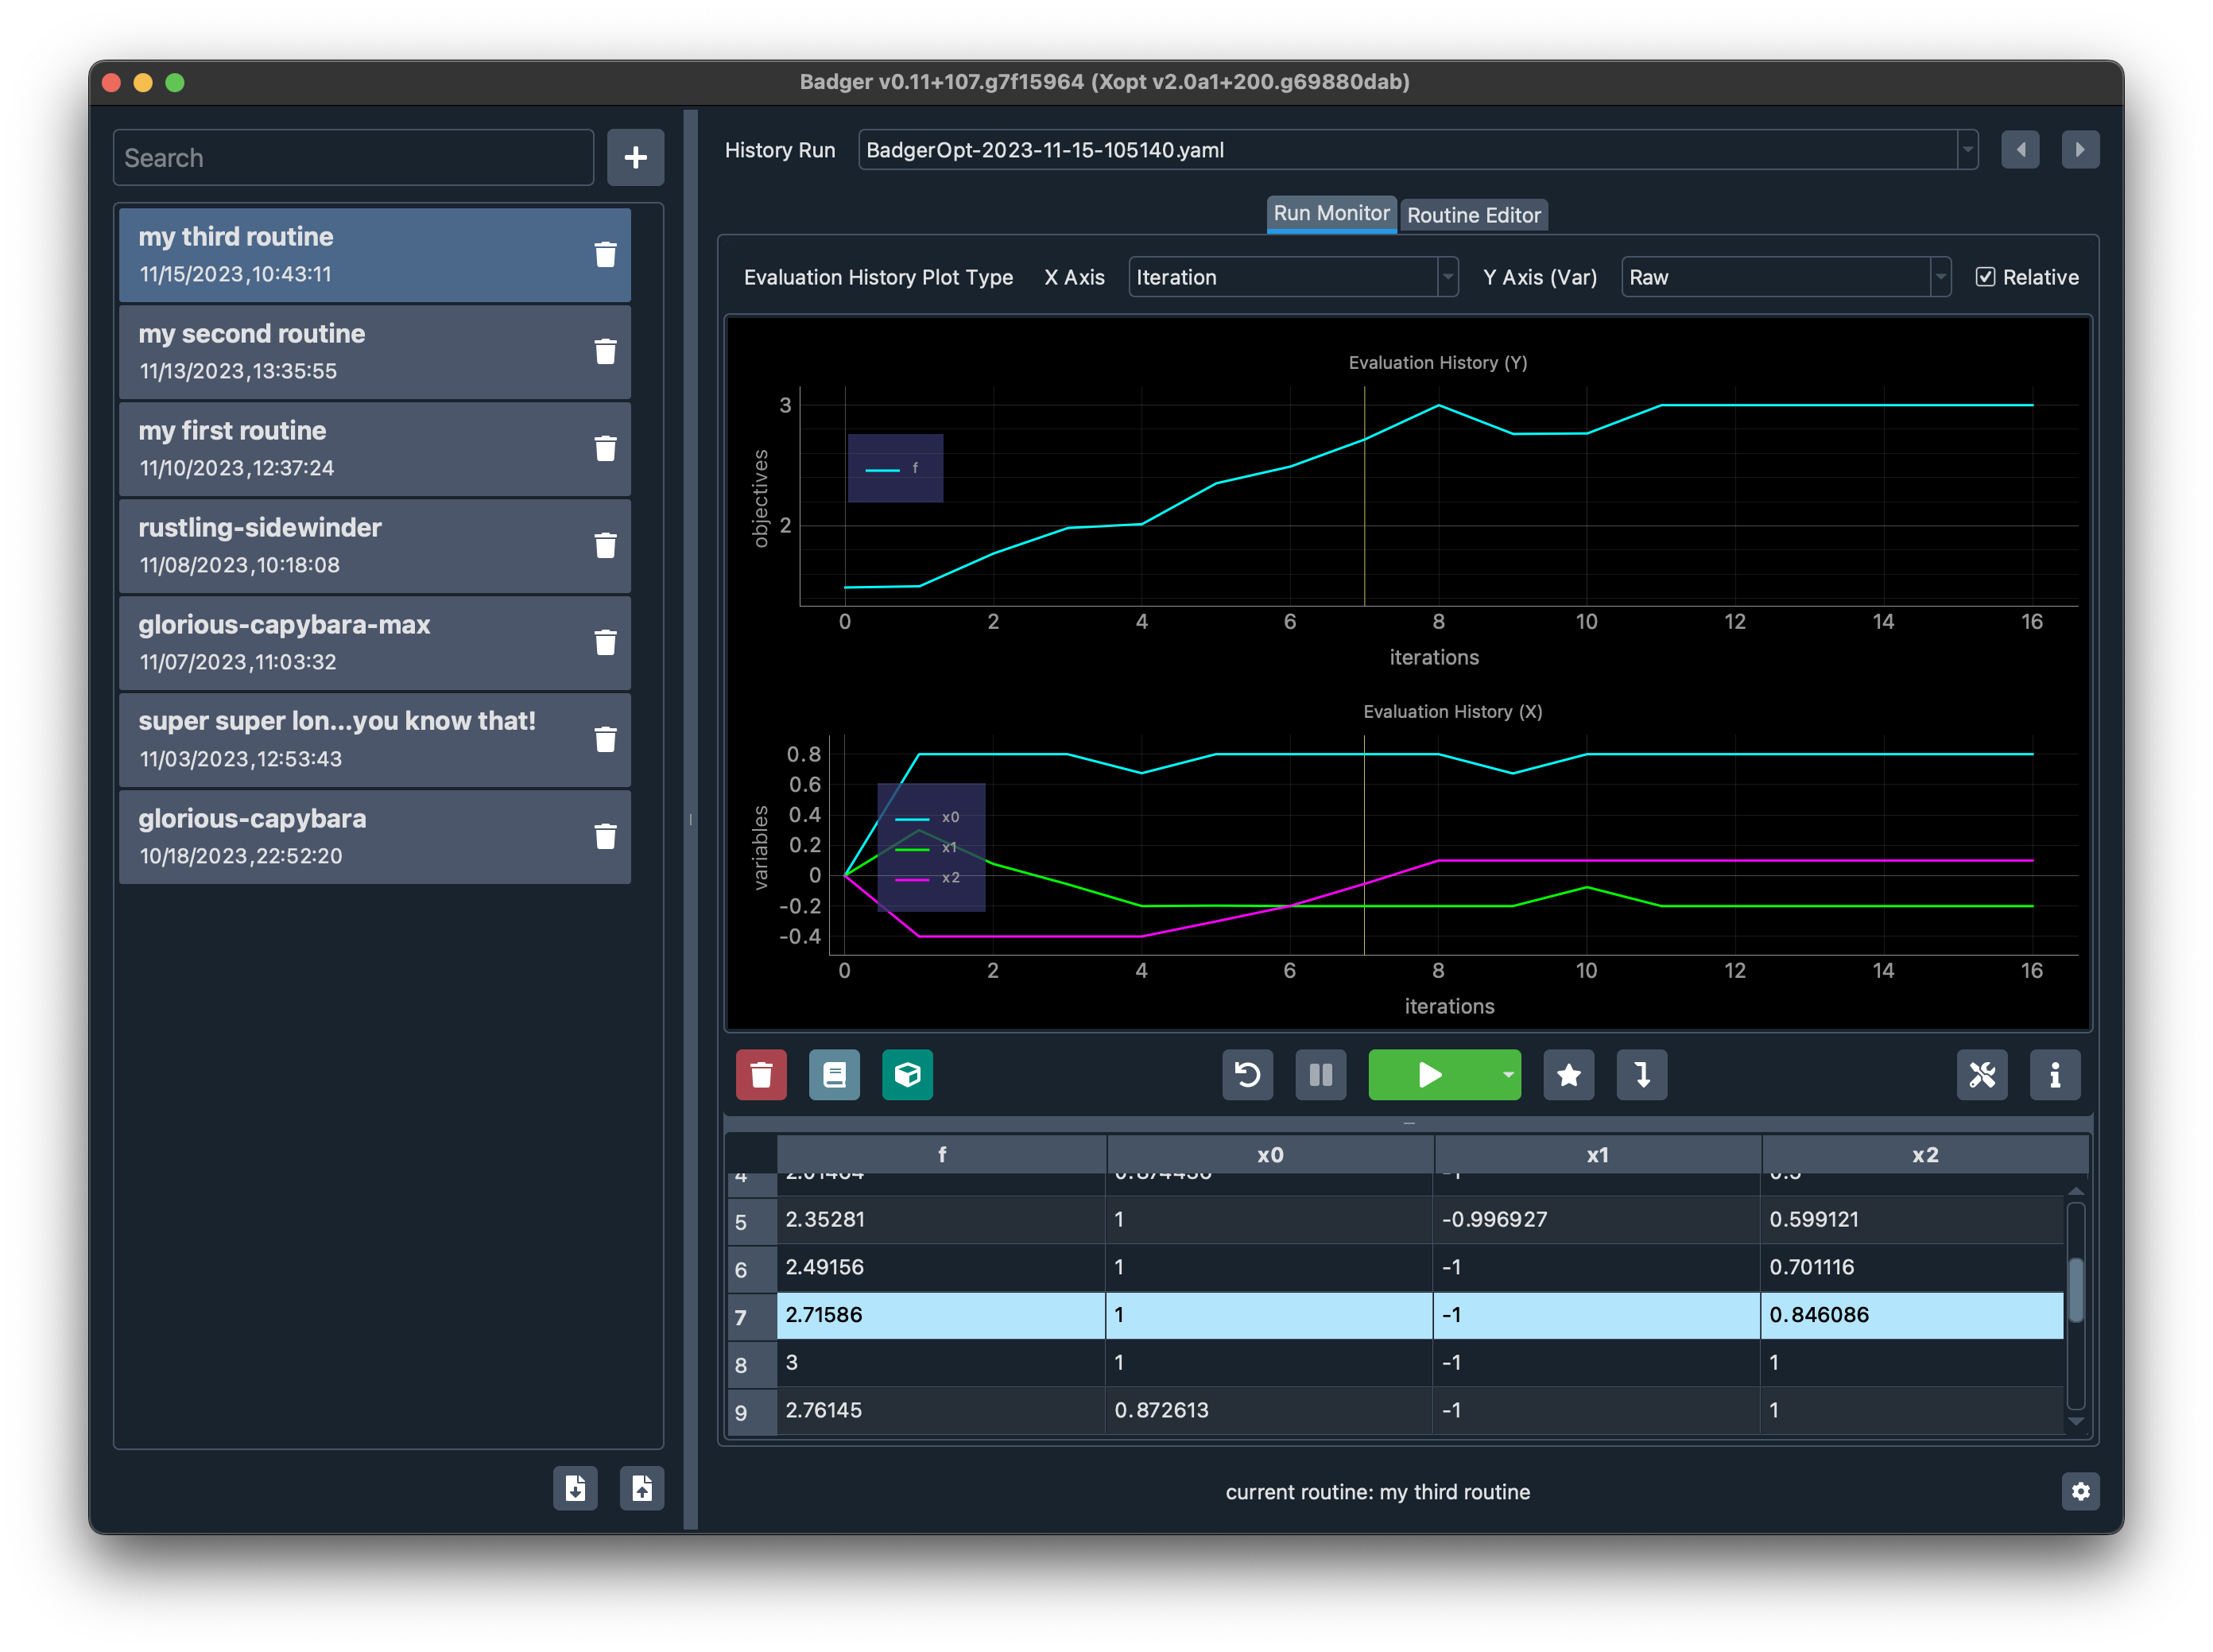
The know the exact values of the variables/objectives of that solution, drag the horizontal handle below the action buttons up to open the data table, the solution selected on the monitor will be highlighted in the data table. You can select any region of the table and copy the data as you do in Excel sheets.
Jump to the optimal solution
Click the star button to select the optimal solution according to the VOCS. Note that this action only selects the optimum, it does NOT set the environment with the selected solution. To dial in the optimal solution, perform the dial in action.
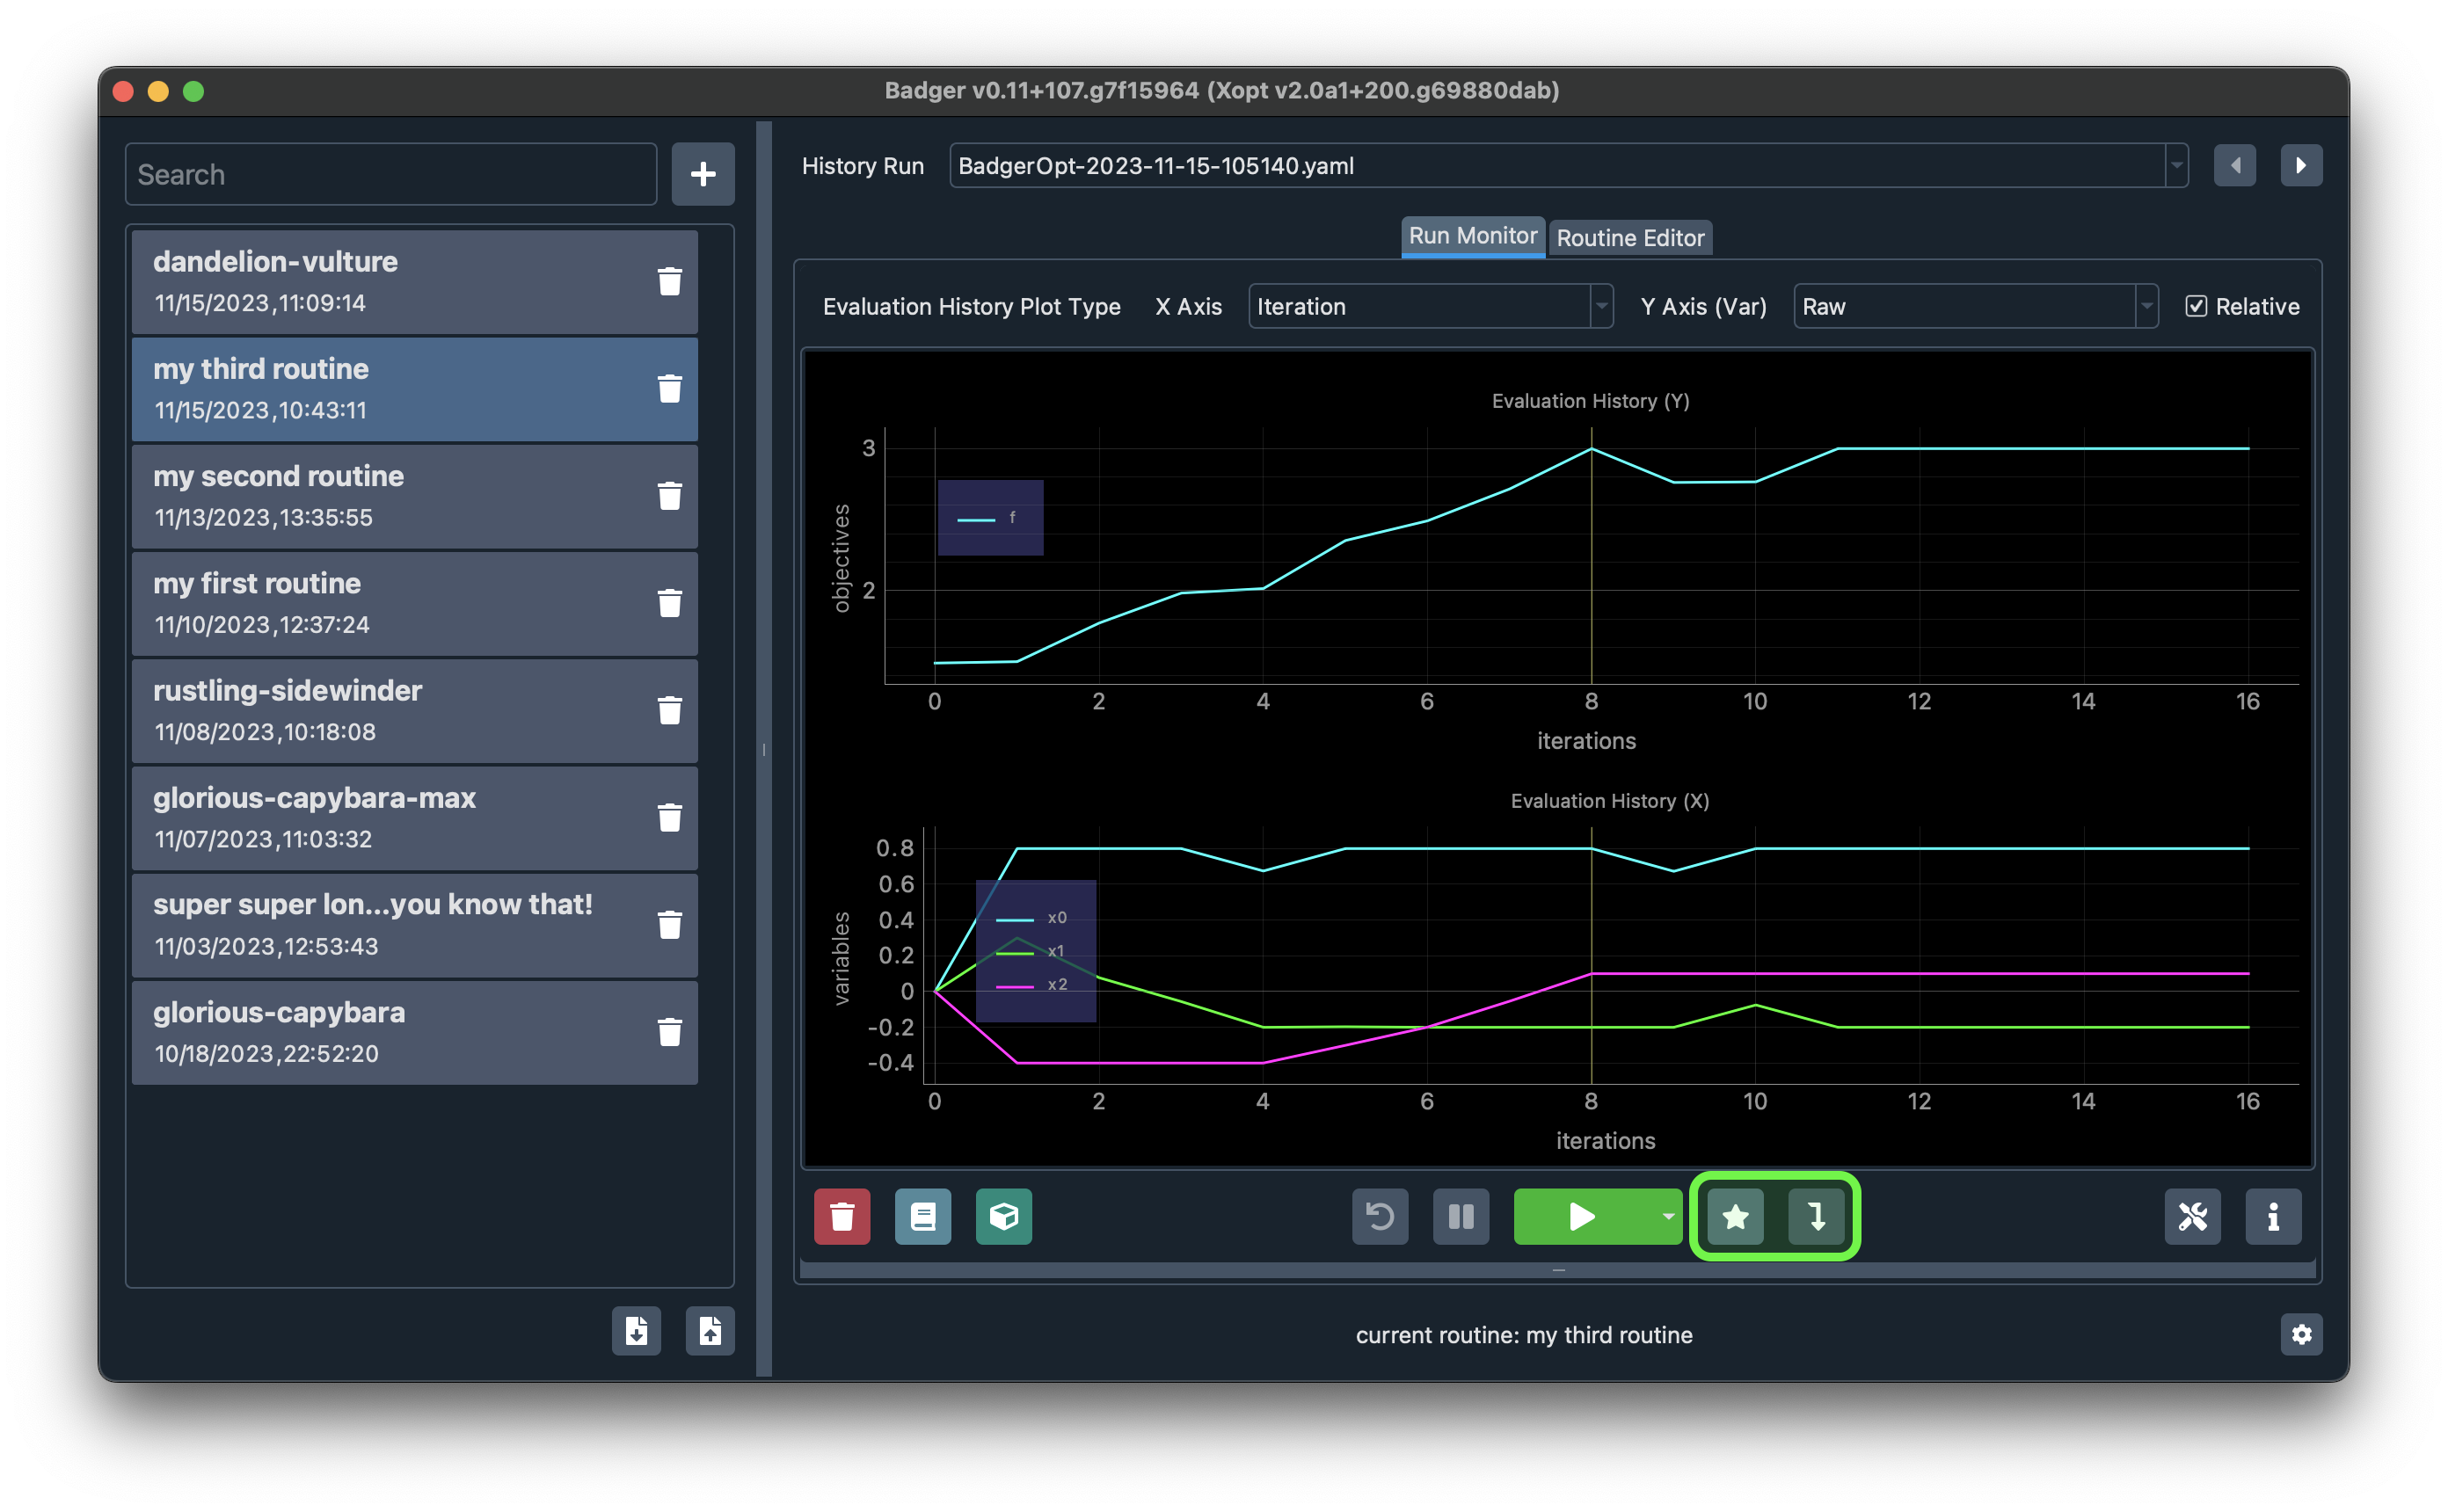
Dial in the selected solution
You can dial in any selected solution by clicking the Dial-in button (with the right-down arrow icon) besides the star button. A confirmation dialog will be popped up to give you a heads-up, in case that you click the button by accident (could be dangerous when you are using Badger to optimize a real machine!).
Change the horizontal axis
You can show the run on iteration-based x-axis or time-based x-axis. Simply select the desired x-axis type (Iteration or Time) in the X Axis dropdown menu in the visualization configuration bar highlighted below.
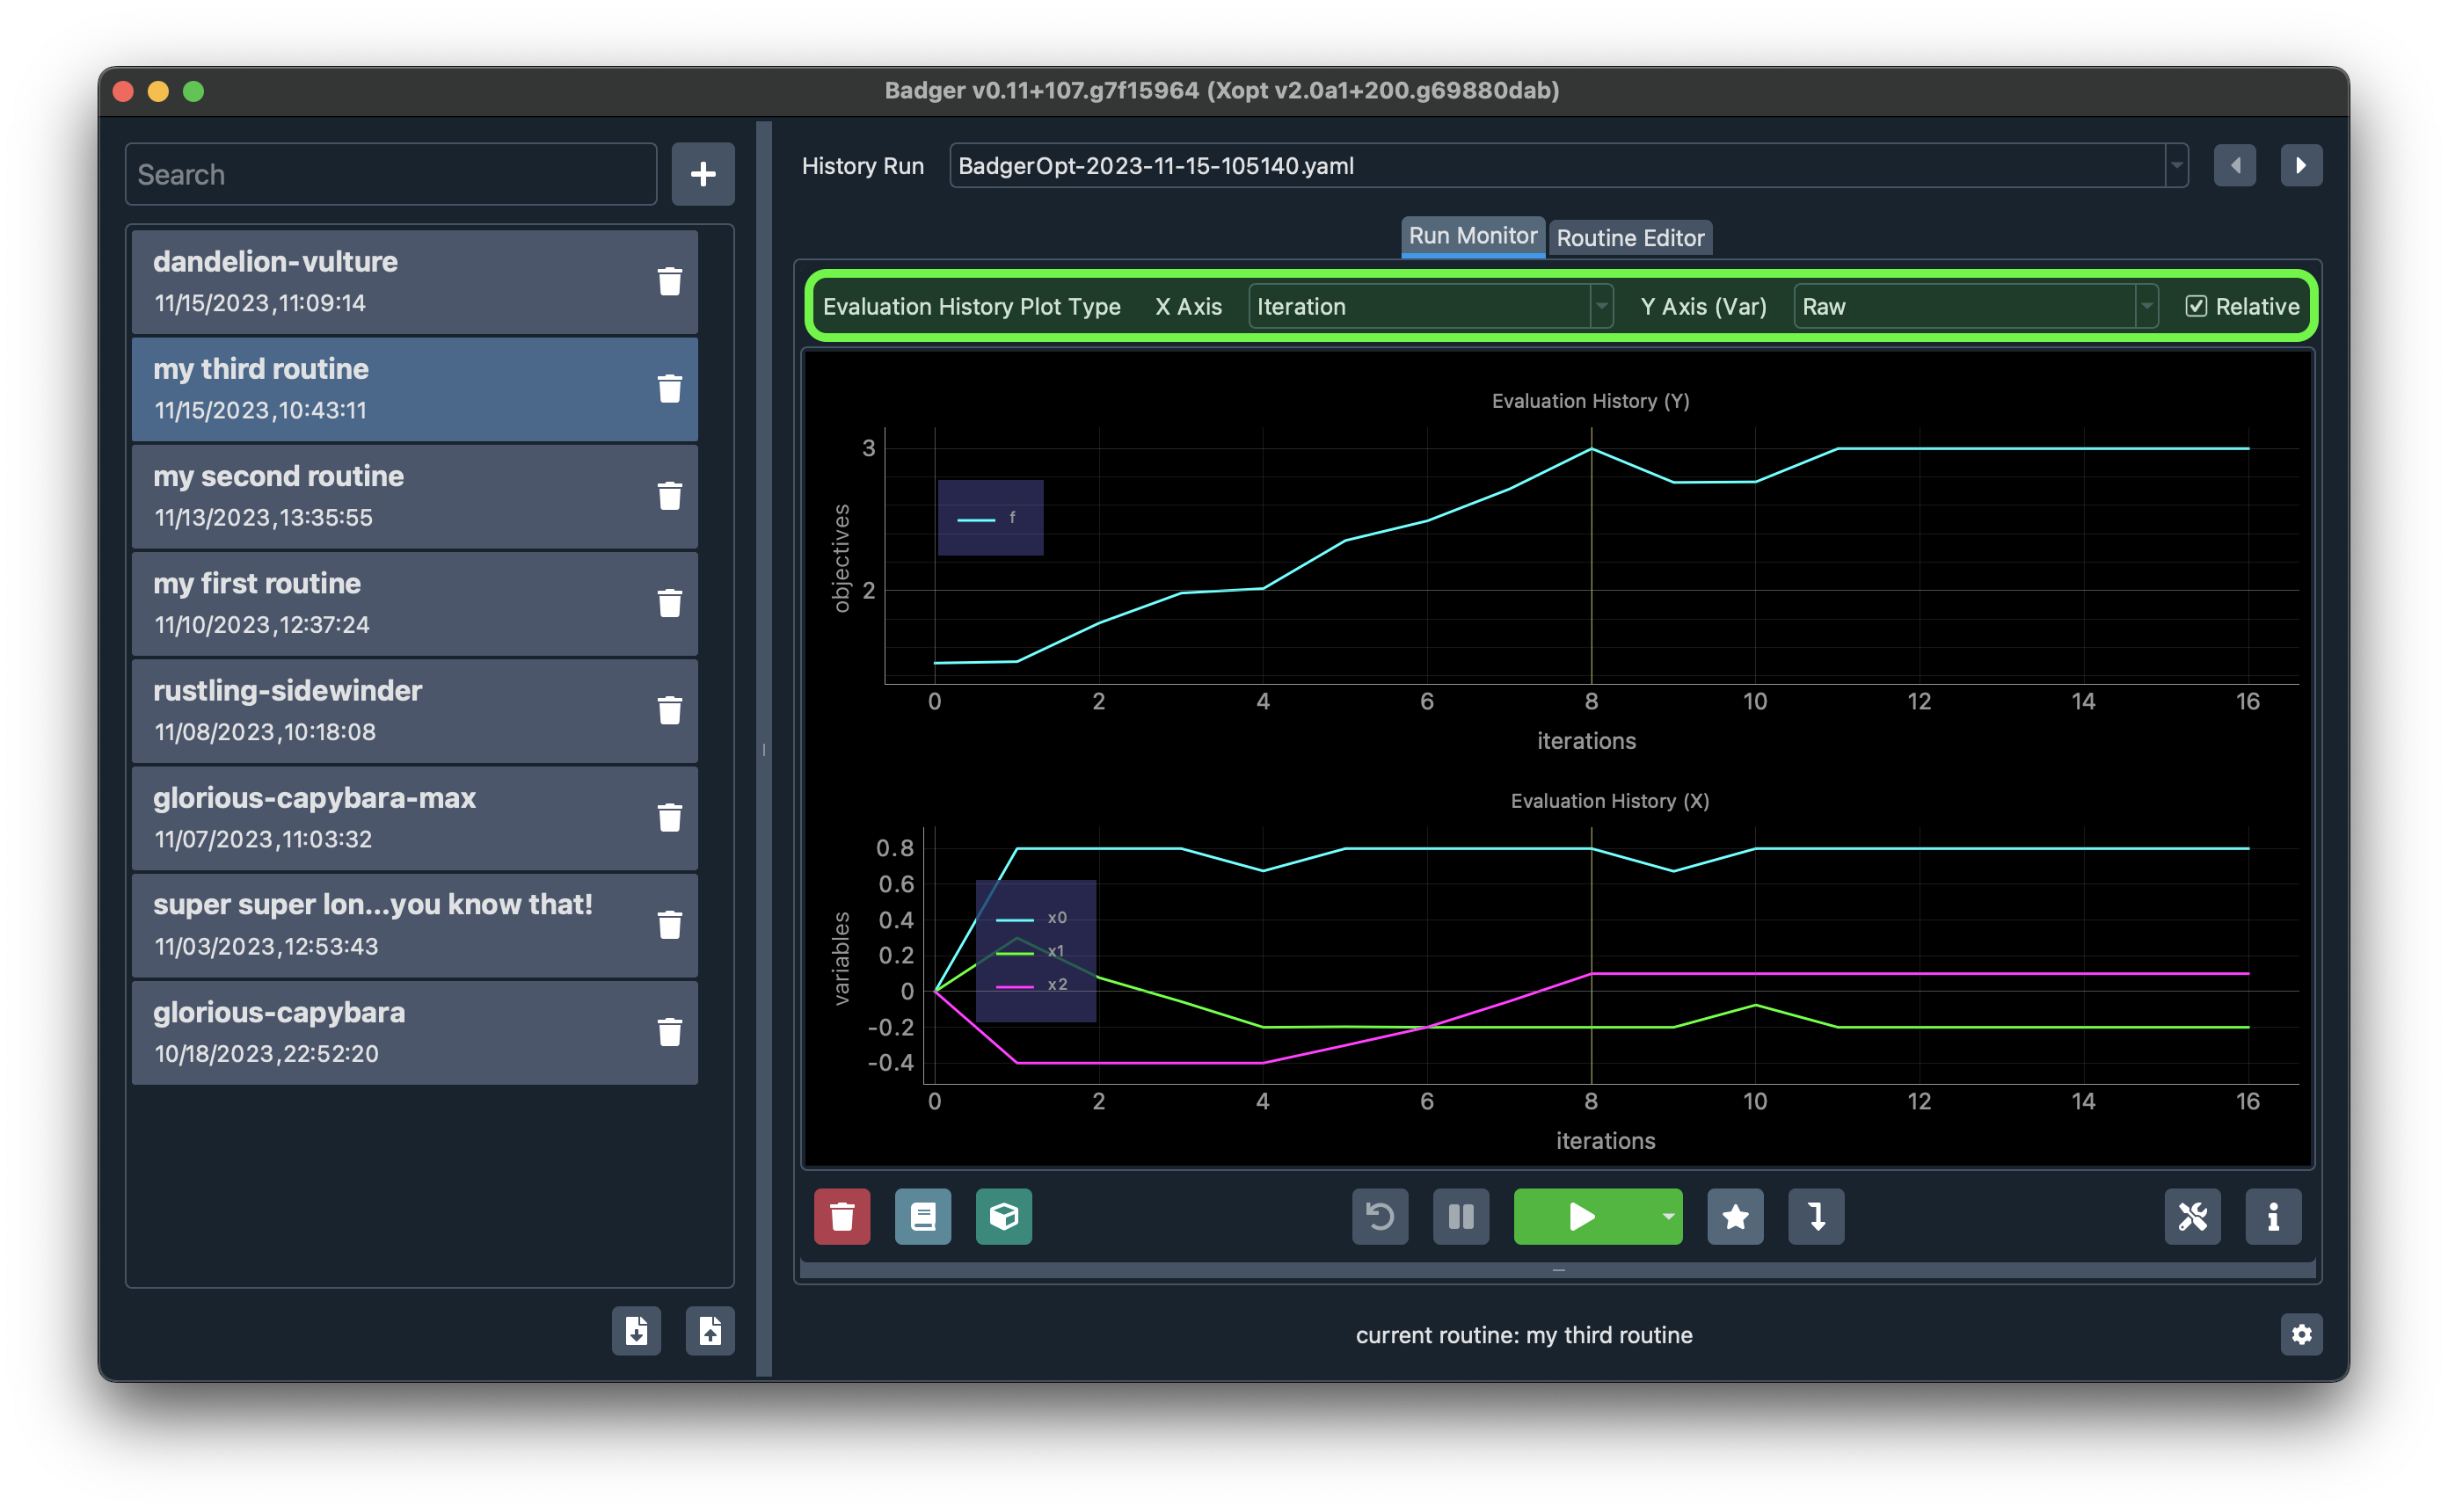
You can configure the visualization options anytime, in the middle of a run or not.
Normalize the variables for better visualization
Sometimes it's convinient to show the variables in a normalized manner, so that you can observe all trends in the same frame. You can do that by selecting Normalized in the Y Axis (Var) dropdown menu. Check the Relative checkbox would show the variable changes relative to its initial value, you can combine the Y Axis (Var) options and the Relative options to fit the visualization to your own needs.
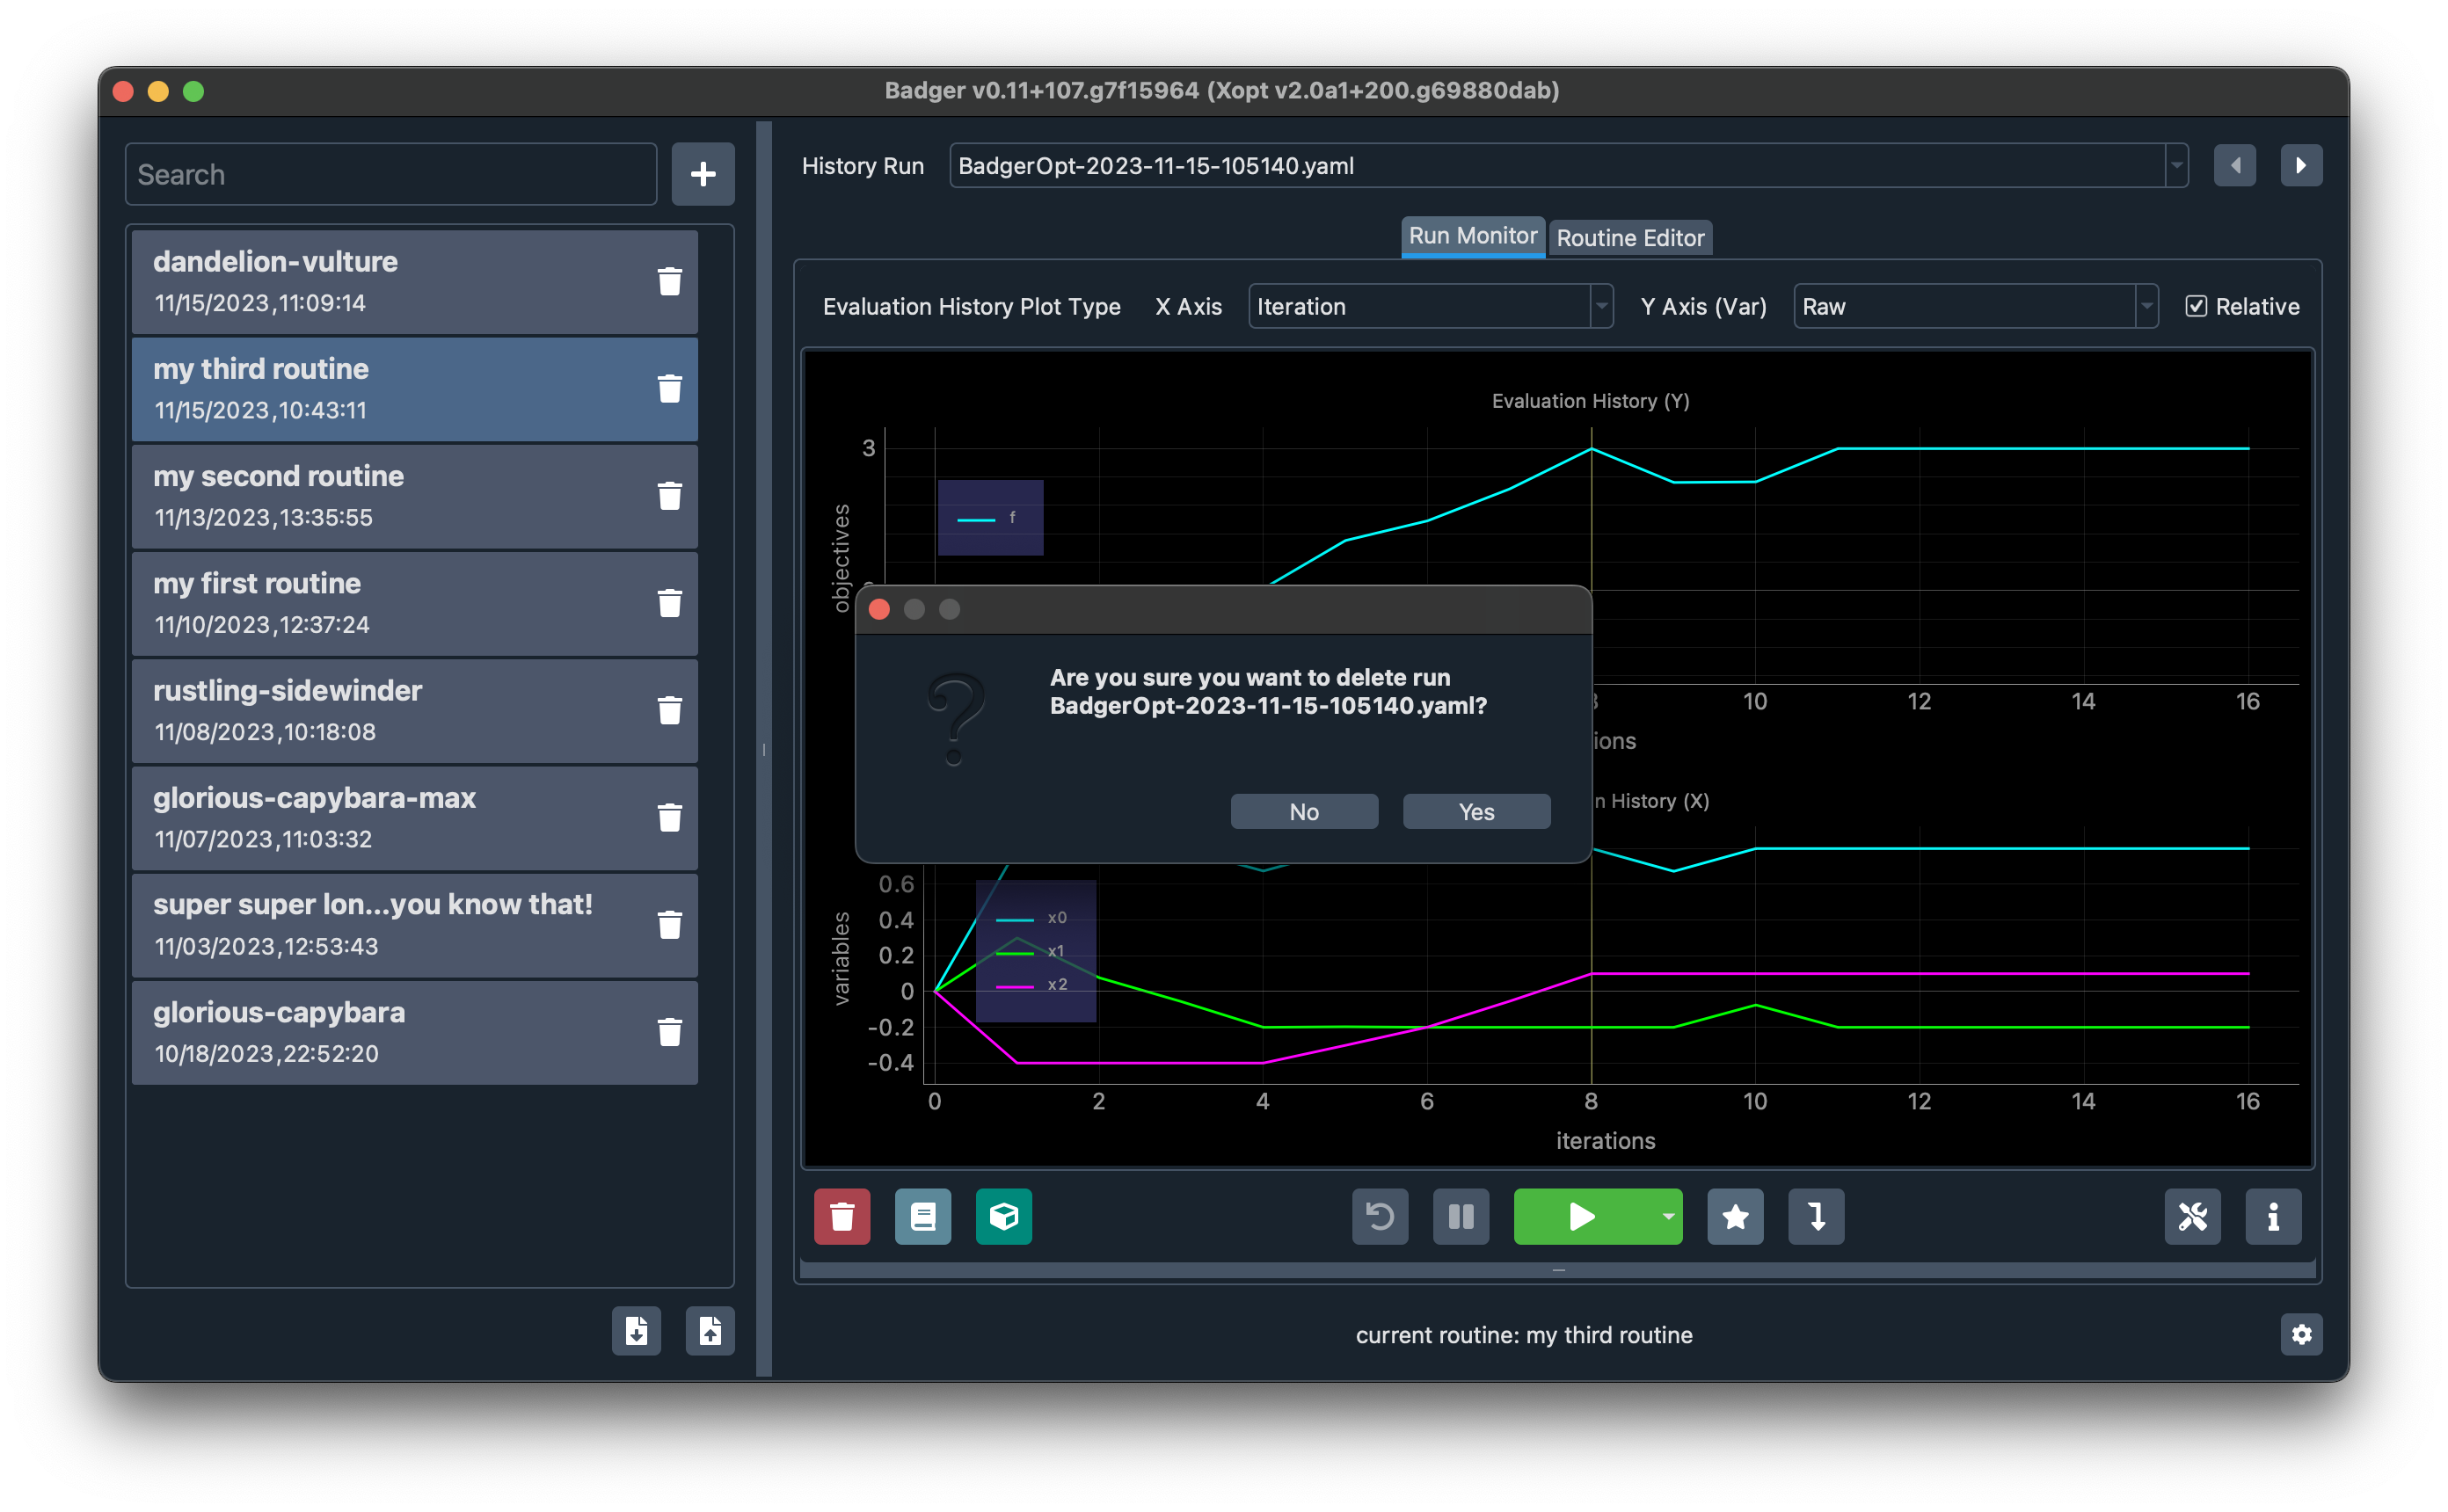
Delete a run
Click the red Delete run button (trash bin icon) at the bottom right of the run monitor to delete the current run shown on the run monitor. You'll be asked to confirm the delete action.
Send record to logbook
To send a log entry to the logbook directory1, click the blue button besides the Delete run button.
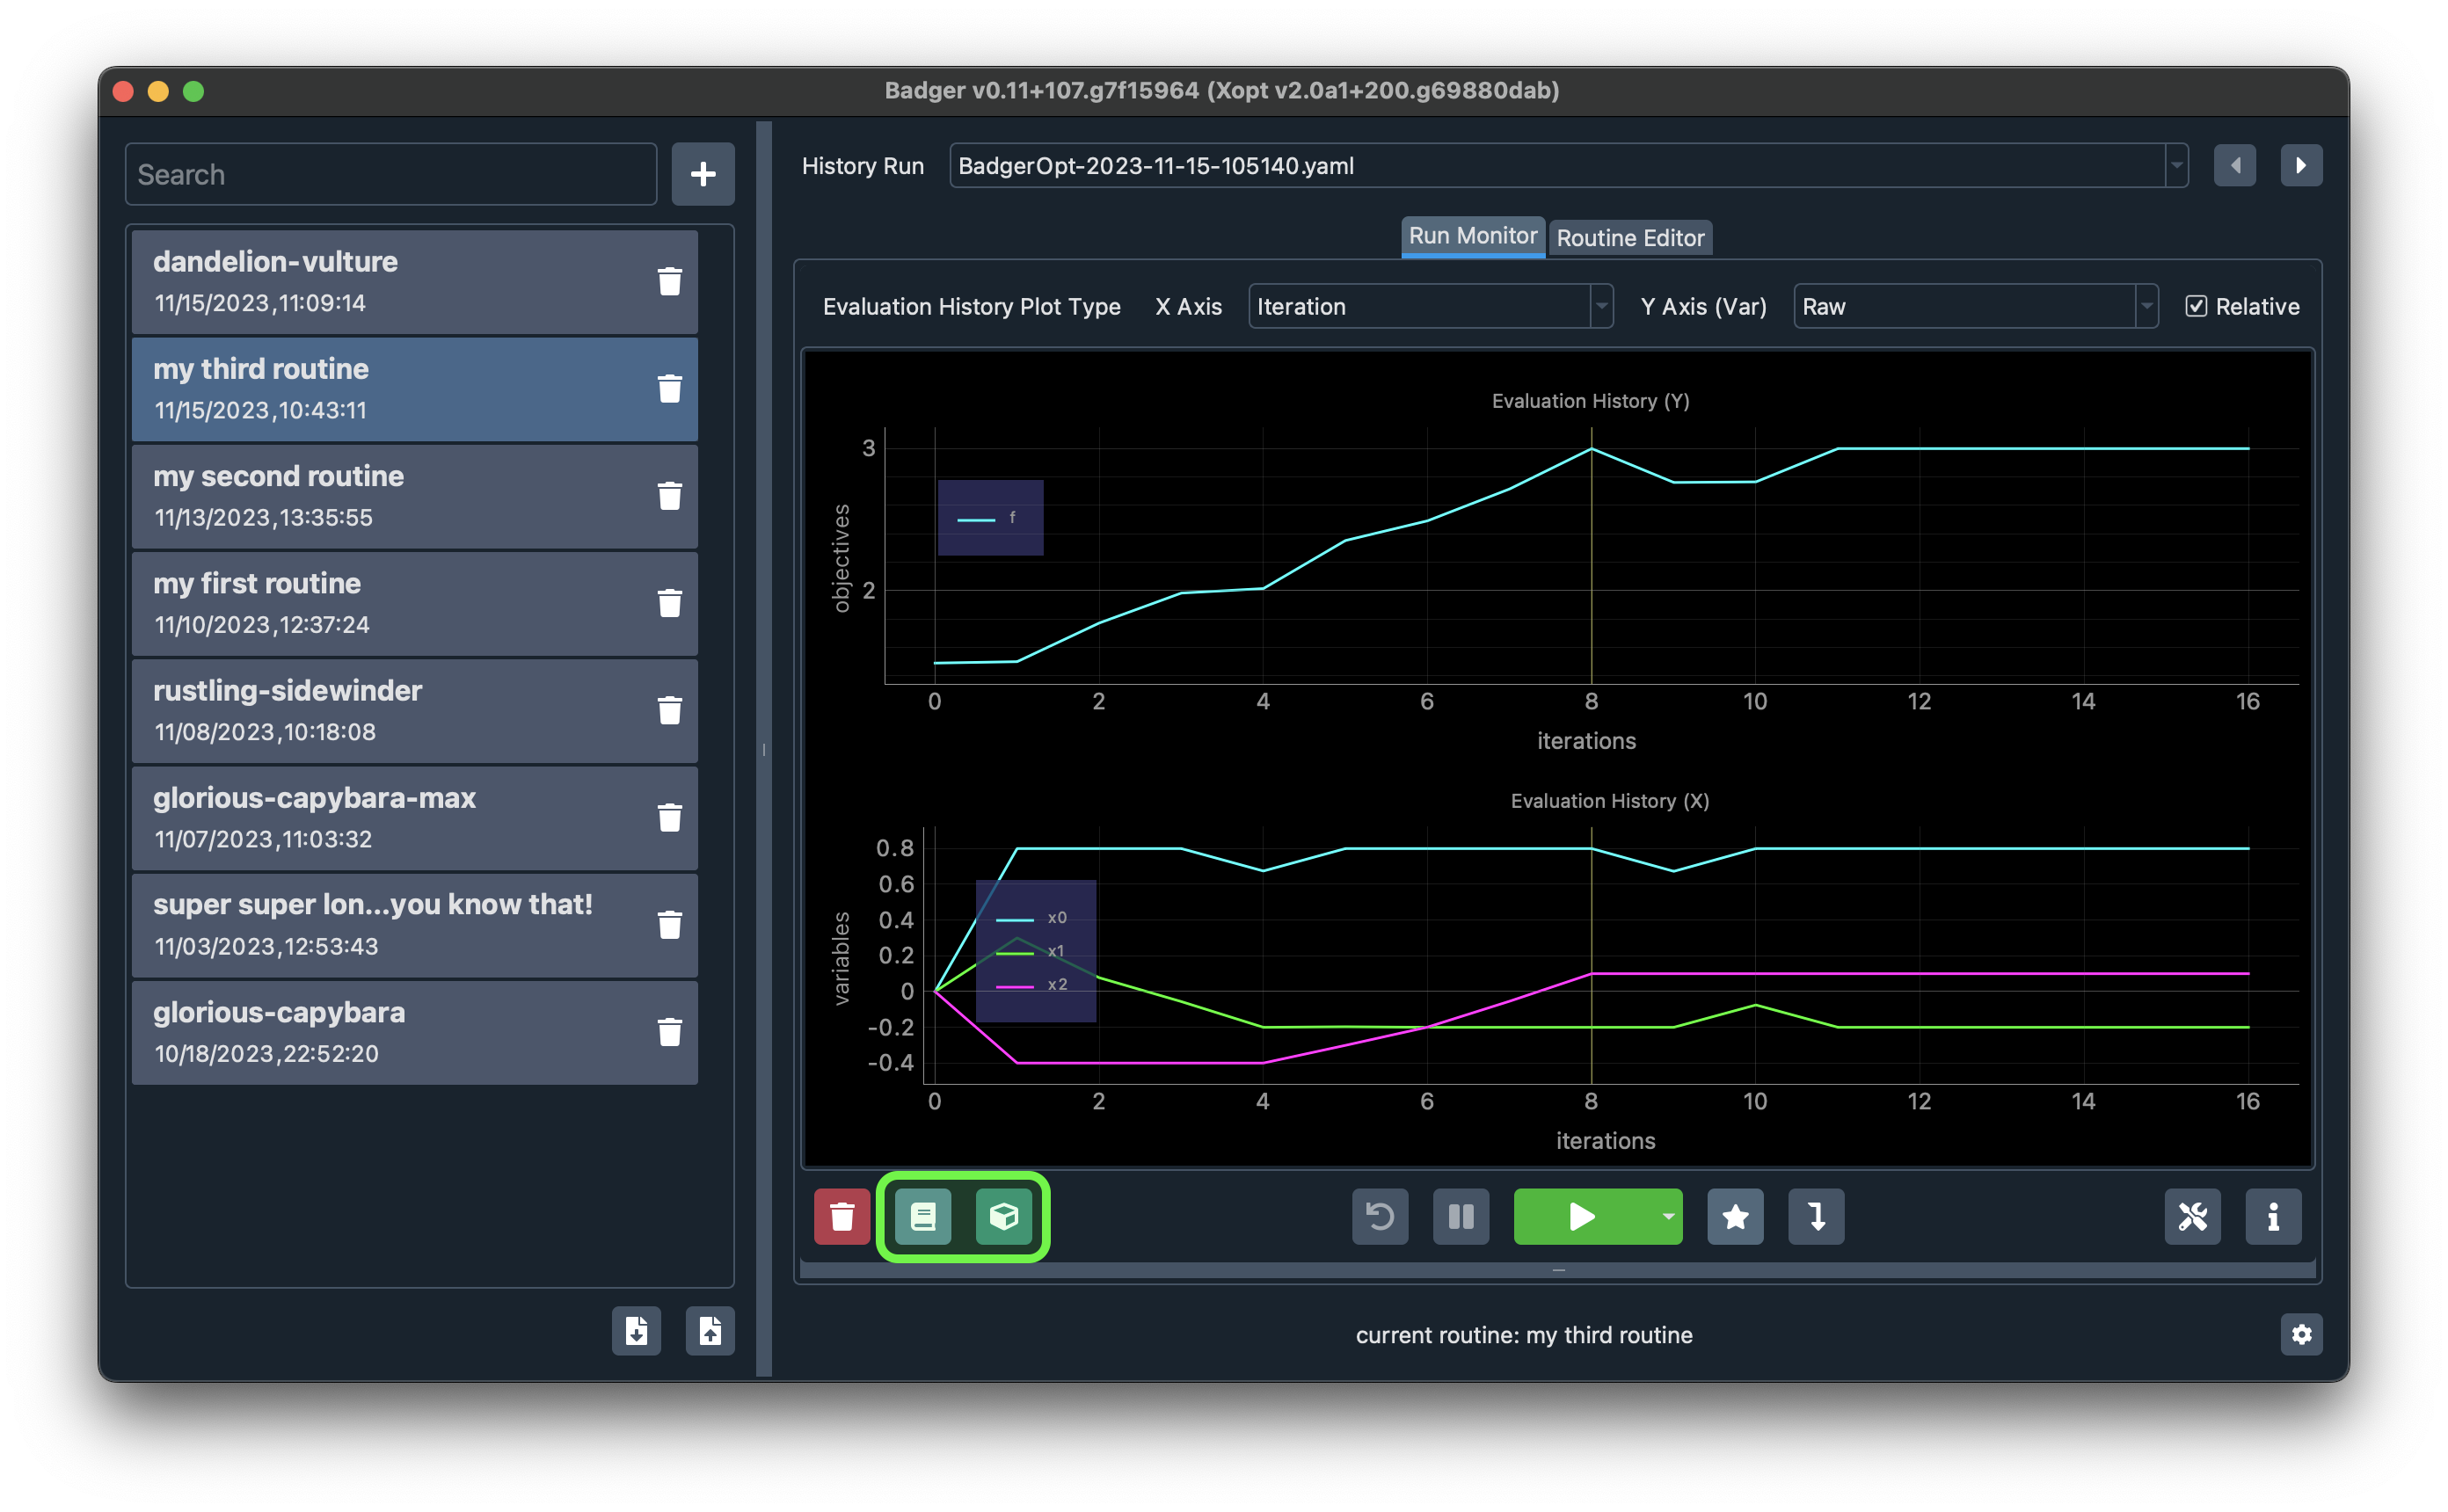
The log entry will include a screenshot of the run monitor and an xml file that summarizes the optimization run.
Currently the log entry format is fixed. Flexible/customizable log entry support will be added in the future releases of Badger.
Use data analysis/visualization extensions
You can open the extension menu by clicking the green Extension button besides the Logbook button. Extensions in Badger provides capibilities more than simply monitoring the optimization curves. Extensions could parse the Gaussian model performance on the fly during the run, visualize the Pareto front in a multi-objective optimization, give insight on tuning knobs sensitivities wrt the objective, etc. Currently we have the following extensions shipped with Badger:
- Pareto front viewer
We plan to implement the extension system in a similar manner to the plugin system in Badger, so that each extension could be developed, maintained, and installed separately, for maximum flexibility and extensibility.
Routine editor
Routine editor enables the users to create/edit/save the routine easily. Below is a simple guide on the main features of the routine editor.
Set the metadata
Metadata of a routine contains the name and the description of the routine. You can change the description of a routine anytime by editing the content then clicking the Update button. Note that if you are creating a new routine then you don't have to click the Update button, since the metadata will be saved once you save the whole routine.
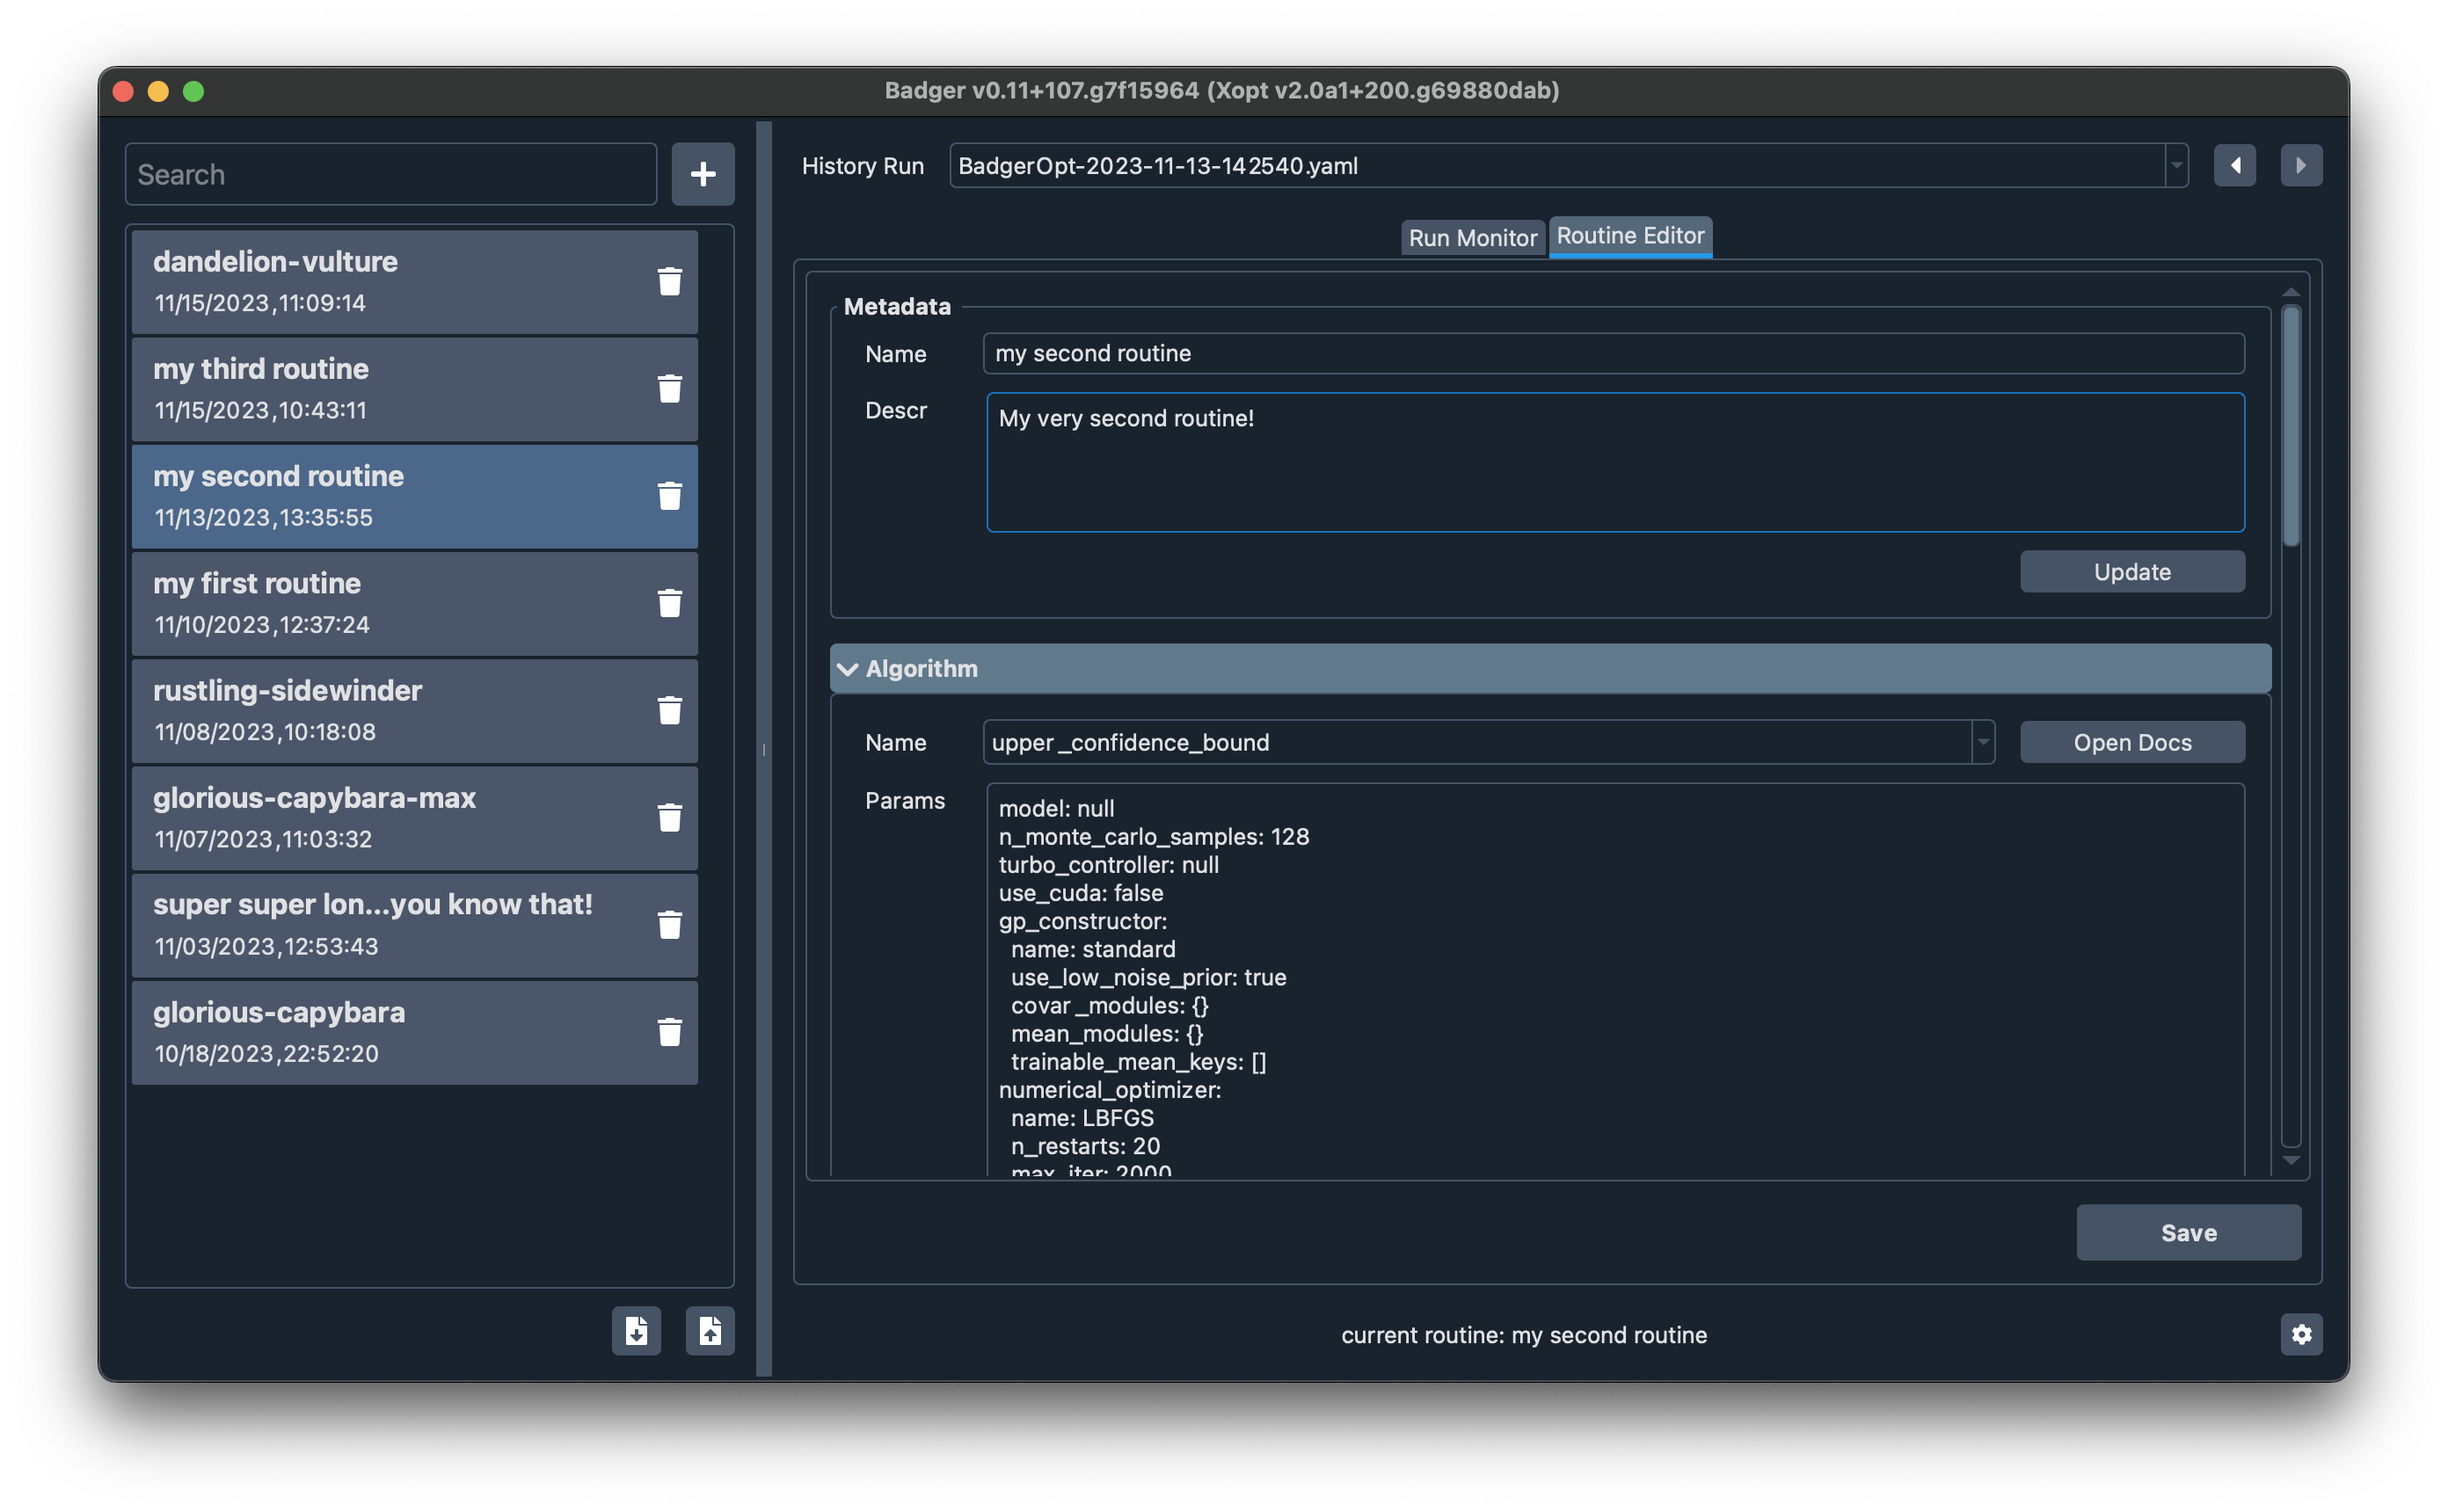
Select and configure the generator
To configure the generator in a routine, click the generator selector in the Algorithm section, then edit the generator parameters in the Params text box. Usually you don't need to change anything in the generator parameters -- the default values should work well for most cases.
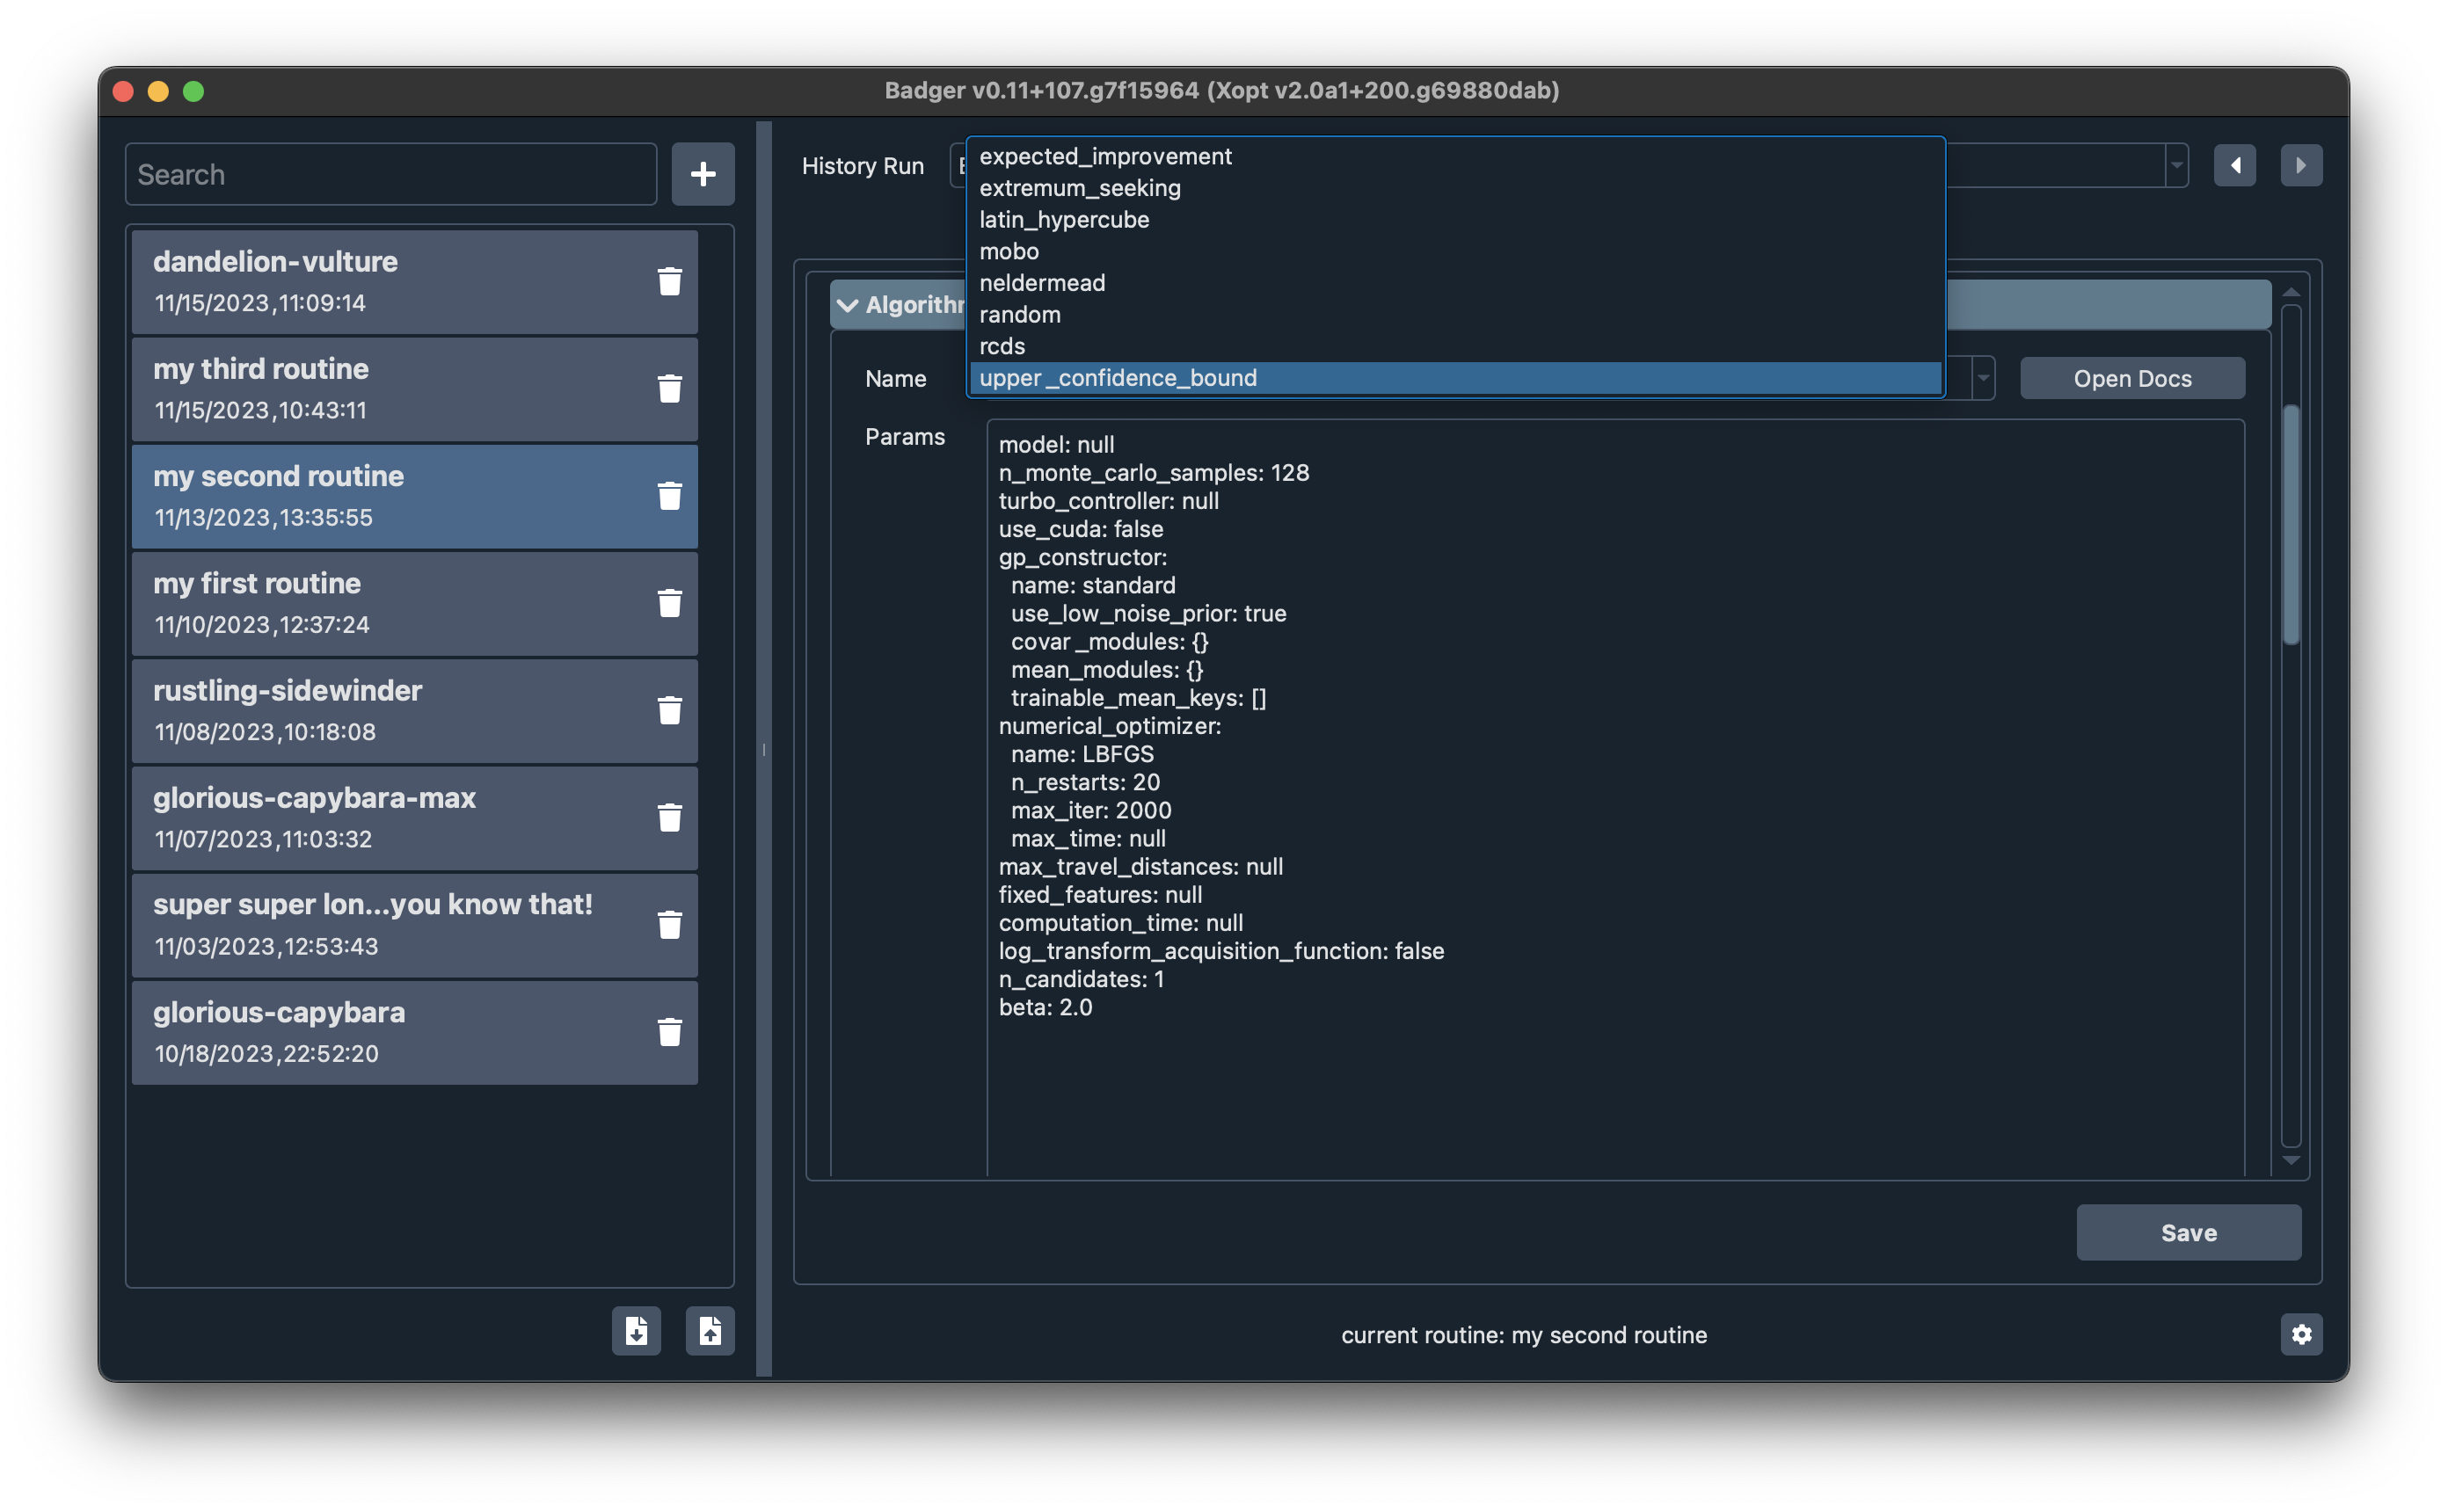
You can check the docs for the selected generator by clicking the Open Docs button.
Select and configure the environment
To configure the environment in a routine, click the environment selector in the Environment + VOCS section, then edit the environment parameters (if any) in the Params text box.
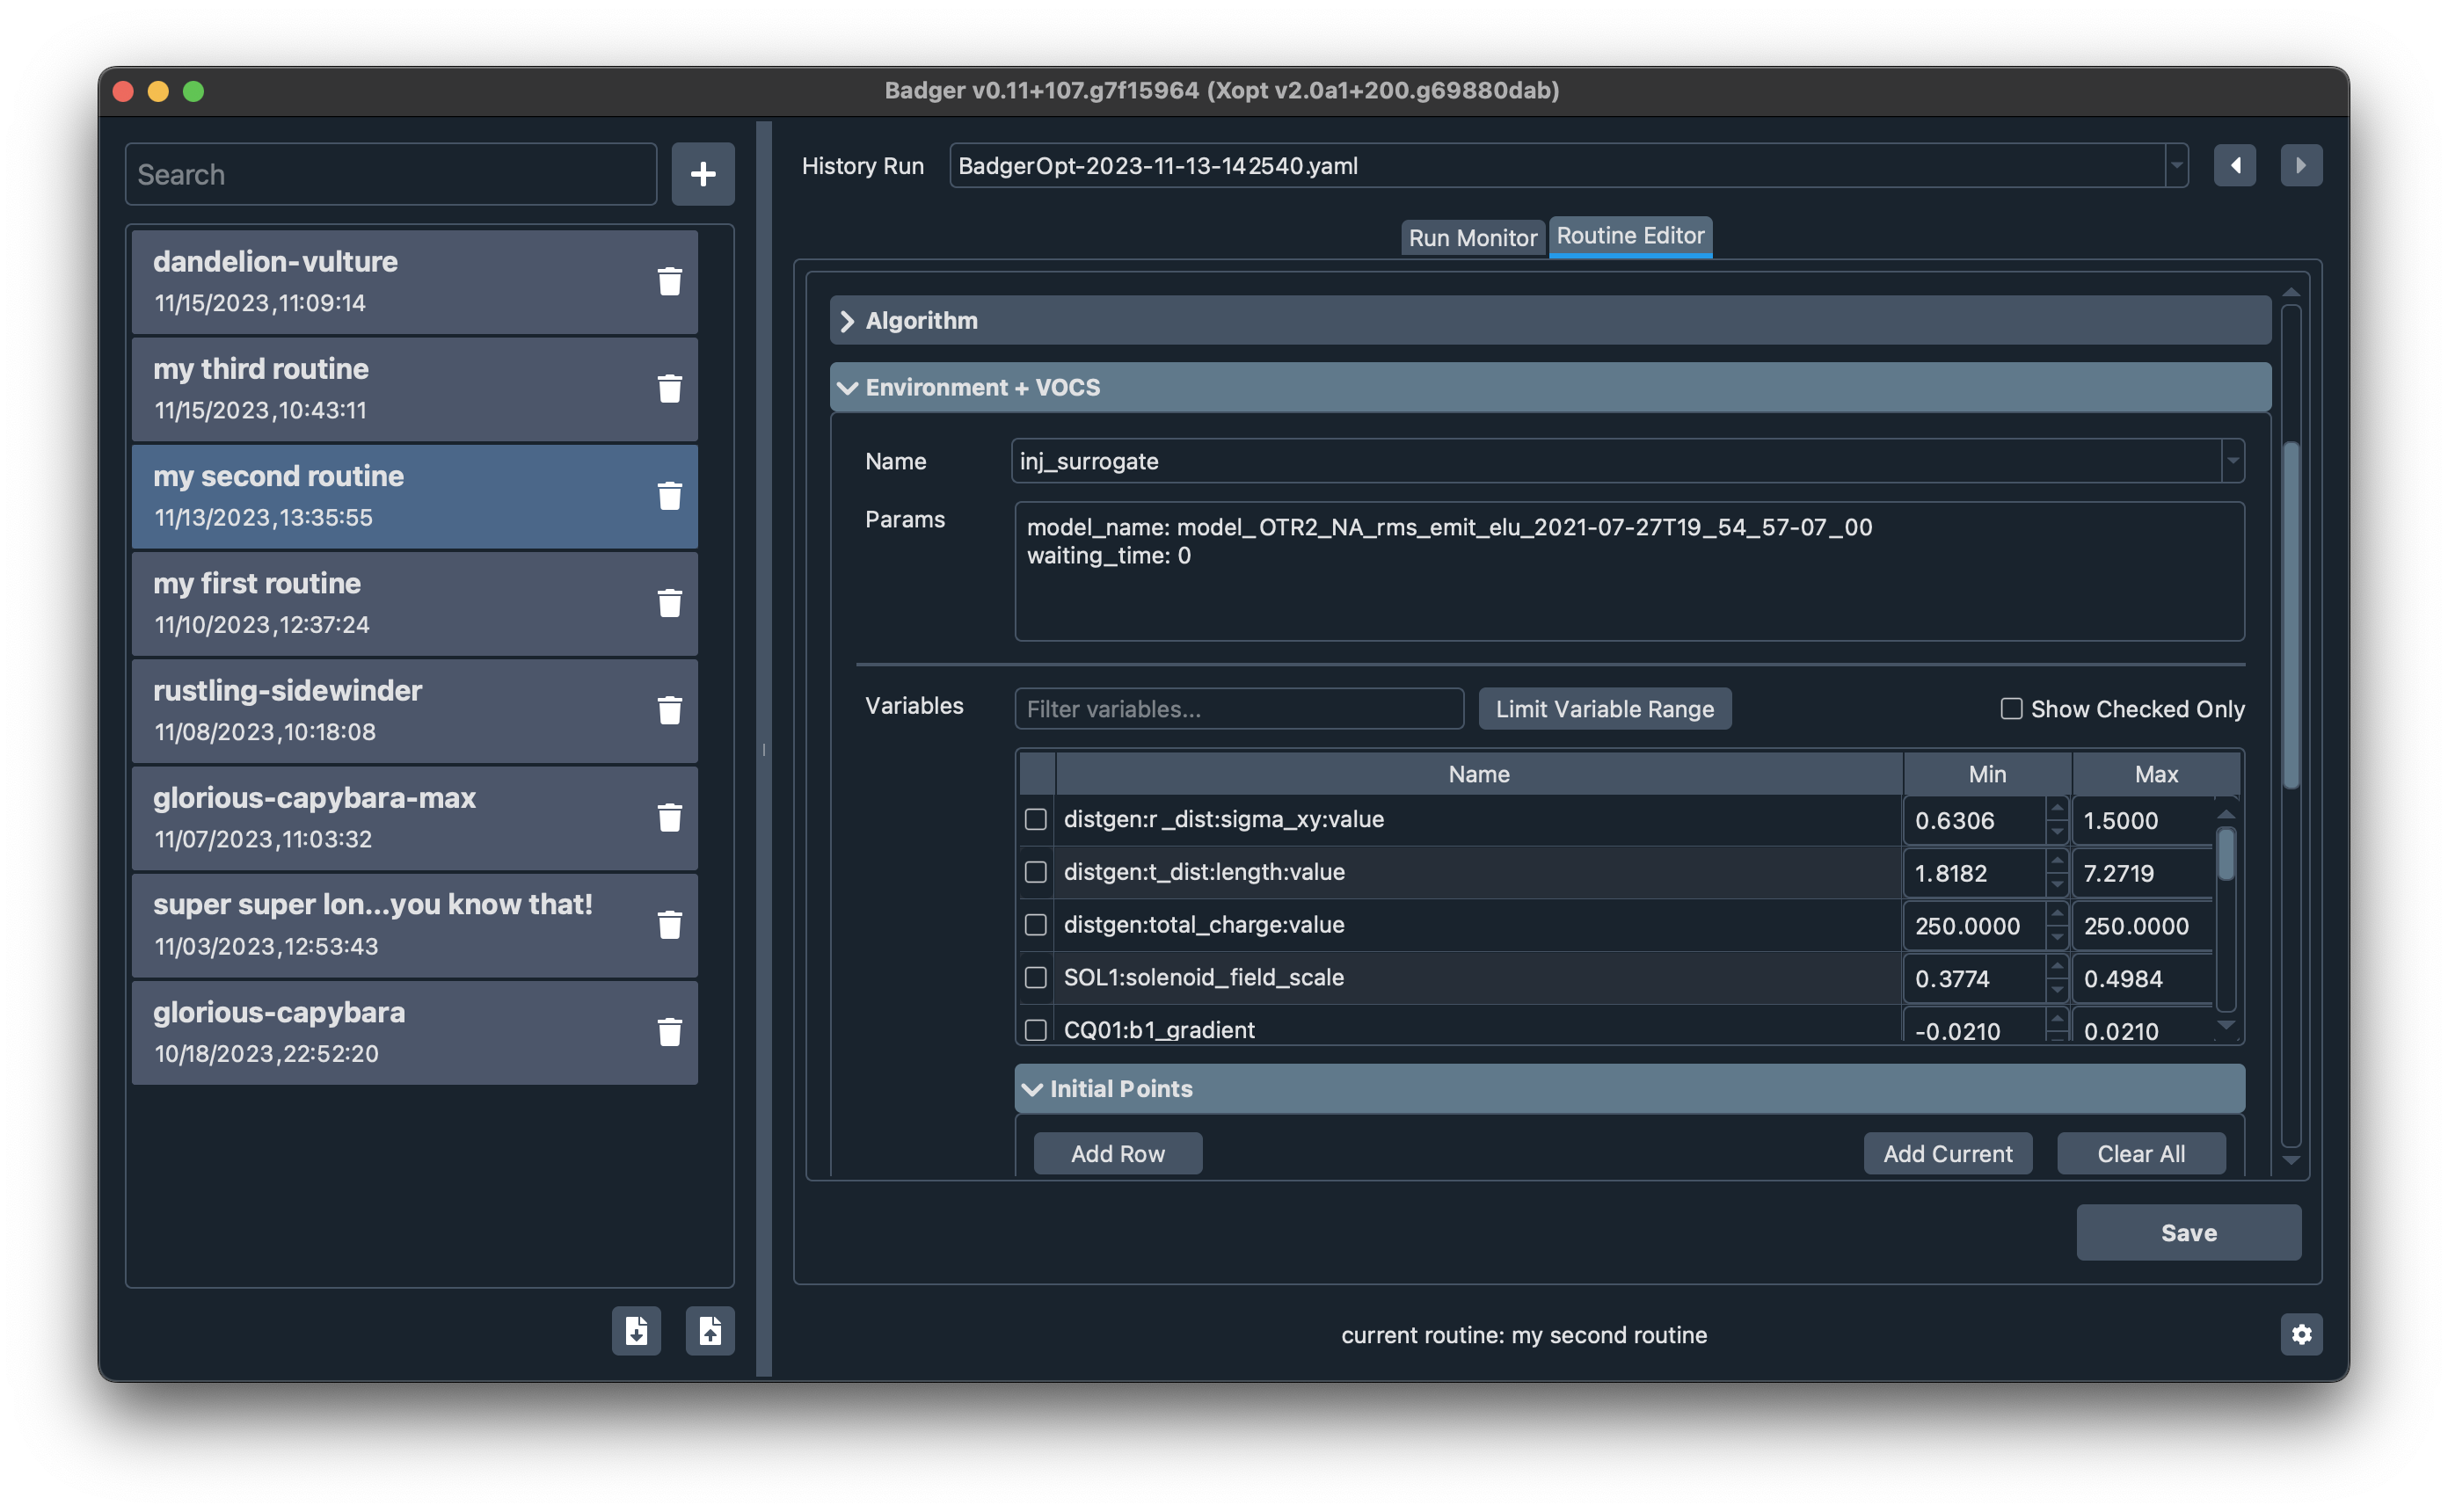
Configure the VOCS
The VOCS configuration panel is right below the environment configuration panel. It has 3 parts: variables configuration, objectives configuration, and constraints/states configurations (under the More subsection).
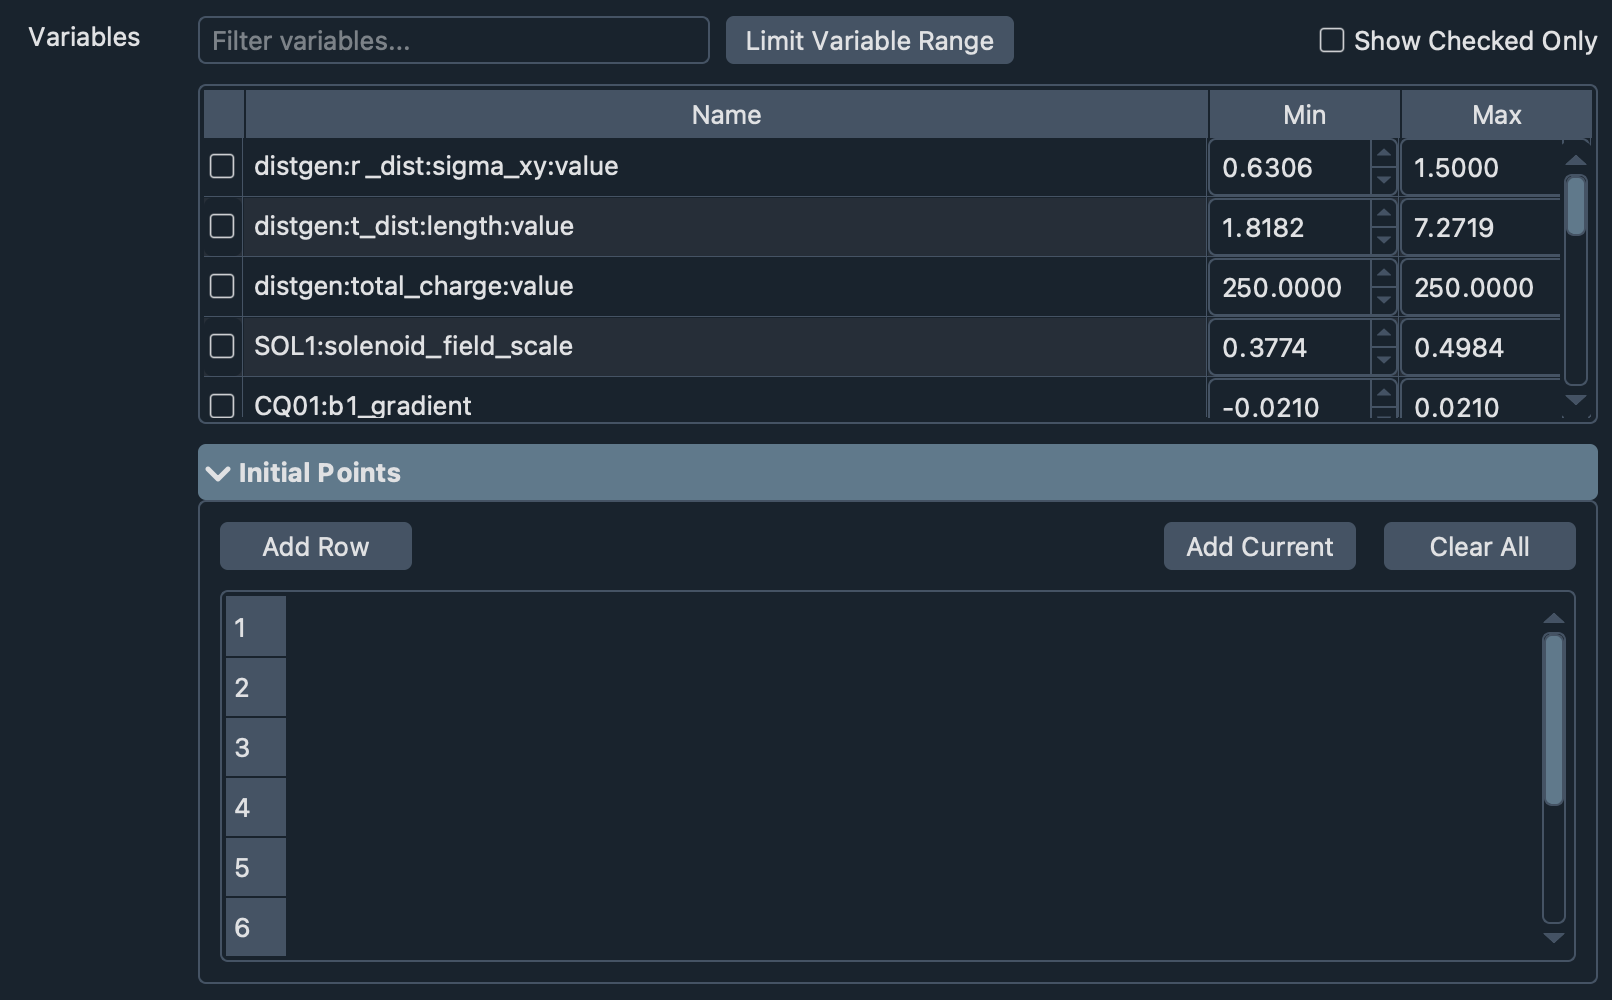
On the variables configuration panel, you can filter the variables in the selected environment by its name, note that RegEx is supported here. For example, you can enter something like Q[1-4]* to match the variables start with Q1, Q2, Q3, and Q4.
You can check the checkbox in front of each variable to include it in the optimization. Variables that are not selected will NOT be tuned during the run! You'll need to check at least one variable to make a valid routine.
Click on the left-most blank cell in the variable table header (the one on top of all the variable checkboxes, besides the Name header cell) will check/uncheck all the filtered variables (all variables that shown in the table when the Show Checked Only checkbox is unchecked).
Check the Show Checked Only checkbox to only show the variables that would join the optimization.
The Min and Max columns in the variable table show the hard limit2 of each variable (defined in the environment, usually limited by hardware). You can change the values in those two columns to adjust the variable ranges that you'd like to use in the optimization (say, you would like to start out conservatively -- so the variables should only change within 10% of the whole tunable ranges).
You can also limit the variable ranges by clicking the Limit Variable Range button, it will give you options to limit all the selected variables ranges by percentage wrt their current values or the full tunable ranges in one go.
Then you'll want to set the initial points (from which solutions the optimization would start), you can do it by edit the table under the Initial Points subsection. One common scenario is to start the optimization from the current solution, you can do that by clicking the Add Current button, this will insert the current solution to the initial points table.
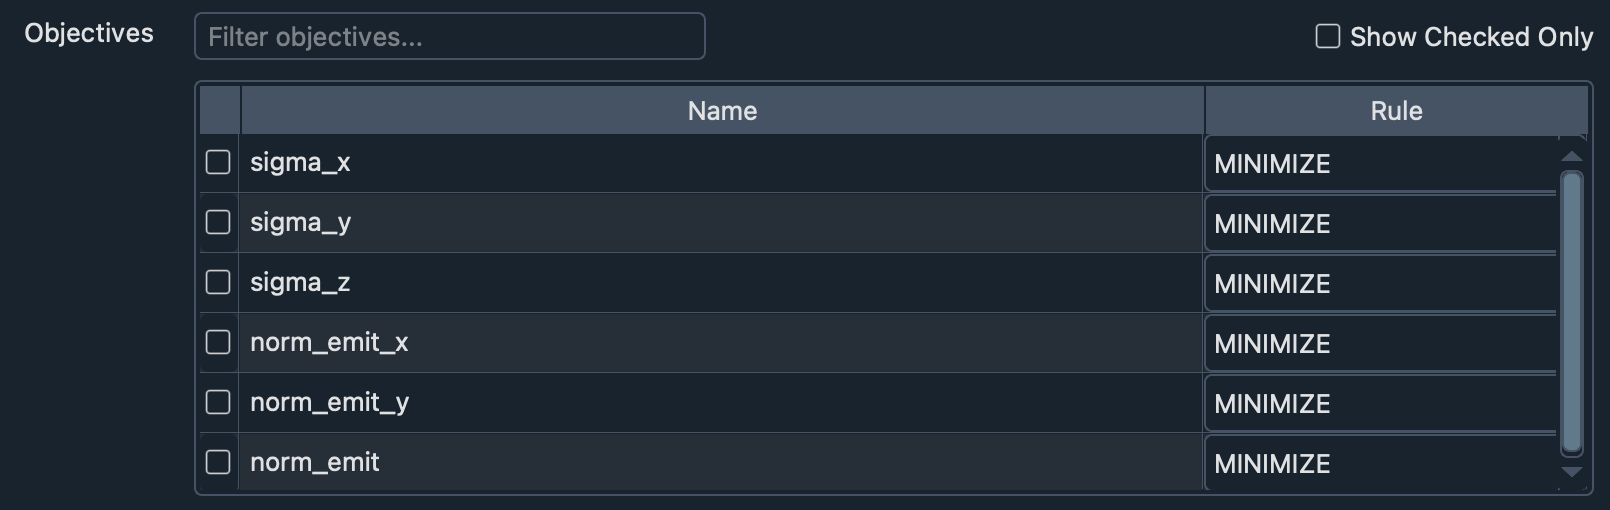
Now we can go ahead and configure the objectives. It's very similar to the variables configuration, the main difference is that this time you'll need to specific the rule3 of each objective.
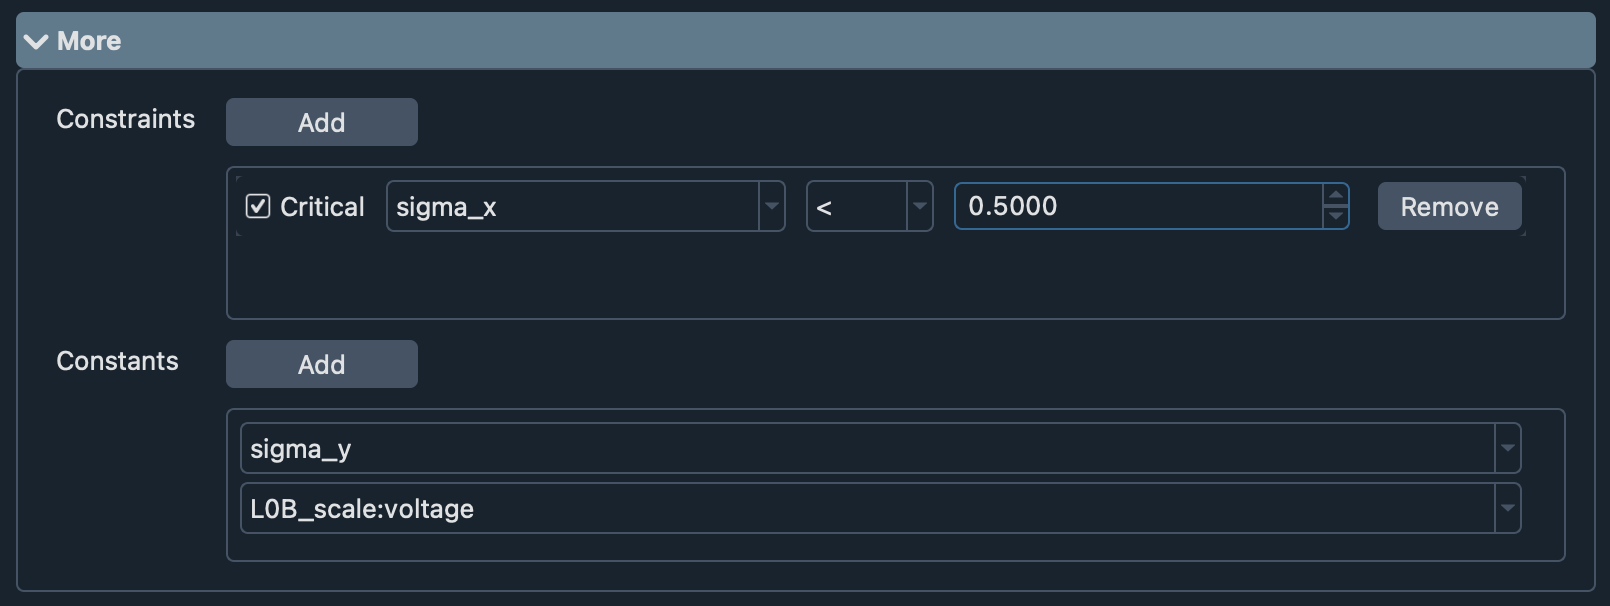
If needed, you can add constraints and states4 to the routine by configuring them in the expanded More subsection. For constraints, check the Critical checkbox would mark the corresponding constraint as a critical one, that would pause the optimization immediately once violated.
For the non-critical constraints, violations will NOT trigger a pause in a run, and it might not affect the optimization behavior at all if the chosen generator (say, neldermead5) doesn't support constraints.
Footnotes
-
Logbook directory is one of the configurations in Badger. You can check the current setting by running
badger configin terminal, then check the value of theBADGER_LOGBOOK_ROOTkey ↩ -
Those are ranges that should never be violated, no matter how the routine would be configured ↩
-
Direction of the optimization, either
MAXIMIZEorMINIMIZE↩ -
Variables or observables that you'd like to monitor during the run, but won't join the run directly ↩
-
Aka Simplex ↩